With recurring payments, you can regularly receive money from your subscribers. You can organize subscription clubs or give users the opportunity to pay for an expensive product in installments.
You can learn more about registering an account in Prodamus and connecting recurring payments from this article .
When connecting recurring payments, you must enable the " club functionality " service. This will allow you to regulate the possibility of subscribing and unsubscribing, setting the frequency and intervals of automatic write-offs, the number of write-off attempts, subscription discounts, demo periods, and monitoring write-offs for a specific subscriber.
To connect the “ club functionality ”, you need to send a request to the email address sales@prodamus.ru or write a personal message to the community on VKontakte .
Settings in Prodamus and creation of subscription products
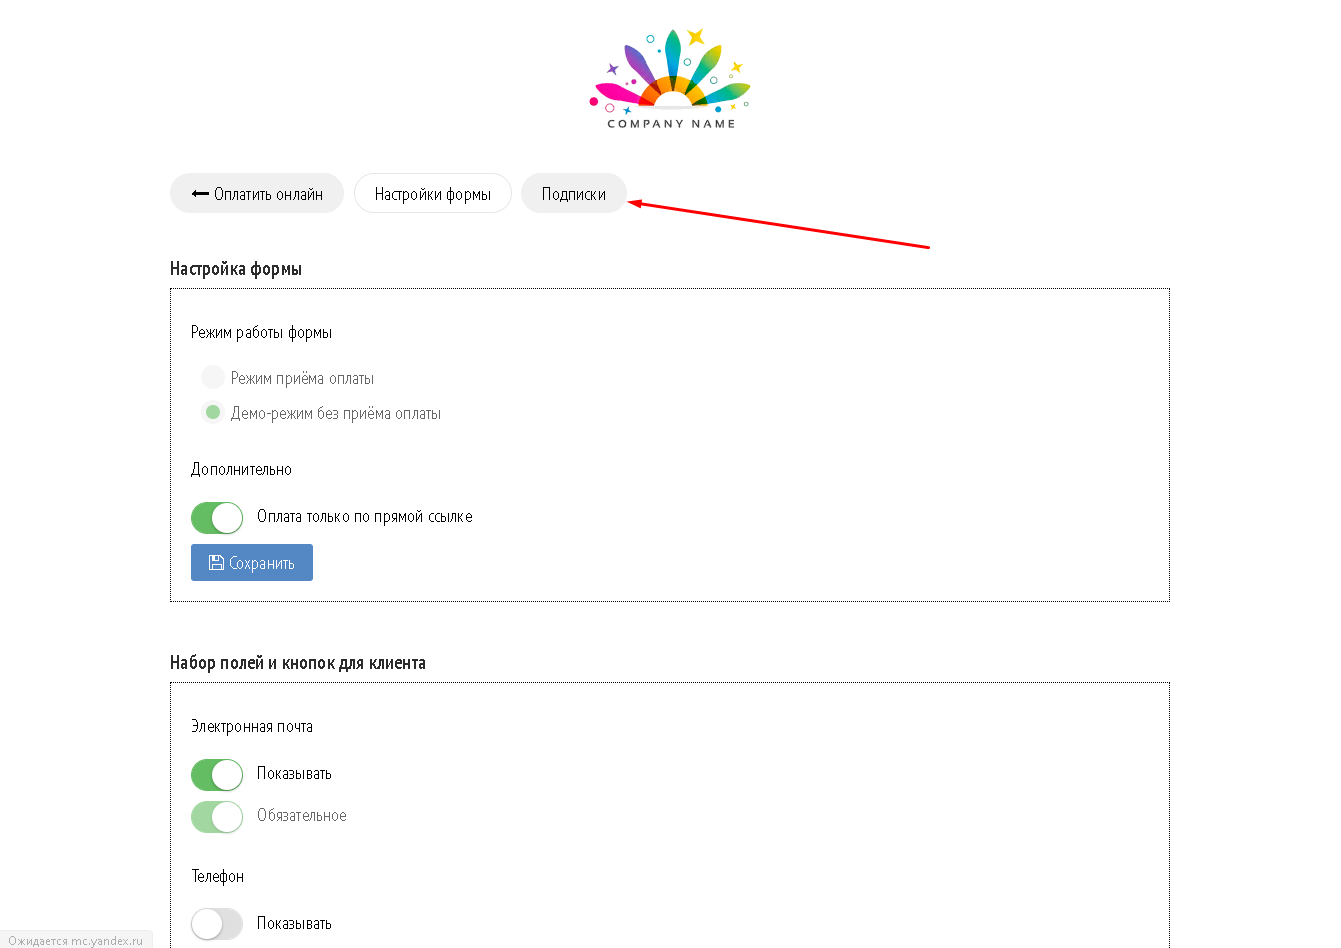
1. Go to the "Settings" section on the payment page. It appears at the bottom of the page after authorization.
2. In “Settings” at the top of the page, go to the “Subscriptions” section.
3. To add a subscription, use the Add . Fill out the form.
Important: the second and subsequent payments for a subscription are considered automatic debits; the first payment is not taken into account here.
If you do not fill in the field with the number of automatic write-offs, their number will be unlimited. To stop write-offs, the owner of the account in Prodamus will need to disable the subscription for a specific subscriber. Or for all subscribers in general.
3.4. Subscription Description
An optional field.
Here you can describe in detail the terms of a specific subscription for the buyer.
General club settings
These settings apply to all configured subscriptions.
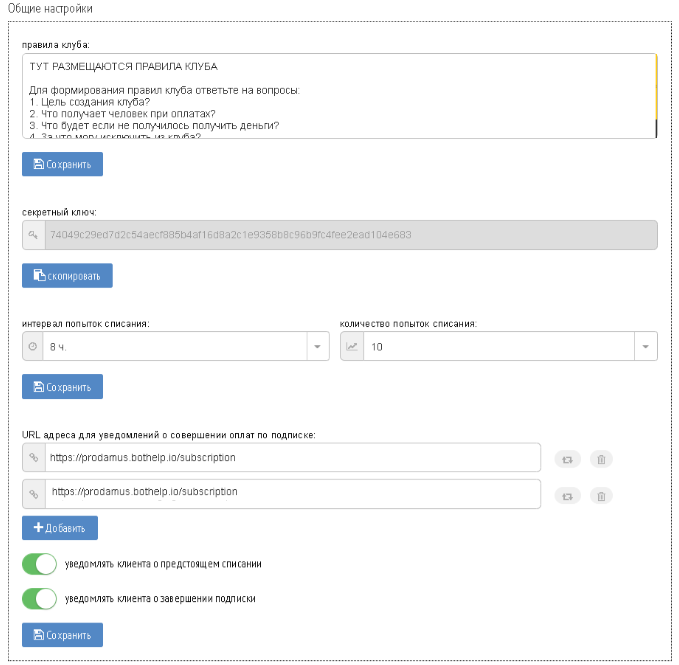
The rules apply to the club as a whole and apply to all subscriptions.
3. Number of write-off attempts
This is the period after which write-off attempts will be repeated.
Important: Setting up a URL is required to track your payment.
Notification URLs are also configured in the Form Settings section. There you can set up addresses for notifications about the first payment for the subscription.
If you have recurring payments set up, the URL notification link should only in the Subscriptions . You do NOT need to specify the link the Form Settings .
If you specified a link in "Subscriptions" for recurring payments and also plan to use payments with the "Subscription" do NOT need to specify a link in "Form Settings" .
If recurring payments are not set up and you want to use payments with the "Product" , then the link must be placed in the "Form Settings" .
If you do not fill in this field , notifications about auto payments will not go to the system with which the integration is configured. The system will not see these payments.
Before you start using the recurring payment, we recommend testing it.
Settings in the BotHelp account
1. Create a new payment page in the "Automation" section.
2. In the payment system, select Prodamus . You need to select the "Subscription" payment type.
3. Specify the subscription ID from Prodamus.
4. Specify the domain of the account from Prodamus. The domain must be copied from the browser line while in the Prodamus account.
5. Specify the secret key. The key must be copied from the general subscription settings in Prodamus.
6. In the "Page Content" section, if necessary, you can enable the transfer of the main fields and UTM tags from the subscriber card. In BotHelp, the main fields are the phone and email.
7. The link validity period can be selected without limitation or with an absolute value. If you set an absolute validity period, the link will be active until the date and time you specify. After the expiration date, payment via this link will be impossible.
8. If necessary, you can specify the discount amount. The discount is indicated in rubles.
Important: the discount amount applies only to the first payment.
6. "Partner ID" is an optional field. It is filled in if several identical payment pages are created. But it is necessary to track in Prodamus from which page the payment was made. You can learn more about this from the article .
7. "Paid content" is also an optional field. After successful payment, the information from this field will be sent to the client's email.
8. urlReturn and urlSuccess — fields for specifying links in case of successful payment and payment refusal for any reason. These fields are optional, but they can be used to provide additional material.
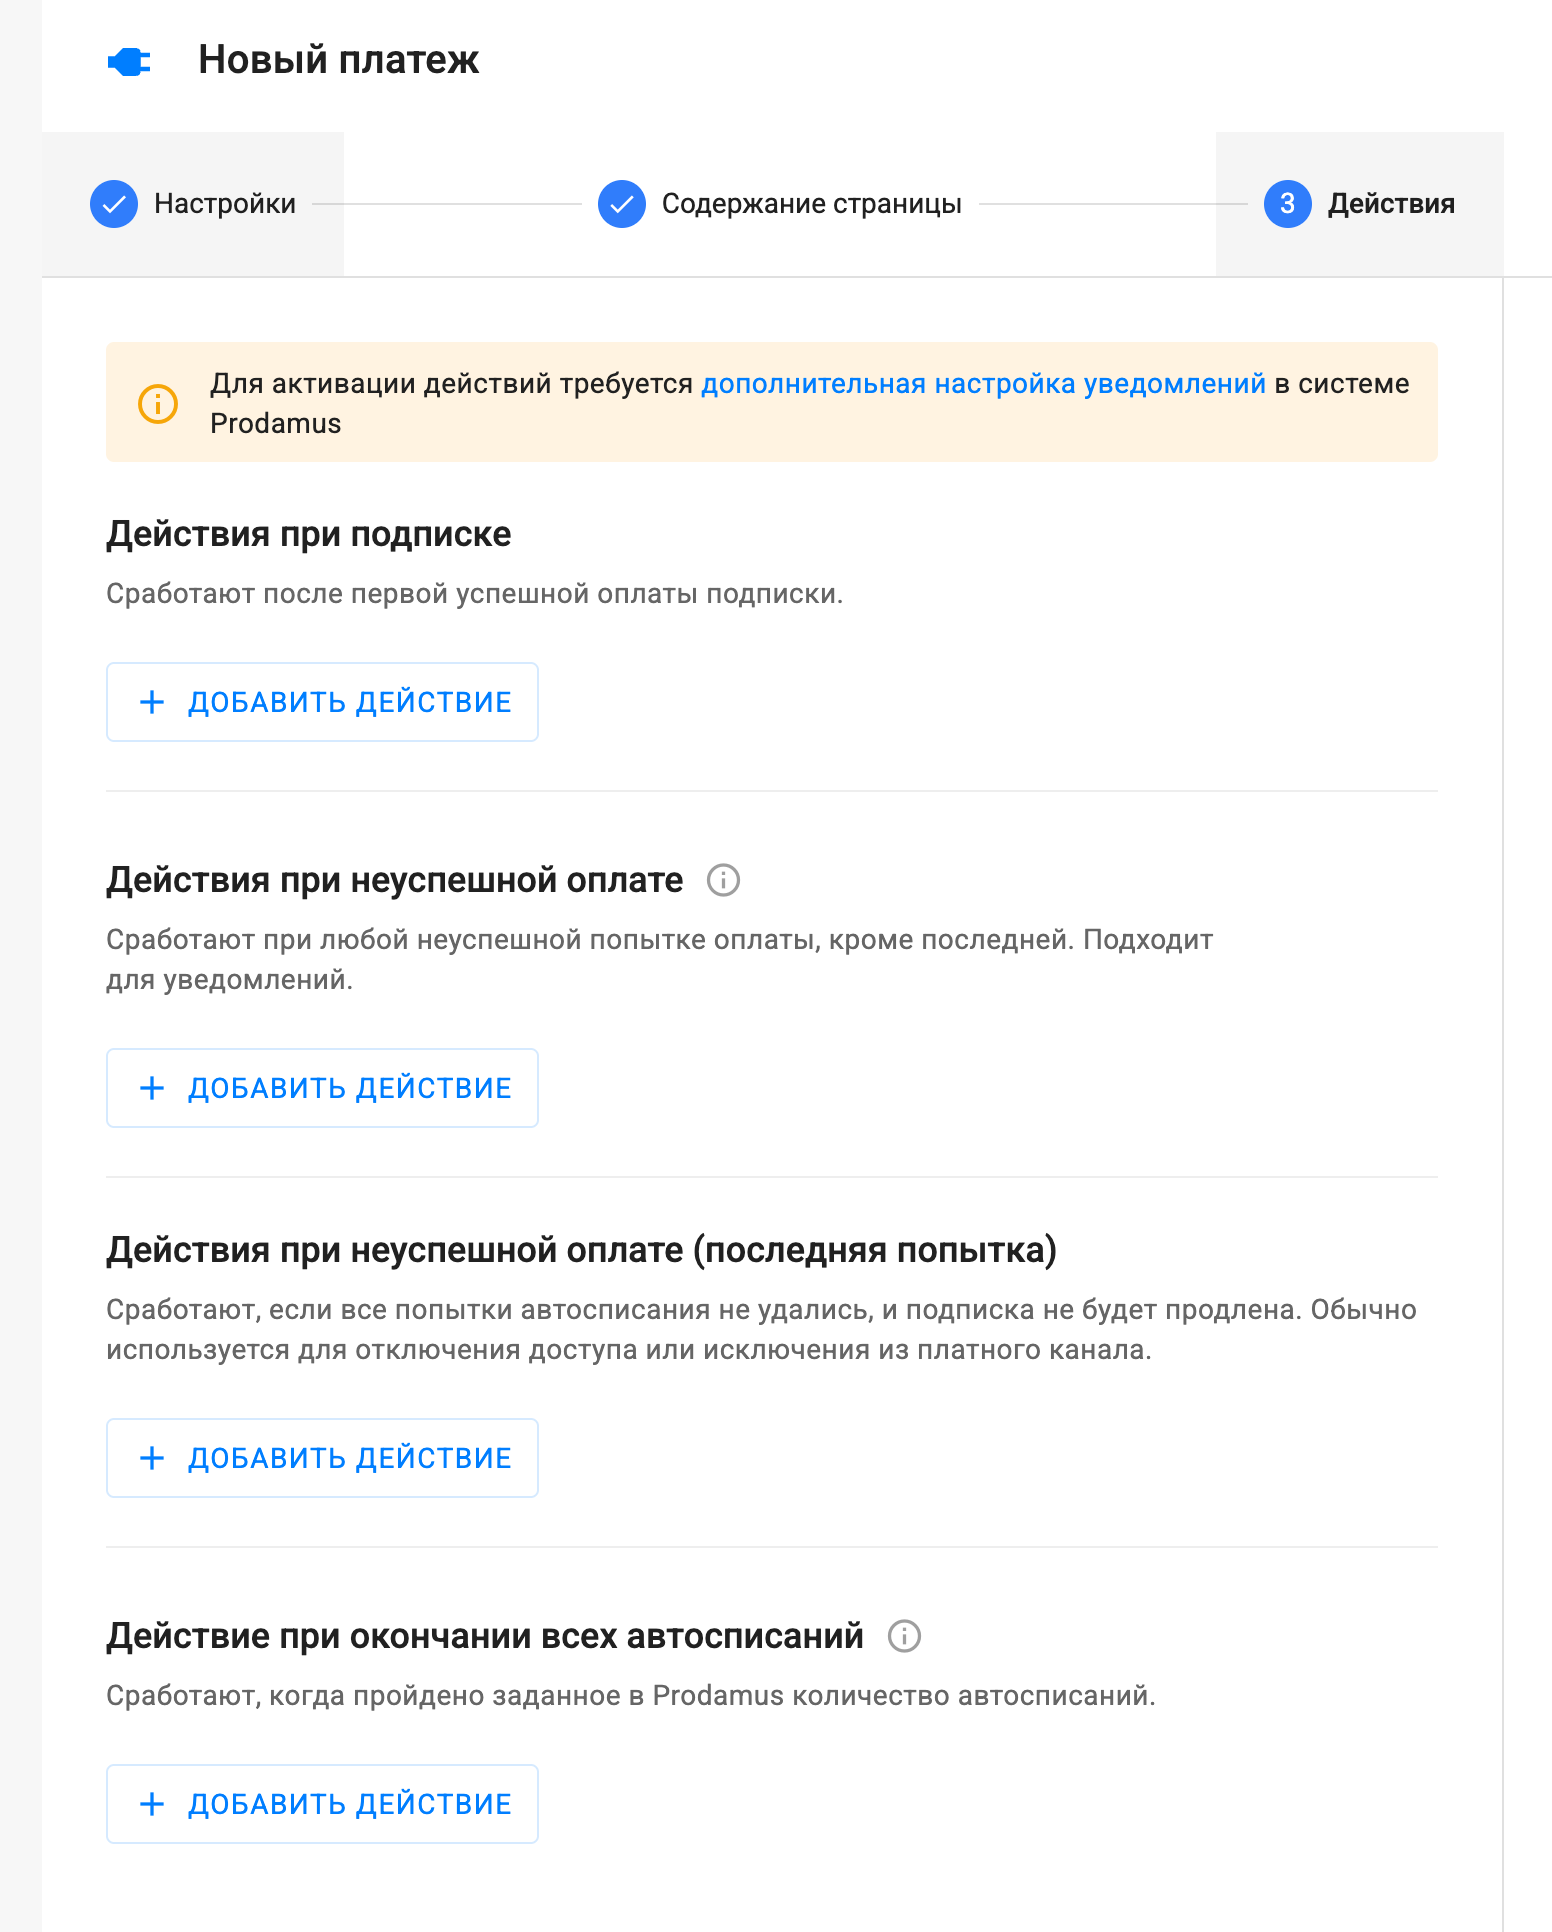
Actions on the payment page
On the payment page actions page, you must specify actions for 4 options:
1. Subscription action - a setting that allows you to perform certain actions for the user who activated the subscription (first successful payment).
2. Action on unsuccessful payment — will be triggered by any automatic write-off error, except for the last attempt. And will be repeated for each unsuccessful write-off attempt. Usually used to warn the subscriber that the payment has not been completed.
Types of errors, according to the Prodamus documentation:
-
Insufficient funds
-
The card has expired
-
Card limits exceeded
-
The map is lost
-
System error
3. Action on unsuccessful payment (last attempt) - will be triggered if all attempts to automatically write off, according to the Prodamus subscription settings, have failed. Usually used to disable access or exclude from a paid channel.

4. Action when all auto-write-offs are finished — will be triggered when the number of auto-write-offs specified in Prodamus has been completed
Important: to activate actions when a subscription ends or a charge is unsuccessful, additional notification settings are required in the Prodamus system.
Testing
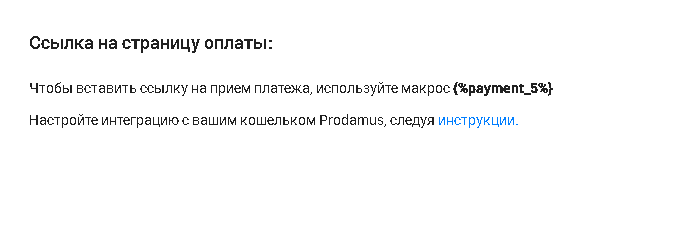
After setting up, be sure to check the automation. Go to the dialogue with your profile and send the macro of the created automation. For example, {%payment_5%}. The macro is specified in the automation settings.
Example message:
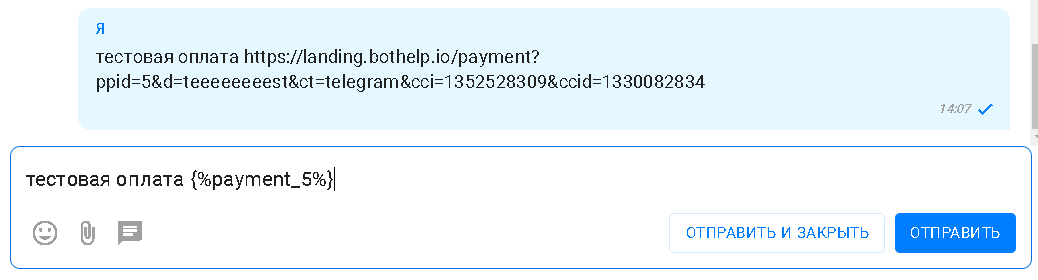
Please note that the payment link is generated after the message has been sent and only works within the correspondence with this user. You cannot send this link in another messenger or to another user. You cannot use this link in another service. Payment only works via macro.
Follow the link from the message in your messenger and test the payment. After a successful test, you can use this macro in other messages in the chain.

If you have not found the answer to your question, ask us in the chat inside your account or write to BotHelpSupportBot or to hello@bothelp.io
Get 14 days of full functionality of the platform for creating mailings, autofunnels and chatbots BotHelp.