IMPORTANT! This is a guide for one of the scenarios for using the integration with GetCourse. A full description of the integration capabilities of BotHelp and GetCourse, as well as other examples of use cases, can be found here .
GetCourse is a platform for conducting training. With the help of integration, you will be able to track those users who have paid for the course and lead them to the next chain. And for those who are still thinking and have not made a purchase, continue to send a warm-up chain.
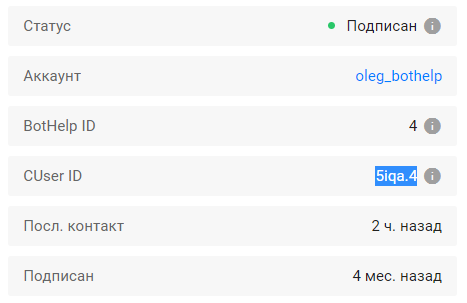
CUID (customer user ID) is a unique subscriber identifier in the BotHelp platform. Its value can be found in the subscriber profile in the "CUser ID" column.
GetCourse setup steps
(!) Please follow these instructions carefully.
You need to make a number of settings inside the GetCourse account and only then move to the bot chain. GetCorse setup steps:
- Add bothelp_id field to registration form.
- Add javascript code to the payment landing page.
- Add ID transfer process.
Add a field to the registration form
1. Create a new field in the user profile
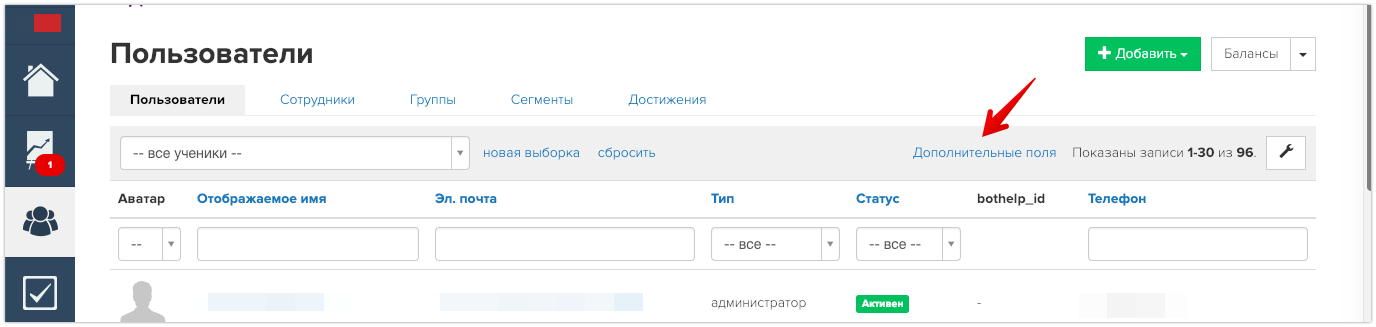
- Go to the Users section.
- Select "Additional fields".
- Select the field type "String".
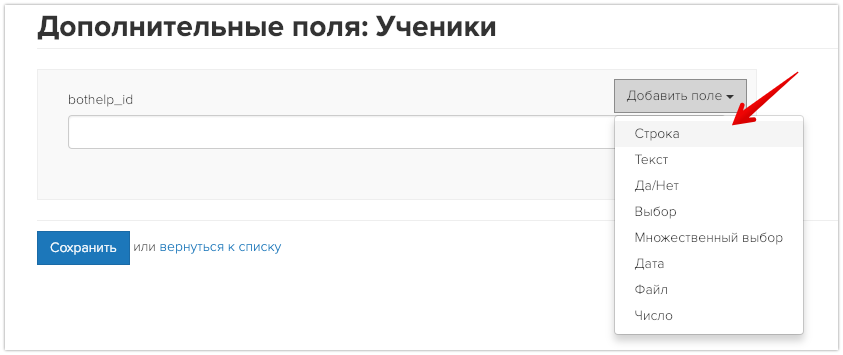
- Name the field bothelp_id .
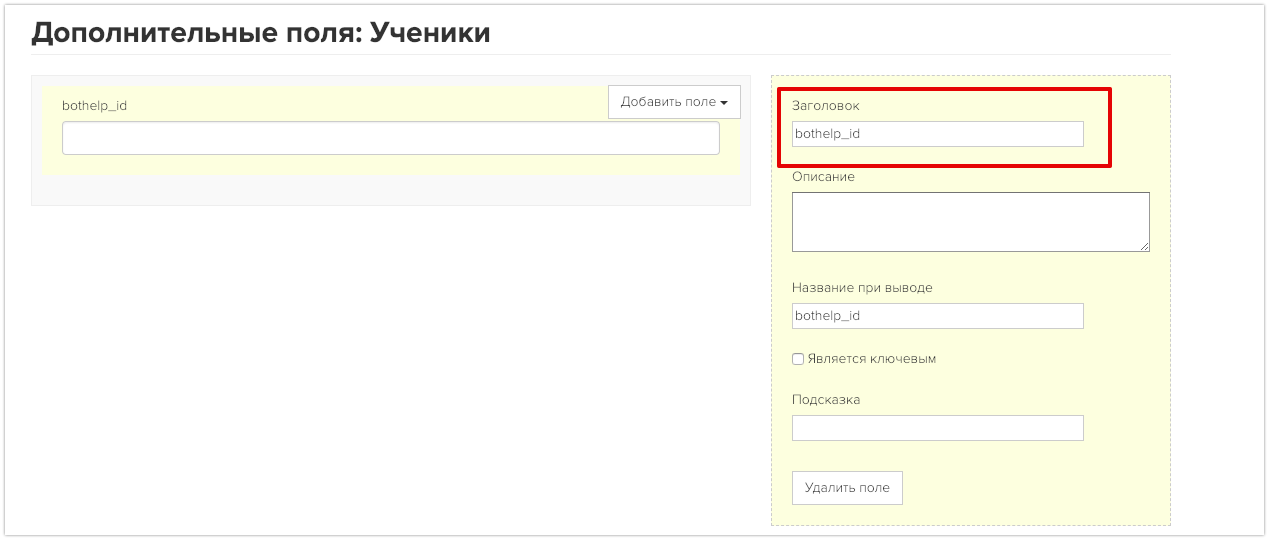
- Save the field.
2. Add a field to the registration form
- Go to the "Site" - "Pages" section.
- Create a new page or edit an existing one.
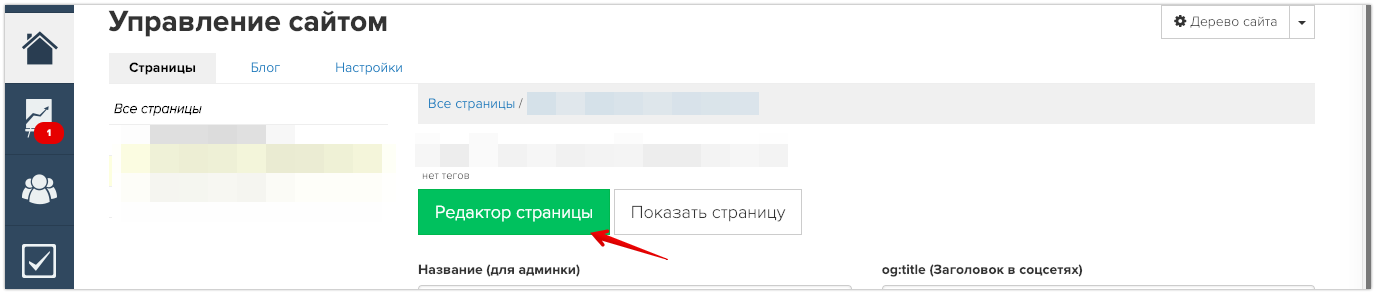
- Create a new form or go to the settings of an existing one.
- Add a new "User Field".
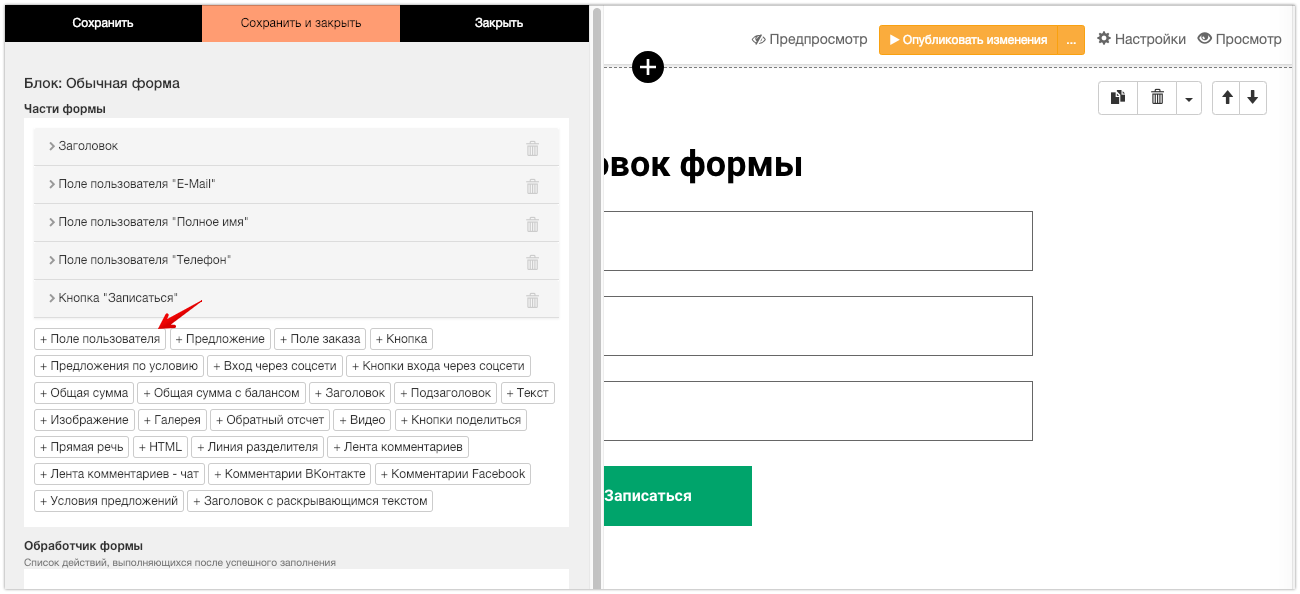
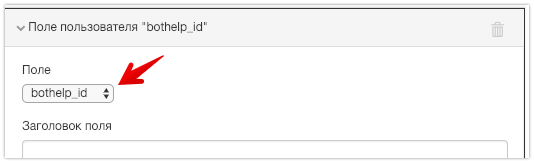
- Select the bothelp_id field type that you created earlier.
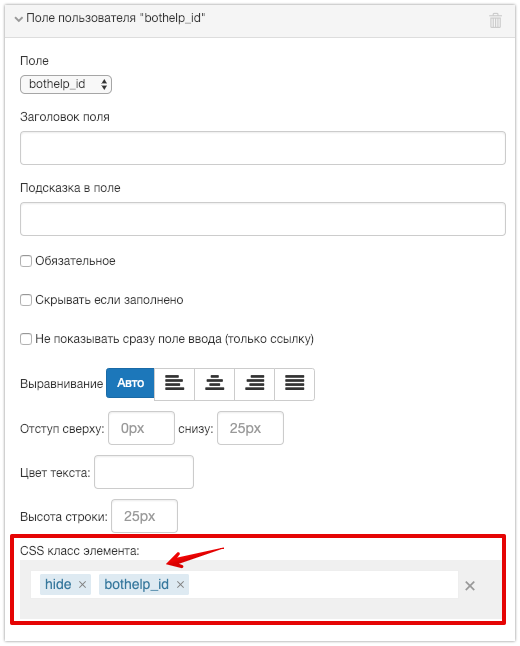
- In the "Element CSS class" section, be sure to specify two values:
- hide
- bothelp_id
This setting will hide this field from the user. It will not be displayed in the form, but thanks to it, the integration with BotHelp will work.
- Save the form.
Add javascript code to the page
- At the bottom of the page, add a new block called "Javascript code". You can find it in the "Insert" section.
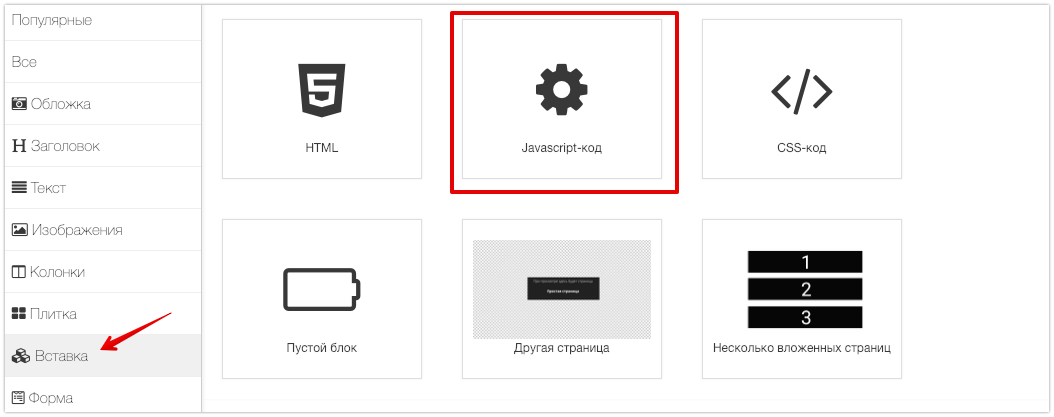
- Specify the code name "Getting BotHelp ID".
- In the code entry field, enter the following code. Make sure you copy it correctly!
$(document).ready(function(){ var regex = new RegExp('[\\?&]sid=([^&#]+)'); var match = regex.exec(window.location.href); if (match && match.length) { $('.bothelp_id input').val(decodeURIComponent(match[1])); } });
This is what it looks like inside GetCourse. Save the block.

Add ID Transfer Process
1. Create a process
- Go to the "Tasks" - "Processes" section and click on the Create process .
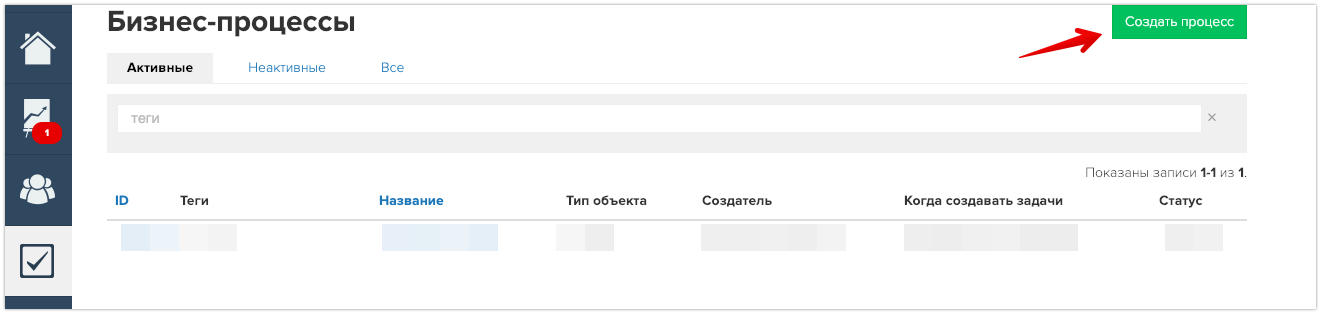
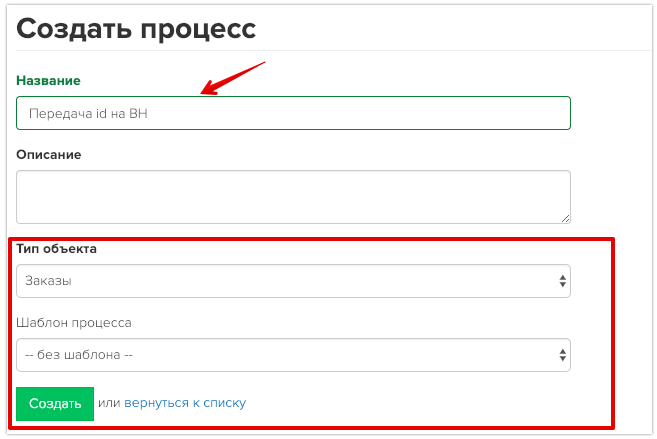
- Name the process "Transfer ID to BotHelp".
- Select the object type "Orders".
- Template "without template".
- Click the Create .
2. General settings
- In the Bulk Task Creation section, select Periodic Check.
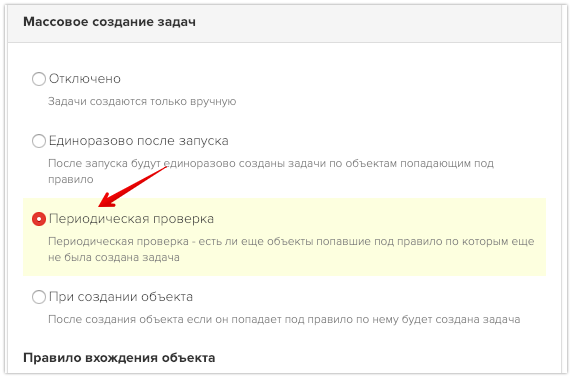
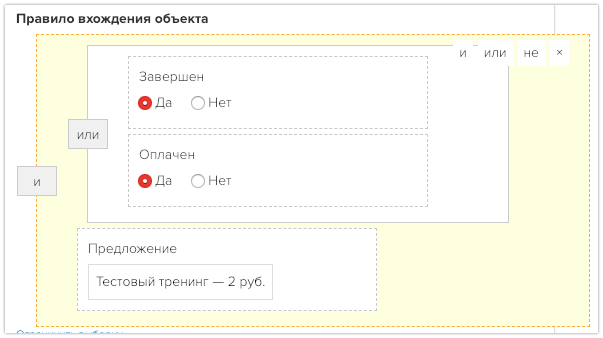
- If the process is completed or paid, in the object entry rules, specify and select the offer you want to check in the chain. You can add several offers.
Example:
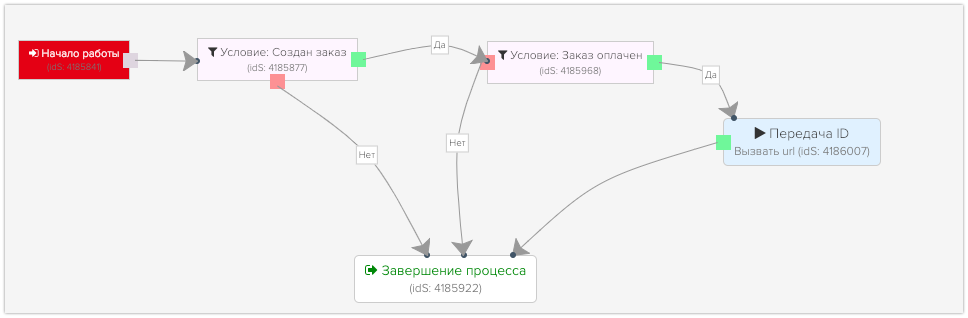
3. Creating a process
The final process that should result. Step-by-step instructions below.
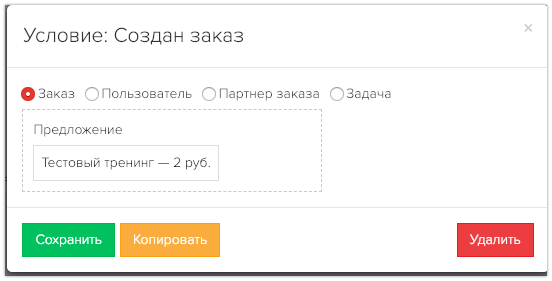
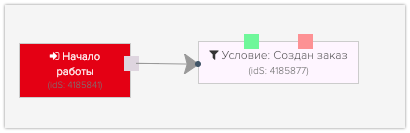
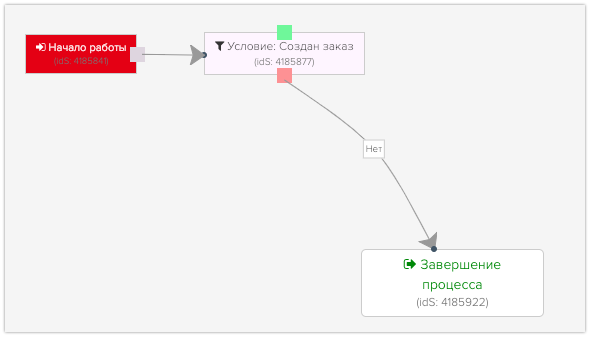
- Condition "Order created"
The first step after starting the process will be the condition "Order" - "Offer" - your offer, the purchase of which must be verified. You can add several offers via the condition or .
If the condition is not met (no), then we move to the completion of the process.
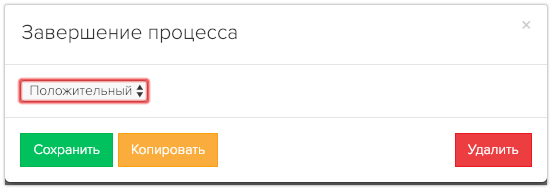
- Block "Process Termination"
Add a Positive "Process Completion" block.
Connect the failure to meet the order creation condition with the completion of the process.
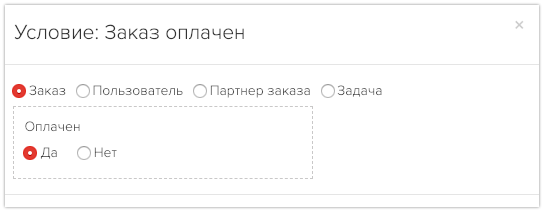
- Condition "Order paid"
Add the condition "Order" - "Paid" - "Yes".
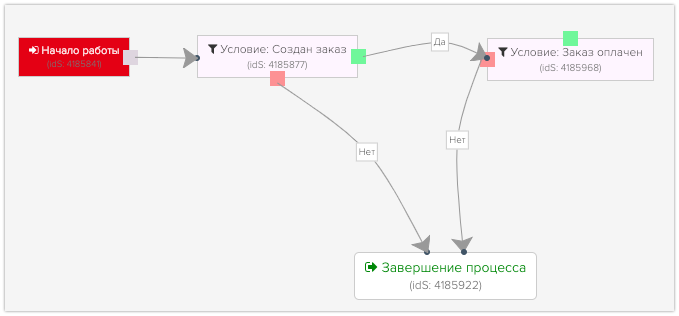
Combine the conditions "Order created" and "Order paid".
If the condition is not met (no), switch to "End process".
If the condition is met (yes), move to the “Operation” block — “Call URL”.
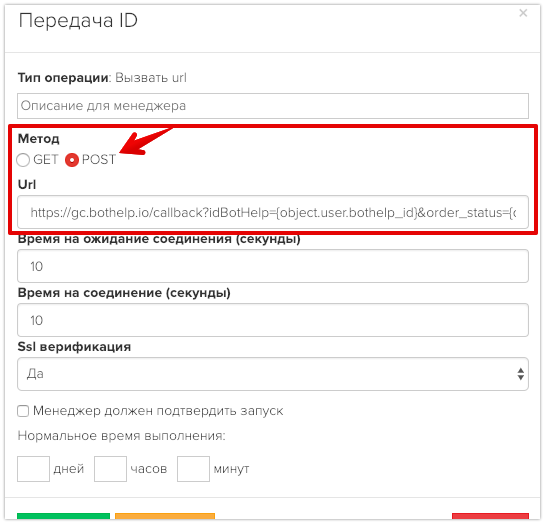
- Block Operation - Call URL
Add a new block of the Operation type, select Call URL and save.
In the "Operations" settings, specify:
- Operation name "ID Transfer".
- Method "POST".
- In the URL field, enter the following link:
https://gc.bothelp.io/callback?idBotHelp={object.user.bothelp_id}&order_status={object.status}&order_num={object.number}&offers={object.offers}
4. Leave the rest as default. Save.
- Don't forget to specify all connections correctly.
Connect the successful execution of the "Order paid" condition with the "Operations" block of the ID transfer.
Connect the Operations block to the Process Termination block.
General diagram of the process.
Make sure your process flow exactly matches the screenshot.

Start the process and make sure it is active.

Setting up in BotHelp
The setup consists of two steps: passing the ID along with the link to the page and adding a payment verification condition.
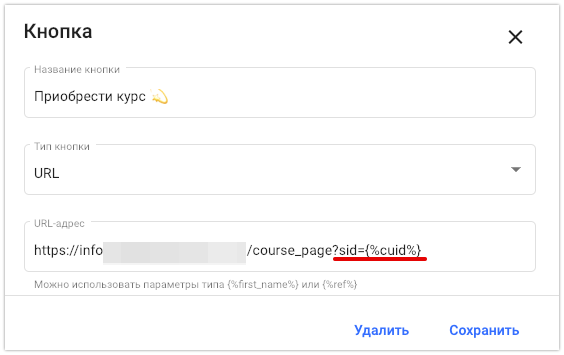
Passing ID in a link
You need to add a parameter to the link that leads to the landing page
?sid={%cuid%}
Example:
https://info/course_page?sid={%cuid%}
The link can be sent within the text or in a URL button.
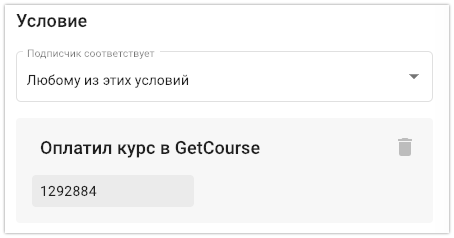
Payment verification condition
Add a new step "Condition" and add the condition "Paid for a course in GetCourse". In the input field, you need to add the ID of the "Offer" from GetCourse.
Go to the Products section, Offers tab. Copy the offer ID and paste it into the conditions field.
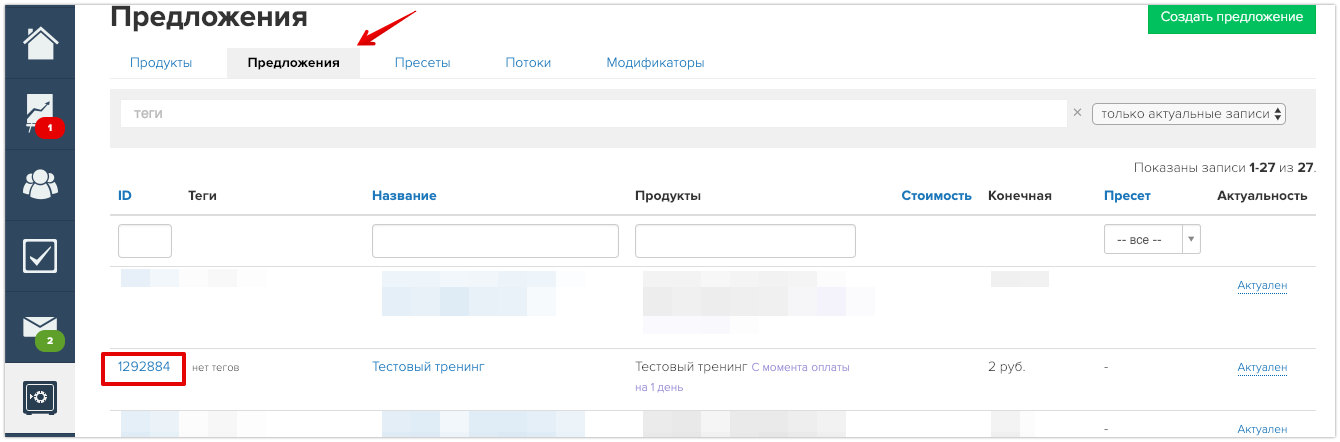
Example of a ready condition. You can add several sentences to one condition.
Important : there is no option to issue a link to pay for existing order in GetCourse via a bot.
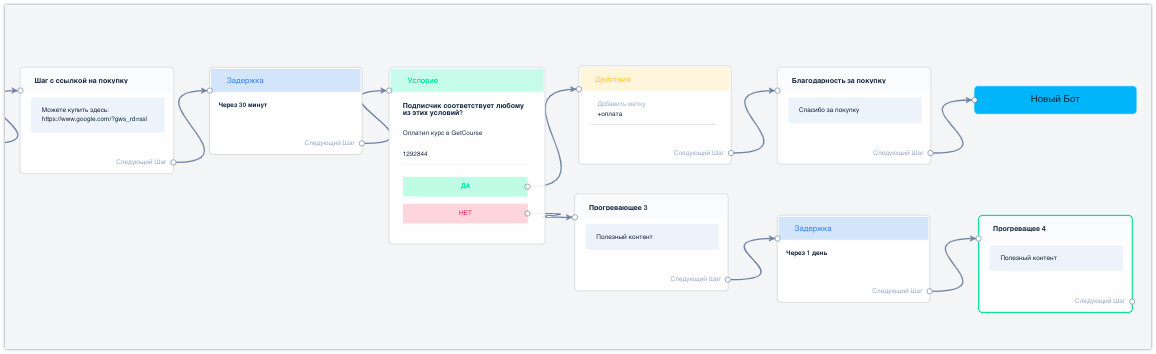
Setting up a chain in BotHelp
To start, create a standard warm-up chain. Send useful content and take other engaging steps.
When you think that users are ready to purchase your product, you send a link to the sales page (landing page) to GetCourse.
You can send a link either as text or via a URL button. The main thing is to add a parameter that transmits the subscriber ID.
After the step with the link, be sure to set a delay of 30-40 minutes and after that - the condition with payment verification. This delay is necessary so that the data from GetCourse has time to be transferred to our system.
If the condition is met, you can assign a payment label and direct the subscriber to the next bot. And if it is not met, continue sending warm-up messages.
You need to check that the conditions are met after each purchase link is sent.
Example of a diagram:
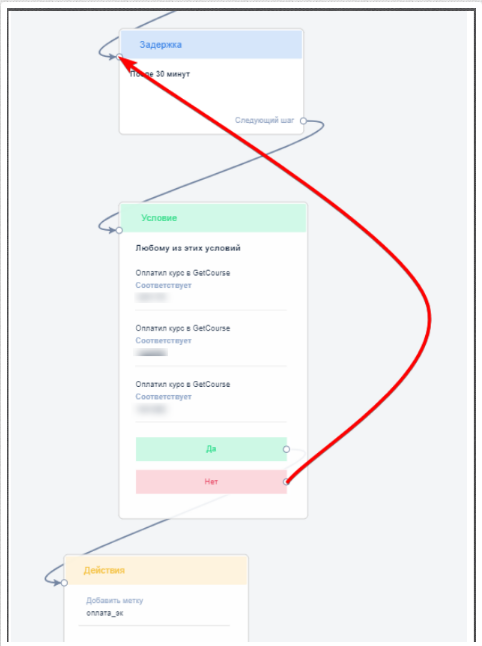
Delay time
Consider the time it will take users to make a payment. This should be added to the 30-40 minute delay. If you do not take this additional time into account, the data on successful payment will be transferred to our platform after the bot has checked the condition, and the subscriber will follow the "Did not pay" scenario.
You can 1) set up multiple checks at different steps throughout the bot chain, or 2) loop the check as shown in the diagram: in this case, the condition is checked every 30 minutes.
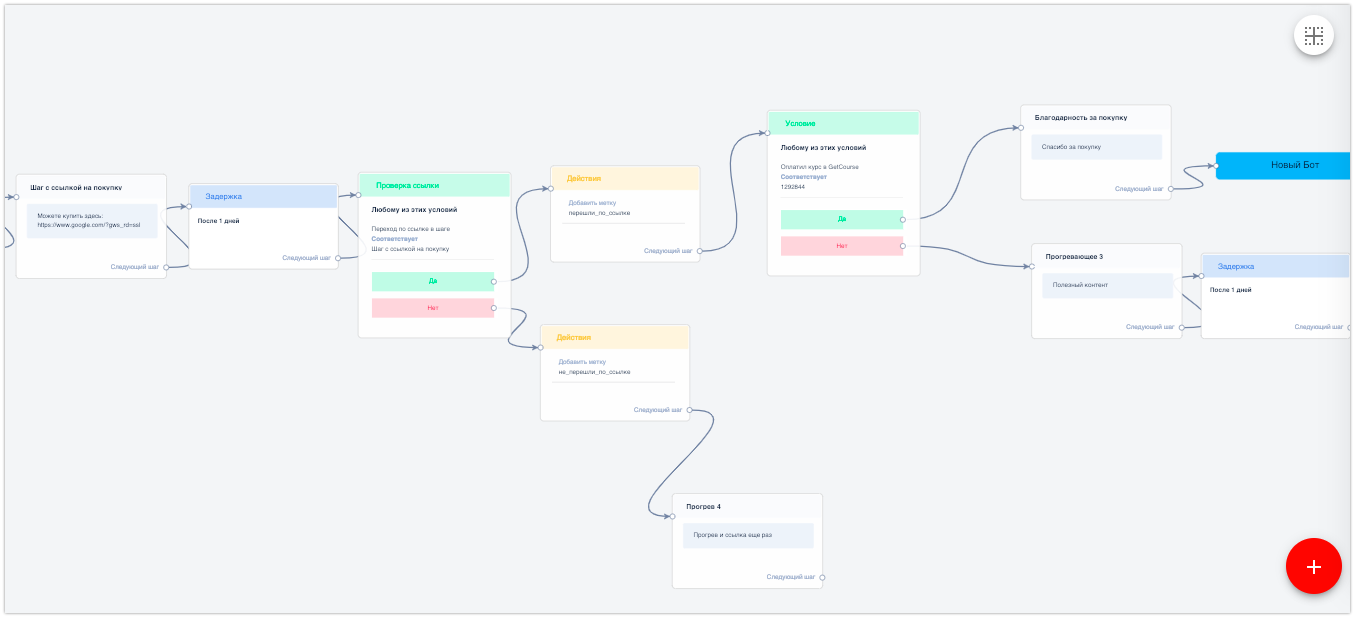
Checking the link transition
You can also first track those who followed the link to the course and check only them for purchase. And send other warm-up content to those who did not follow the link.
If you have not found the answer to your question, ask us in the chat inside your account or write to BotHelpSupportBot or to hello@bothelp.io
Get 14 days of full functionality of the platform for creating mailings, autofunnels and chatbots BotHelp.