You need to create a mini-landing page , an advertisement and then link them together.
Read the article .
If you don't have a Facebook account yet, create one by following the detailed instructions from Facebook *.
It is necessary to set up a Facebook pixel *, which will collect the audience in the retargeting databases. It will help to create a conversion, for which we will then optimize advertising. Instructions for setting up a pixel .
Creating an advertisement
After you have created a mini-landing page and set up conversions, go to your account using the link . Create a new ad.
- Select Conversion . Enter the campaign name and click Continue .
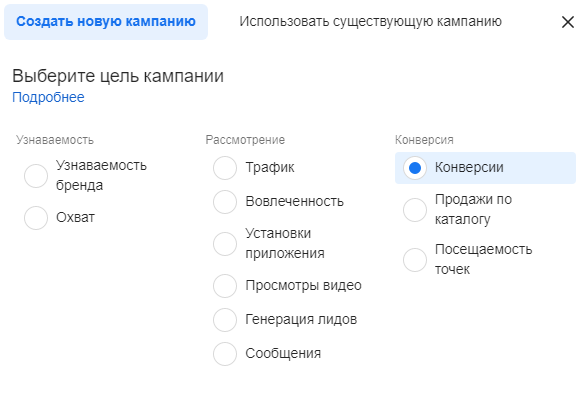
Note: For more effective setup with a mini-landing page, we recommend using two goals: traffic and conversions .
When we have just created mini-landings and need to measure objective conversion and collect registrations for the pixel, we choose the Traffic .
After the first 100 clicks, you can turn off this campaign and collect ads for the Conversion , because we don't need clicks anymore. We need registrations and applications.
Setting up an ad
- In the first editing window, do not change anything at the initial stage. Click Next .
- Go to the ad group level setting.
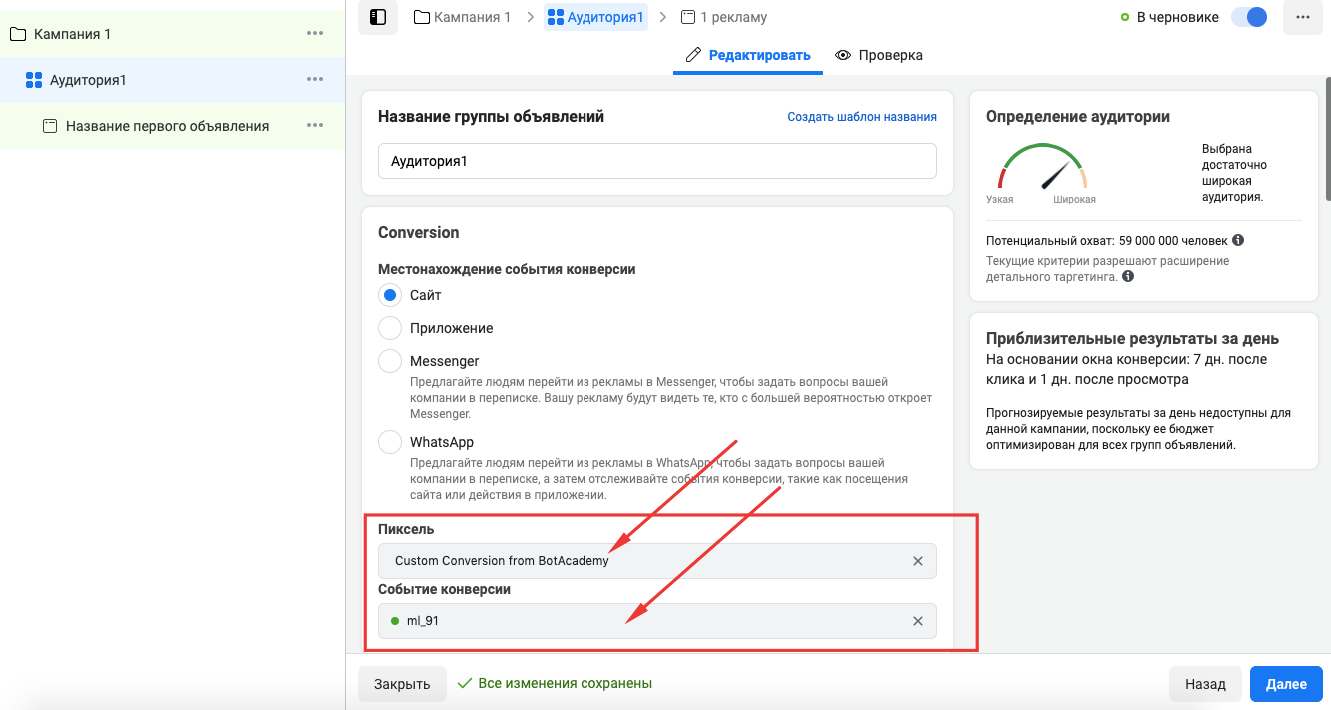
- Conversion Event Location: Select Site .
- Select the pixel and the desired conversion (the pixel and conversion were configured earlier).
- Set up your budget and schedule.
- Customize your audience: geographic location, gender, age, language.
Note: When setting up interests, we recommend recruiting from 300 thousand to a million users so that the conversion can be optimized.
If you choose a quantity of up to 300 thousand, the audience will be very narrow and Facebook* will overestimate the cpt - cost per thousand impressions.
If you choose a number greater than a million, the audience will be too broad and Facebook* will spread itself among everyone, and you will not get the necessary numbers.
If you can't target these audiences due to geographic limitations, simply try to sample more broadly.
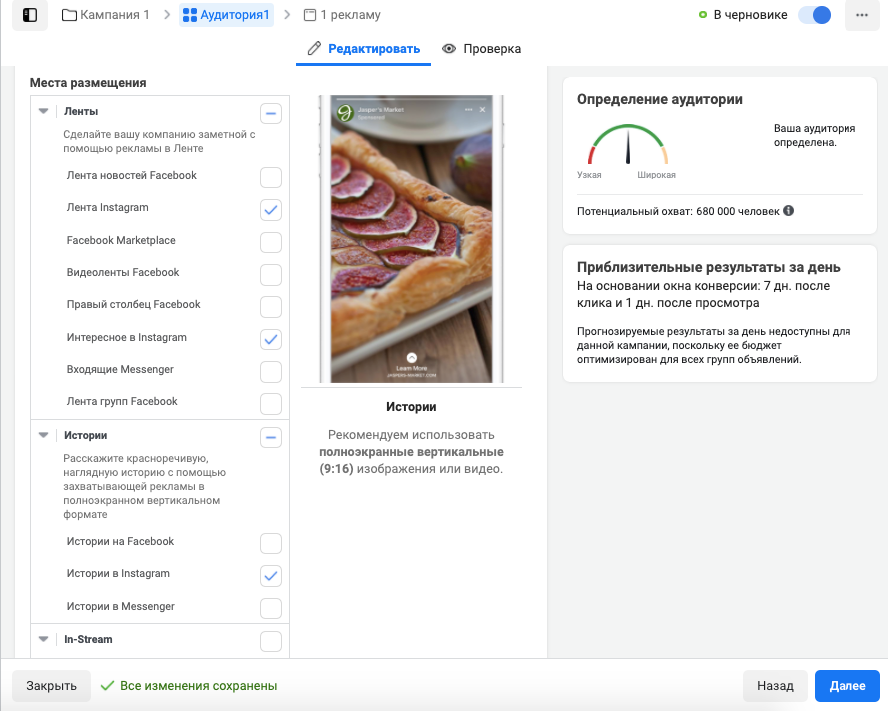
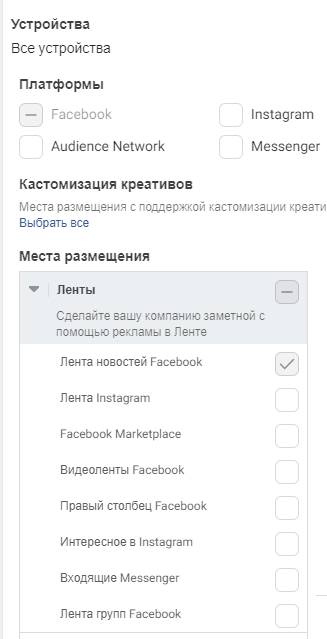
Placement - Instagram*
- Select Instagram placement*. Manually specify where exactly the ad will be shown.
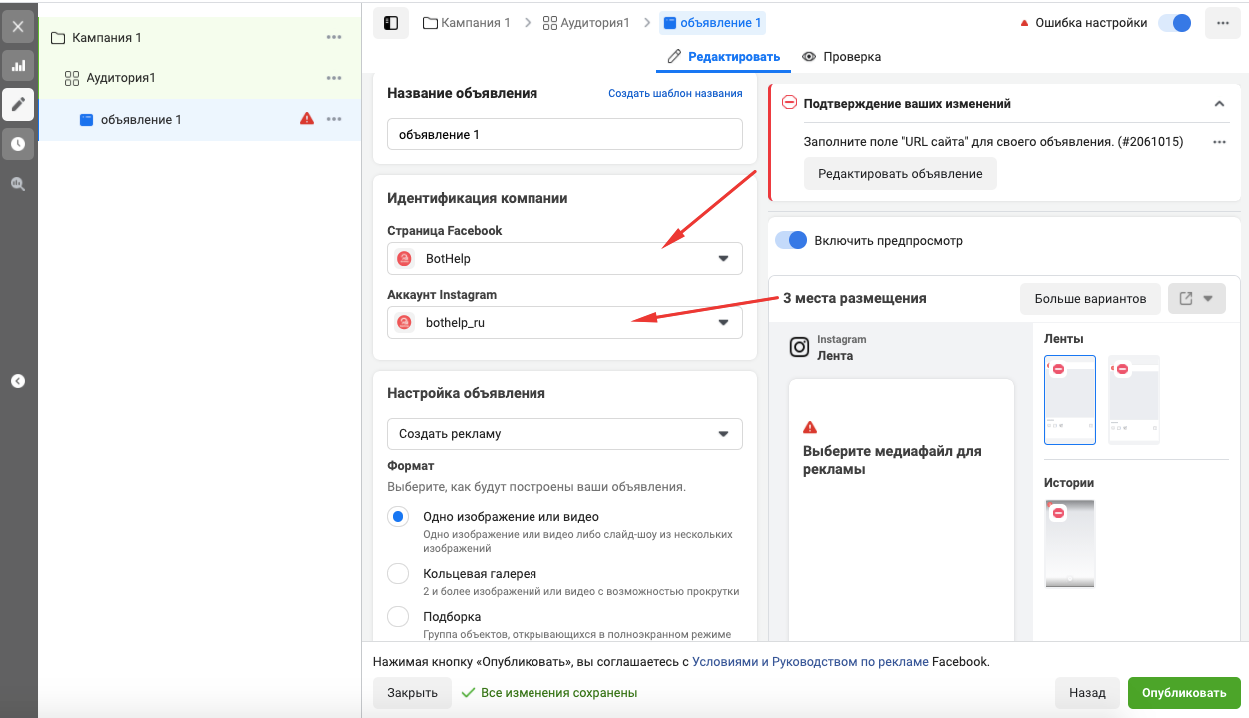
- Select a Facebook business page* and an Instagram profile* from which the ad will be sent. The page in the ad must be the same one from which the bot is launched on the mini-landing page.
- Customize the format, text, and appearance of your ad.
- Insert a link to the mini-landing page where the advertisement should lead.
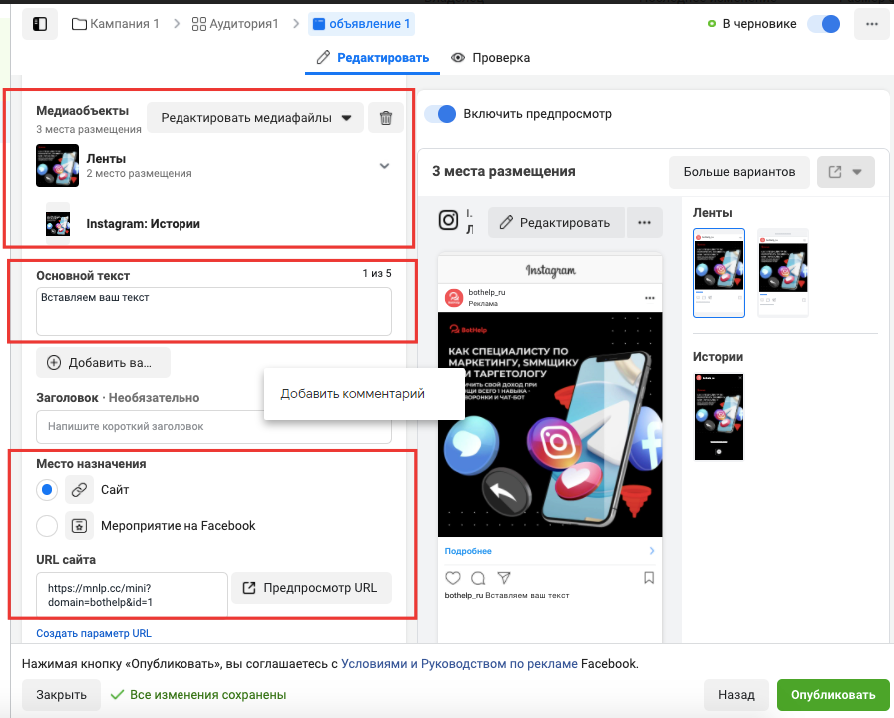
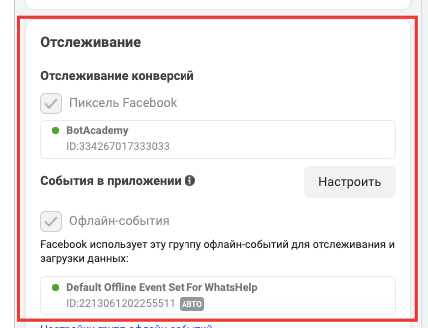
- Check that the correct pixel is connected.
- Enable ad preview in your feed and test the bot's operation.
- Click Publish . The ad will be automatically sent for moderation and will be launched immediately after verification.
Setting up an ad for Facebook*
The settings will be the same as for Instagram*. The only difference is that you need to select Facebook* in the placement.
- Mark the Facebook placement*. Manually specify where exactly you want the ad to appear. For example, this would be the Facebook News Feed *.
- Select the Facebook business page* from which the ad will be sent. The page in the ad must be the same one from which the bot will be launched on the mini-landing page.
UTM tags
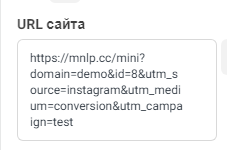
To analyze the effectiveness of advertising campaigns, we recommend setting up UTM tags .
You can add tags manually or create a link using special constructors. How to do this is described in our article UTM tags .
Paste the resulting link into the “Site URL” field.
* Belongs to Meta, which is recognized as an extremist organization in Russia.
If you have not found the answer to your question, ask us in the chat inside your account or write to BotHelpSupportBot or to hello@bothelp.io
Get 14 days of full functionality of the platform for creating mailings, autofunnels and chatbots BotHelp.