Auto-mailing allows you to send several consecutive text messages. It can be configured for all connected channels: VKontakte, Telegram, Viber, Facebook Messenger*.
(!) There are no channels for WhatsApp* and Instagram* yet.
It is not tied to a channel, and you can launch it in several messengers or communities at the same time.
How to start an automatic mailing?
There are several ways to start sending automatic messages to subscribers.
Launch from landing page
On our platform you can create two types of landing pages:
- landing page for VKontakte
- mini-landing (for Facebook*, Telegram, Viber)
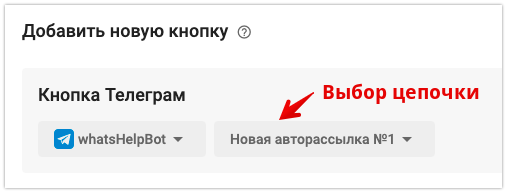
You need to create a landing page, add a button and in its settings select an automatic mailing that will be launched by clicking on the button.
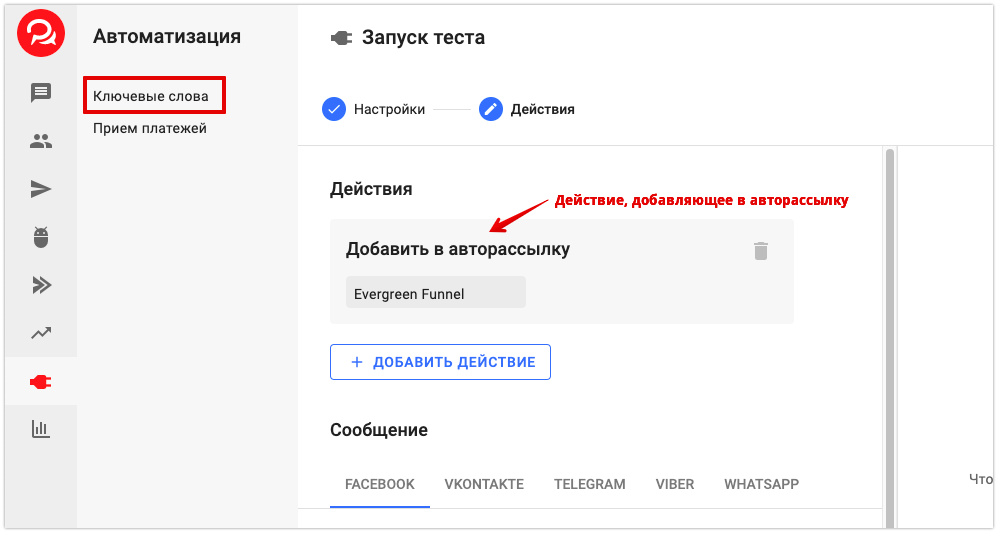
Launch by keyword
You need to set up automation by keyword . In the selection of actions that will occur after entering keywords, select "Add to automation". And then select the mailing that should start.
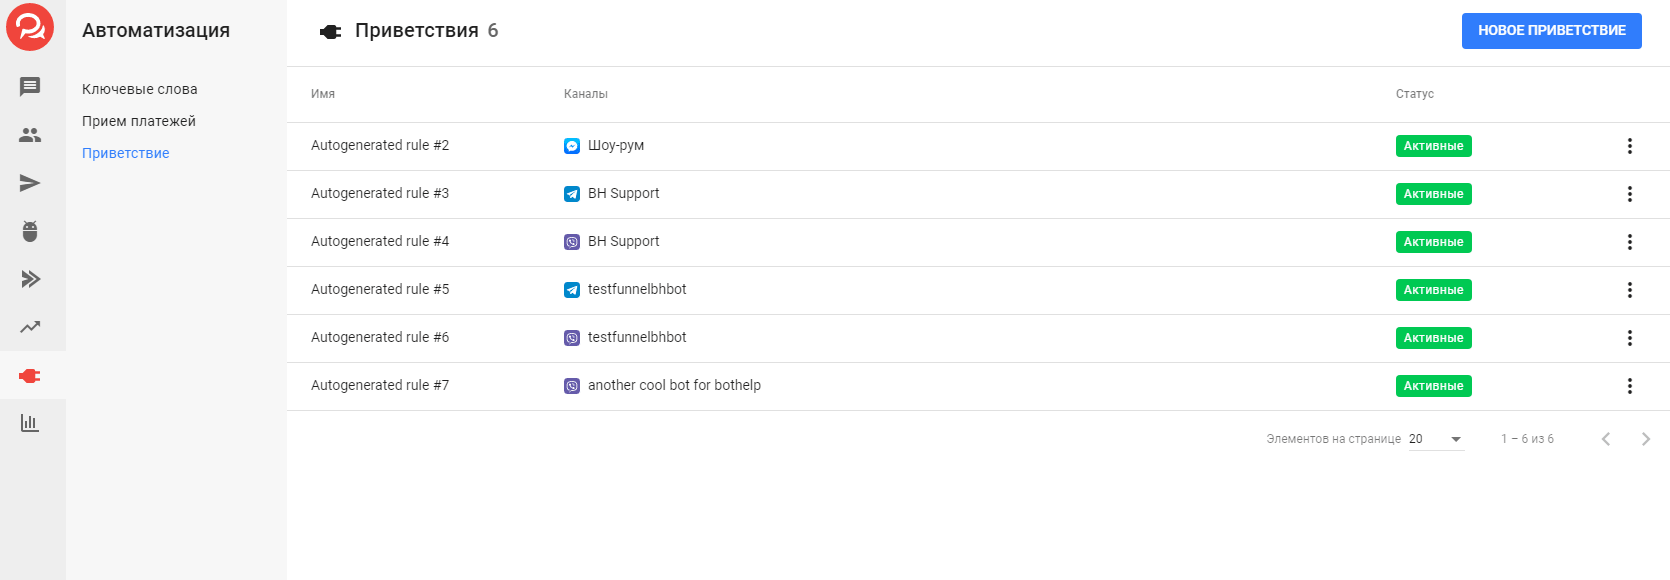
Launch on subscription
In the automation Greeting, create a new greeting. Write a name and select a channel. In "Actions", select the auto-mailing that will be launched when new subscribers subscribe.
(!) This option works only when you subscribe to a channel for the first time (except for Telegram), that is, for new subscribers . If you have previously subscribed to a channel, when you try to test this option, the auto-mailing will not start for you either, but it will work for new subscribers.
(!) We are talking specifically about starting a dialogue with a bot/community/page, and not just about subscribing to a community. When a potential subscriber clicks the Start/Start/Allow messages in the selected channel, this auto-mailing will start.
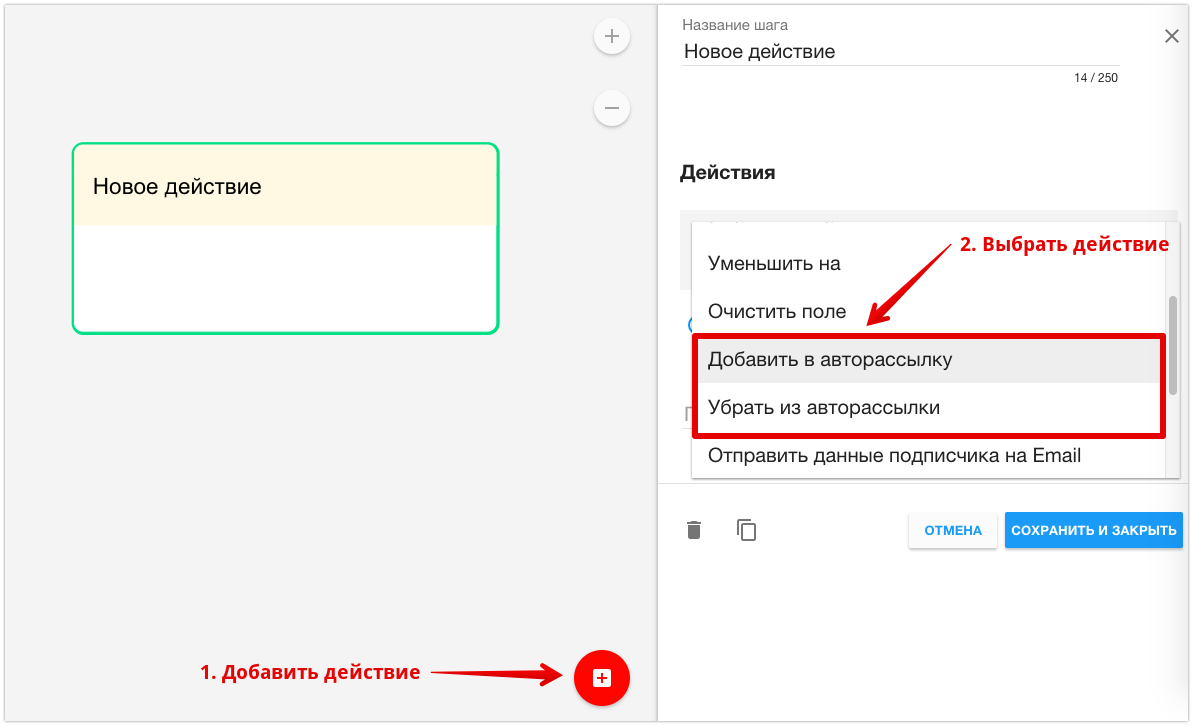
Launch from a multi-step bot
To start a mailing from it, you need to create a new action “Add to automatic mailing”.
Launch for one subscriber
You can add a subscriber to the auto-mailing manually. For example, if your manager spoke with someone and after the conversation suggested subscribing to the mailing list.
To do this you need:
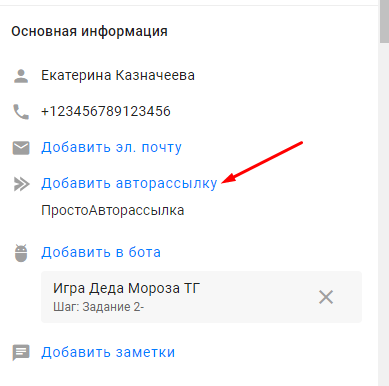
- Go to the subscriber's profile.
- Find the "Automailing" item.
- Click on the "add" link.
- Select an auto-mailing from the list.
- Click on the Add .
To remove a subscriber manually, click the "remove" link next to the newsletter name.
Mass launch of automatic mailing
(!) The mass launch of automatic mailings has a limit of up to 100 subscribers . In the future, we plan to expand it.
- Go to the "Subscribers" section.
- Select subscribers for whom you want to launch an automatic mailing.
- Click on the “…” button to open the list of mass actions.
- Select the “Add to auto-distribution” option.
- Select the auto-mailing list to which you want to add subscribers and click the Add .

To add all subscribers, you need to click on the checkbox (name). Then all users will be selected, not just those on the page.
(!) Mass actions take time to complete. The more subscribers you select, the more time it takes. The automated mailing will not reach everyone at the same time.
(!) If a subscriber goes through an auto-mailing and we add him there again (in the subscriber profile or by mass actions, actions in a bot/automation, etc.) — the previous auto-mailing session will be cancelled. And for this subscriber, the auto-mailing starts coming from the very beginning. Thus, in the statistics "unsubscribed at the step" we see +1, in the statistics "added" — also +1, since the subscriber is added to the auto-mailing again.
Several auto-mailings
At any time when a user is in one mailing list, you can add them to another. You can either remove them from the first one or send them simultaneously. One mailing list does not affect the other.
For example, a subscriber can be in a long auto-funnel for 6 months and receive one message per week. But in parallel, you can launch a short chain for him for 7 days.
The main thing is to make sure that the user does not receive too many messages, otherwise you risk getting banned from the messenger.
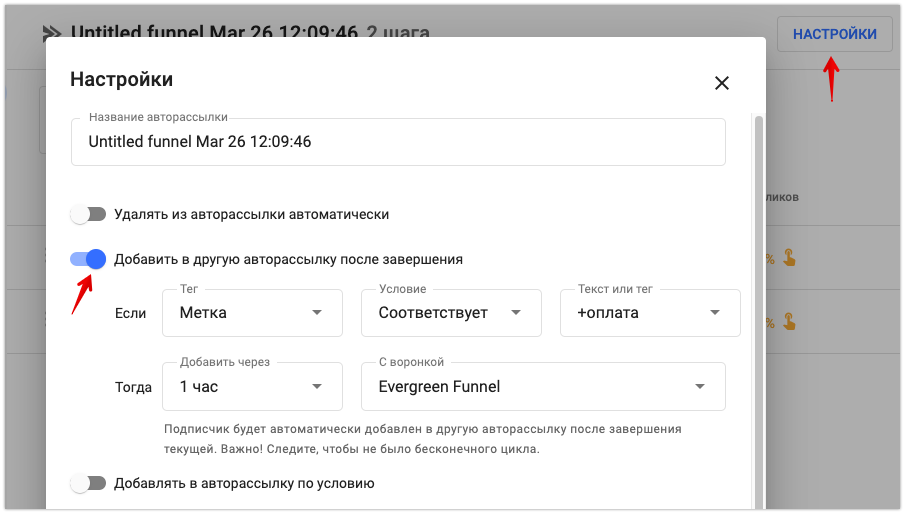
Transition from one auto-dispatch to another
After one mailing is over, you can send the user to the next one. Be sure to ensure that there is no endless loop and the user is not driven in circles.
You can add specific users to the second mailing list who will have the required tags or filled in the required fields at the time of adding. You can also add everyone who was in the first mailing list without additional conditions (to do this, fill in only the fields "Add via" and "With funnel").
The earliest time to start the next mailing is 23 hours later, but it is better to set the delay time in the second automatic mailing.
* Belongs to the Meta organization, recognized as extremist and banned in the Russian Federation.
If you have not found the answer to your question, ask us in the chat inside your account or write to BotHelpSupportBot or to hello@bothelp.io
Get 14 days of full functionality of the platform for creating mailings, autofunnels and chatbots BotHelp.