Setting up a simple linear bot chain is described in the previous article .
In this article, we will look at the settings of a variable multi-step bot.
Delay
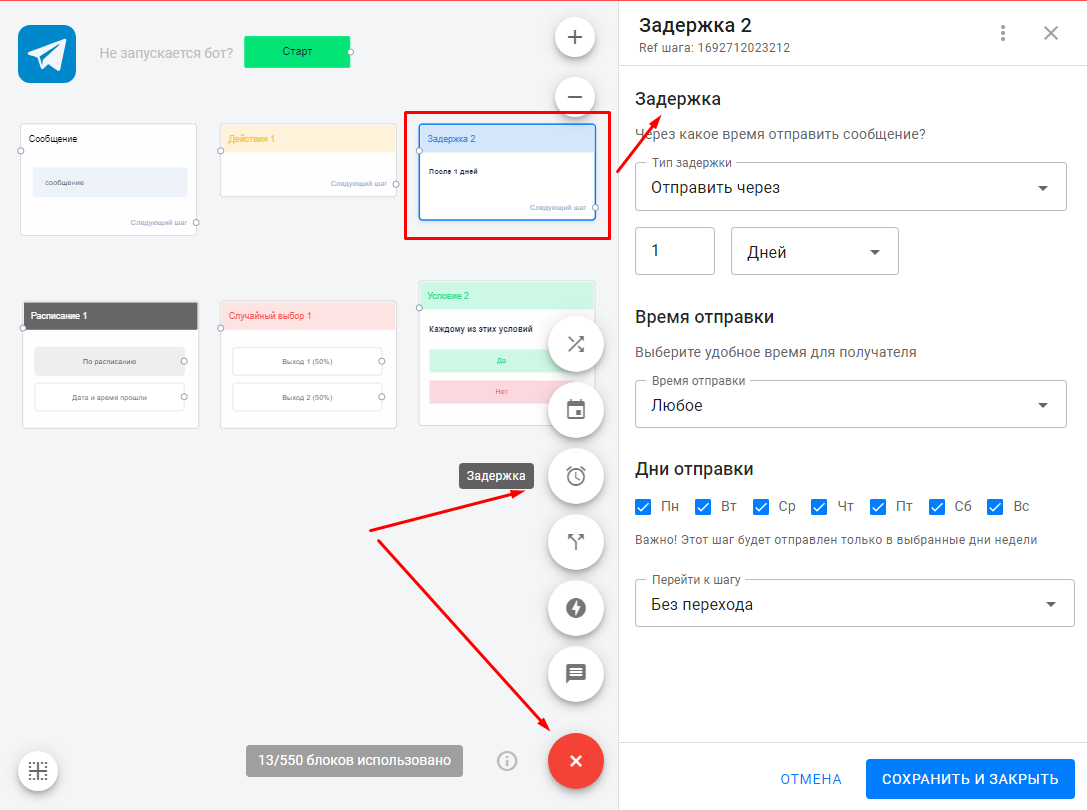
You may have noticed during testing that the bot sent all the messages very quickly. To avoid this, we can use the Delay .
- Click on "+" and add a new delay.
- Give it a name.
- Set the required delay (from 1 second to 365 days).
Dispatch time
You can set the time and day of sending. The step will be sent in the specified interval, but as soon as the delay time has passed. The delay of sending is counted from the previous step.
For example:
You set the delay to "in 1 day, at 8am".
The subscriber received the first step in the evening at 9:00 PM. A delay of 1 day passes = 9:00 PM the next evening. This is not 8 AM. So the next step after the delay will go to the next allowed interval at 8 AM.
If you also set the day of the week, the bot will wait this entire time.
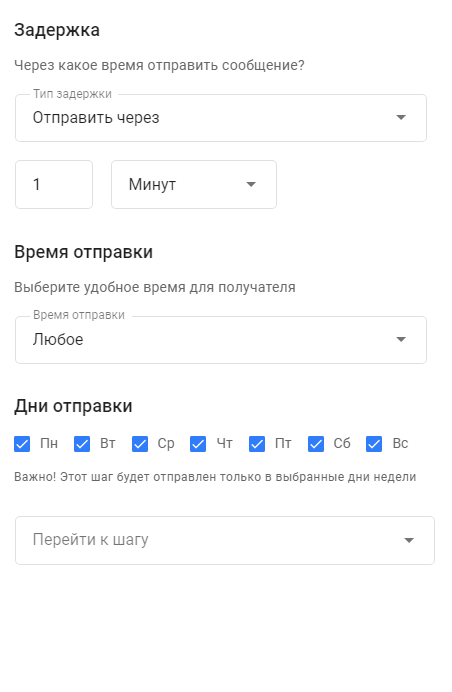
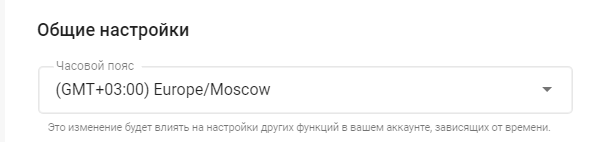
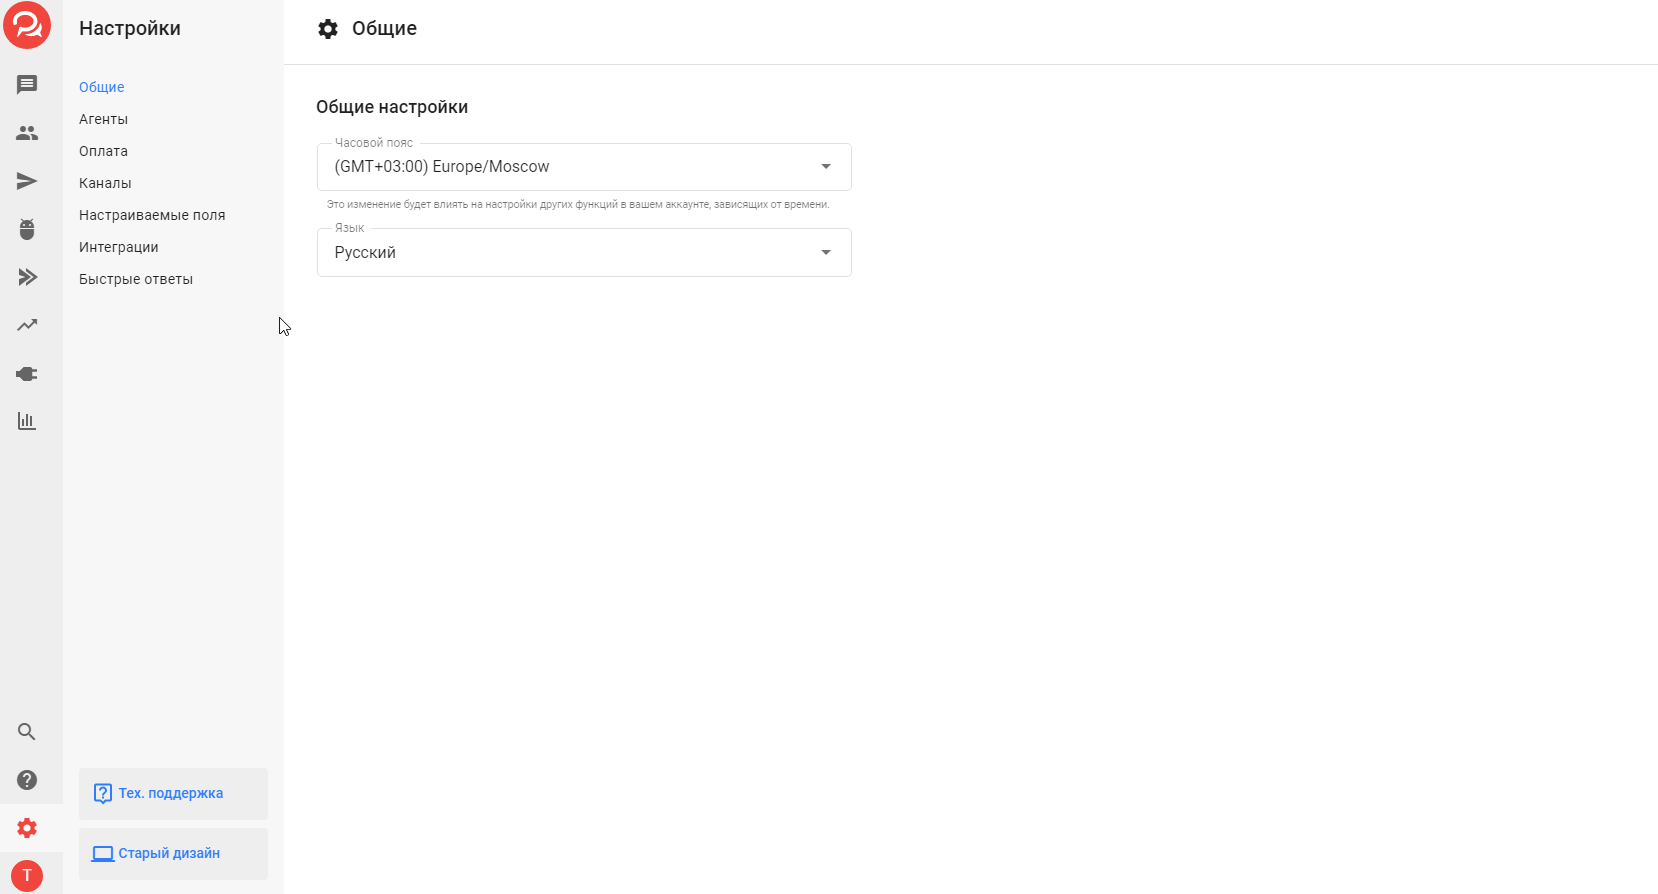
Please note that time zone is set in the account settings. The message will be sent according to the time set in the account, and not according to the subscriber's or admin's time.
Action

An action is an element that is invisible to the subscriber, but it helps us:
- study and segment subscribers,
- add and remove them from the auto-distribution,
- transmit subscriber data to external systems,
- subscribe and unsubscribe users and more.
There are various actions , but in this article we will only look at adding a label. Labels allow you to designate something in a user's profile. For example, in a bot, you can mark everyone who clicked the Marketer as marketers. In the future, you will be able to filter users by this label.

To learn about other actions available, read the Actions .
Condition
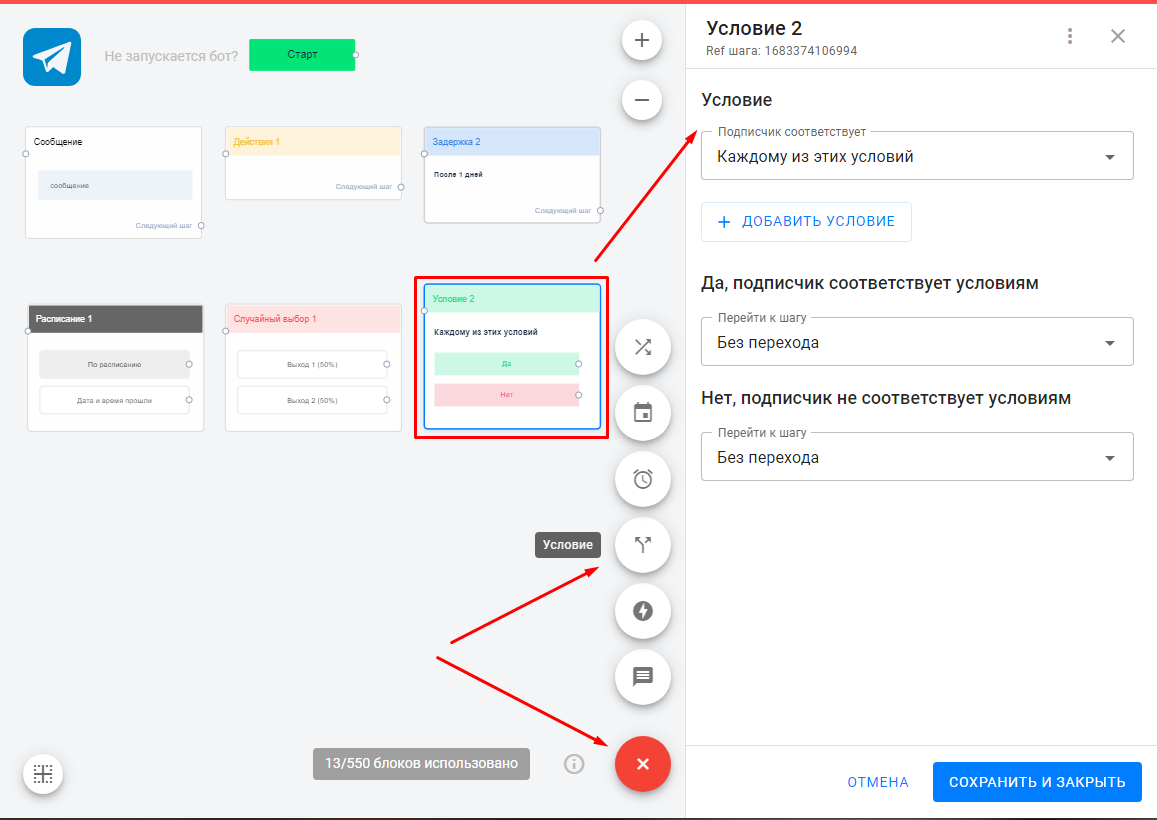
Condition element allows you to add variability to the bot. It helps track whether something is done or not, and depending on that, launch the necessary chain.
In addition, using conditions, you can check whether the user has entered a phone number (filled field), or the correctness of the answer in a quiz (there is a label).
To learn about all the options for conditions that can be applied, read the Conditions .
the Schedule and Random Selection blocks in our articles.
Checking for errors
Make sure there are no errors in the bot. The editor itself will help you with this. Details in the video:
Testing the bot
We talked about testing the bot and resetting statistics in more detail in the first part of the bot setup instructions.
After you have created a bot, you need to give subscribers the opportunity to launch it. There are several ways to do this. Read the article and choose the most convenient for you.
How to create a quiz bot
You can conduct quizzes or tests using a multi-step bot, giving answers depending on the points scored. To do this, you need to:
1. Create a "numeric" field
- Go to profile settings.
- Find "Custom Fields".
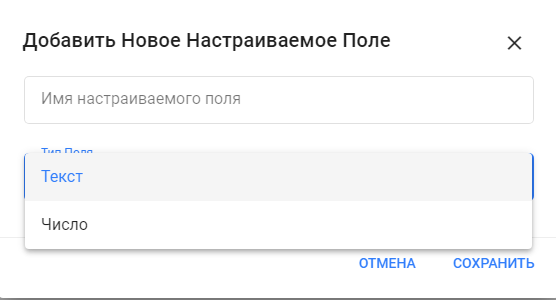
- Click the Add New Field .
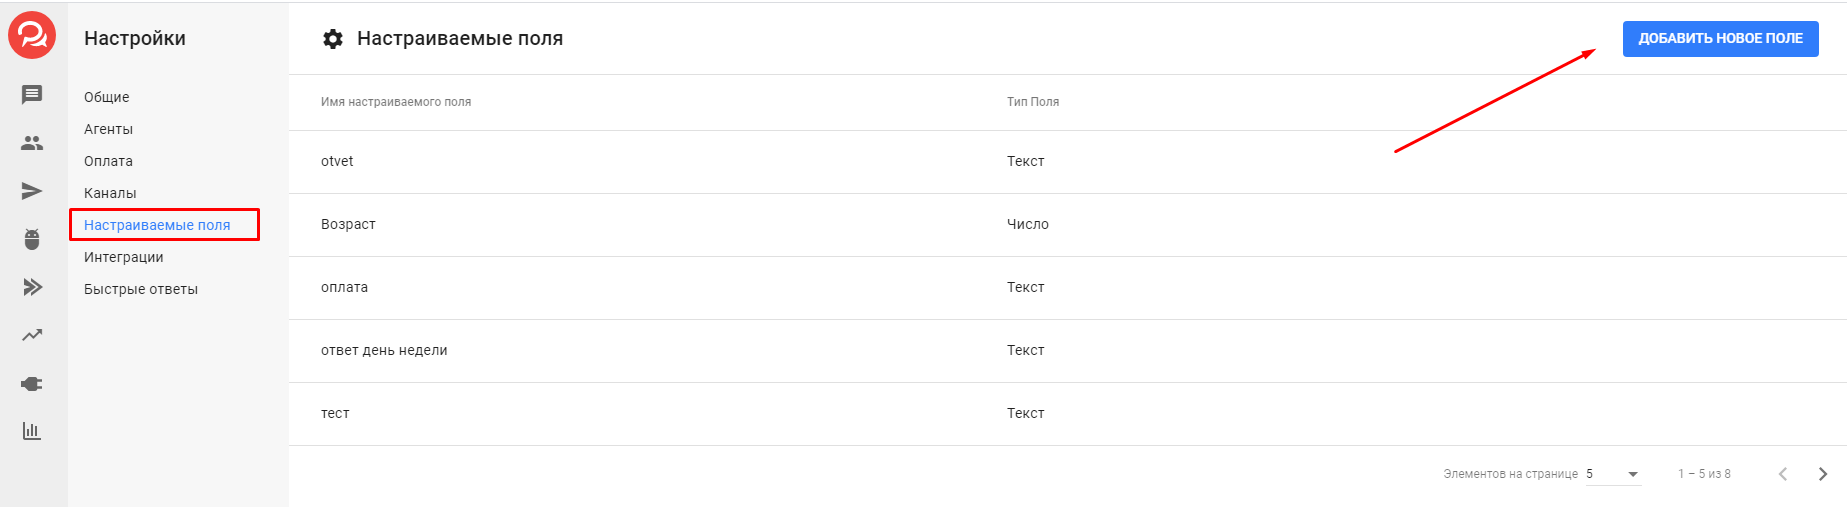
- Enter the field name.
- Select the field type "number".
- Click the Save .
2. Create a multi-step bot
Go to the "Bots" tab in the left menu and click the Create Bot .
Select the channel you are creating the bot for.
Click the button, name the bot and select the community from the drop-down list.
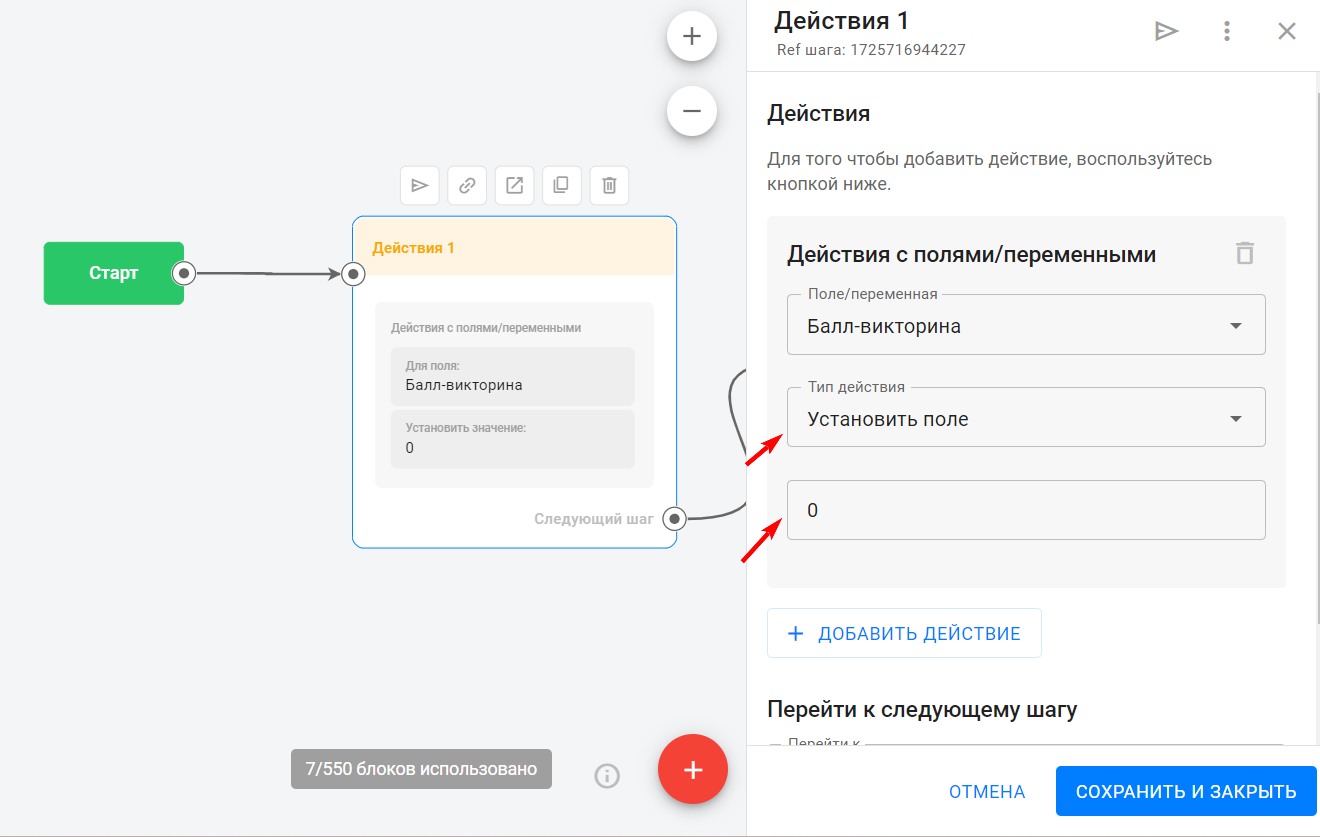
3. Zeroing out points
Add an action right after the start. Set the value of the "Score" field to "0" so that everything works correctly and so that the scores are recalculated each time the test is taken, rather than added to the previous result.
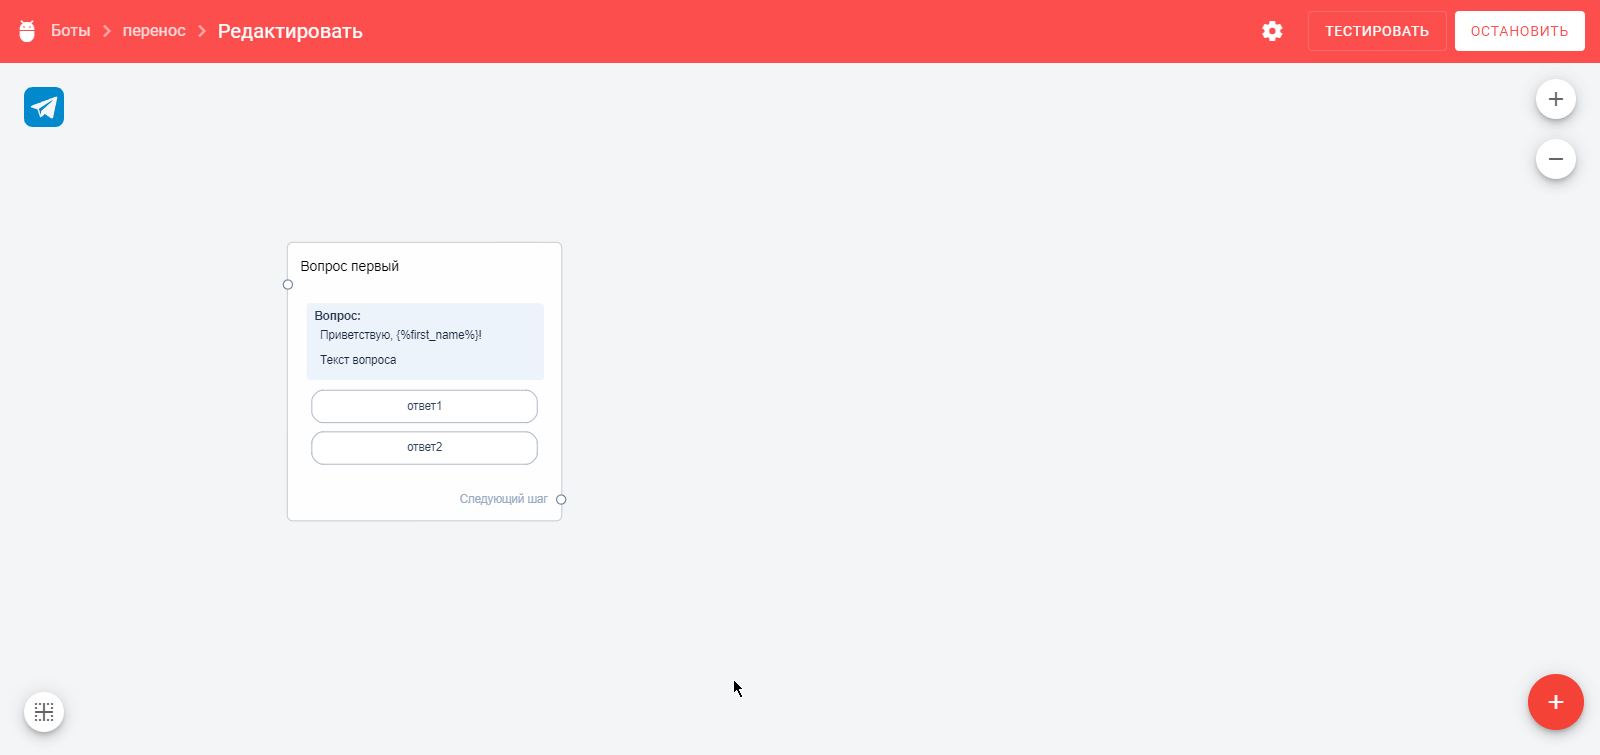
4. Create your first question
- Click on the first message box and delete the "text" card. The quiz will require "question" blocks.
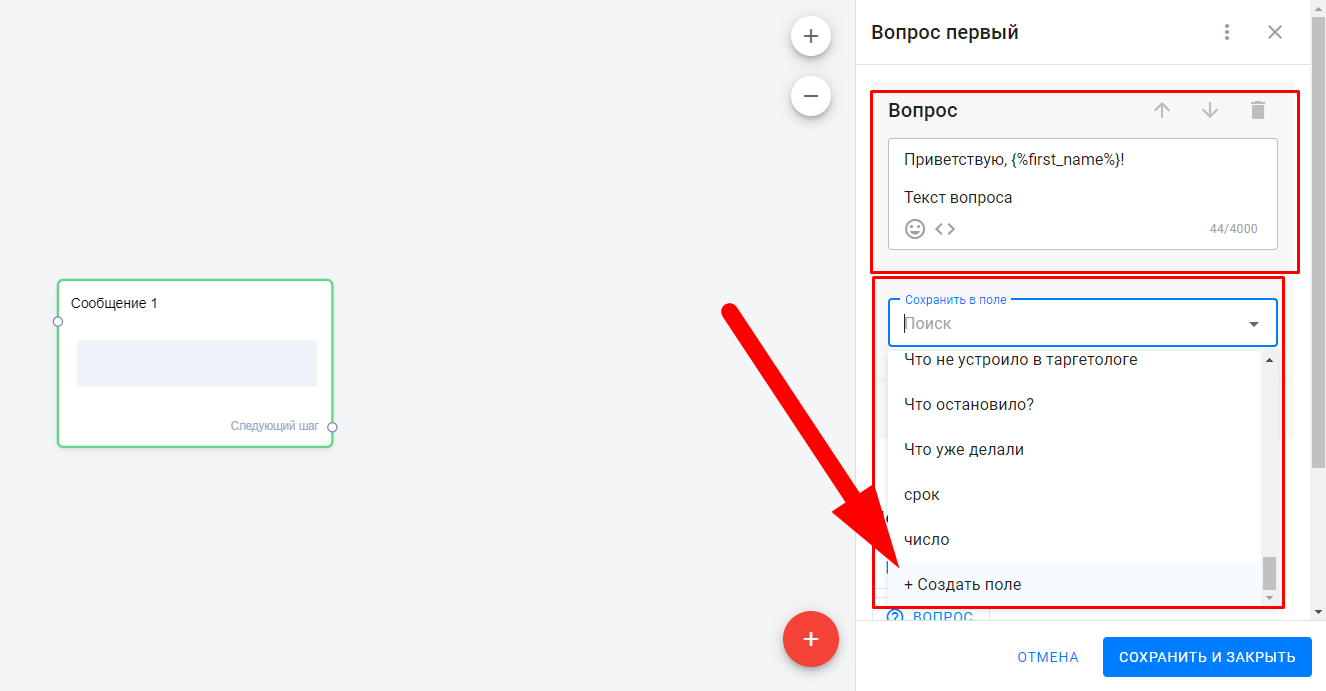
- Greet the user in the first message.
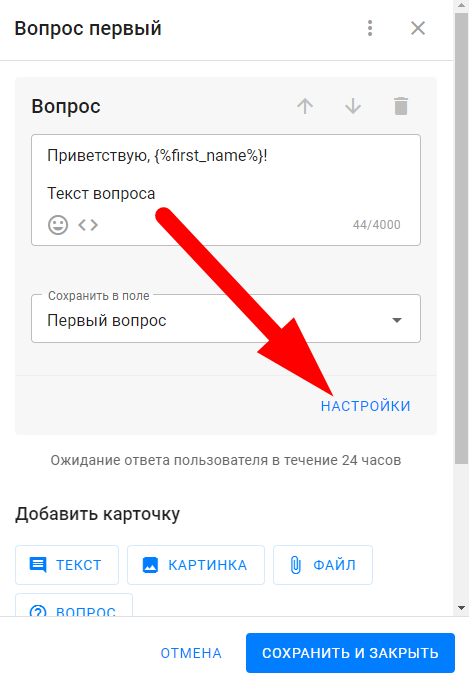
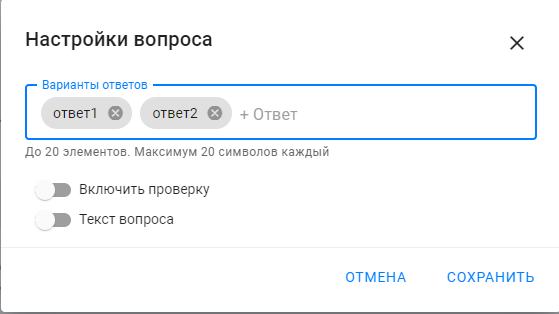
The bot has already loaded the profile data and knows the subscriber's name, so you can address the person by name. To do this, click on the variable selection icon « <…>» . - Write the first question. Then go to settings and specify the answer options.
Sometimes a subscriber writes an answer manually. To take it into account, save the answer to this question in the user profile using the field . By default, the platform already has several fields, but you can create your own according to the instructions: fields . Don't forget to save the step.
- Name the step so you don't get confused later.

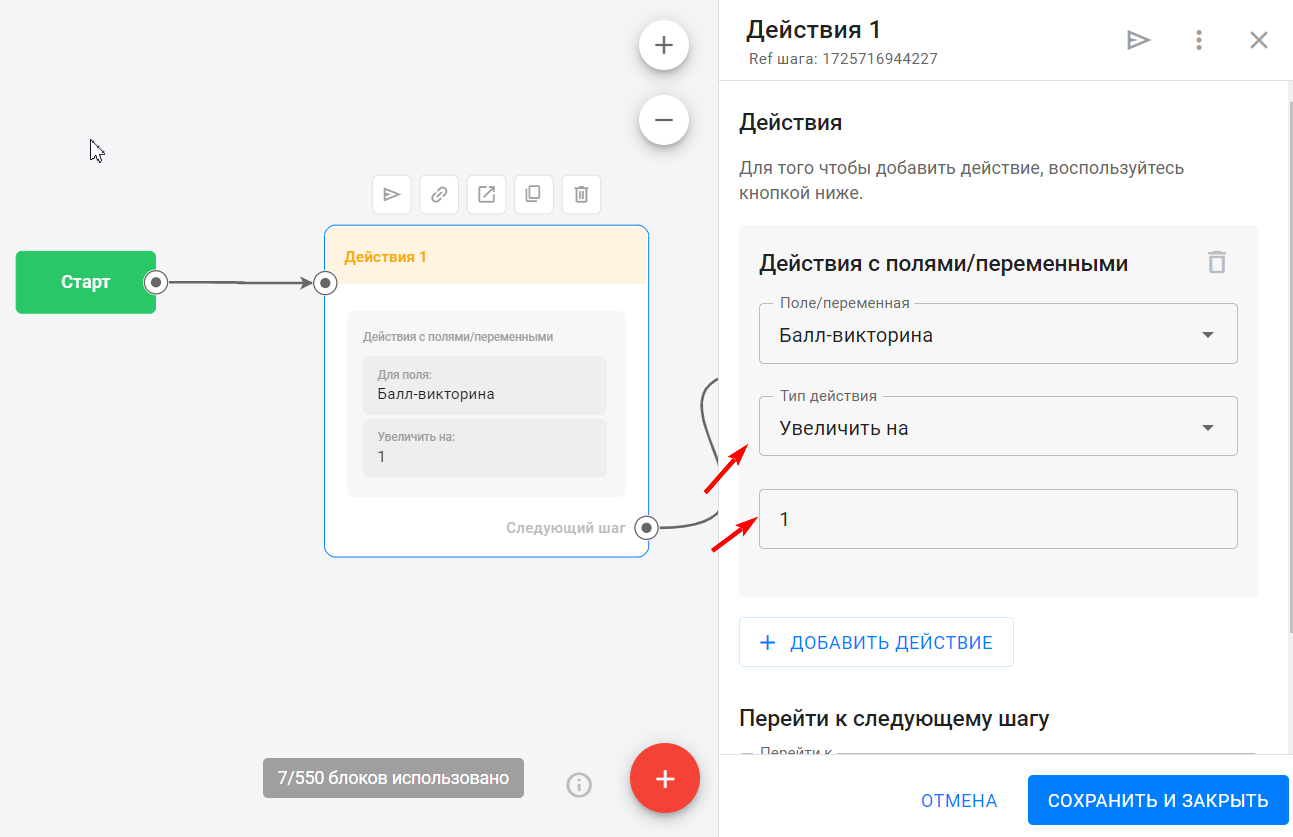
5. Create an action "Increase the value of the "score" field by ..."
- Be sure to give the step a name, such as "Action #1".
- Add the "Zoom by" action.
- Specify which field value needs to be increased.
- Write how much you need to increase your points
- Match the correct answer with Action #1.
You can find more information about the actions here: actions .
From the “incorrect” answer options, it is necessary to lead directly to the second question, since the value of the points does not change.
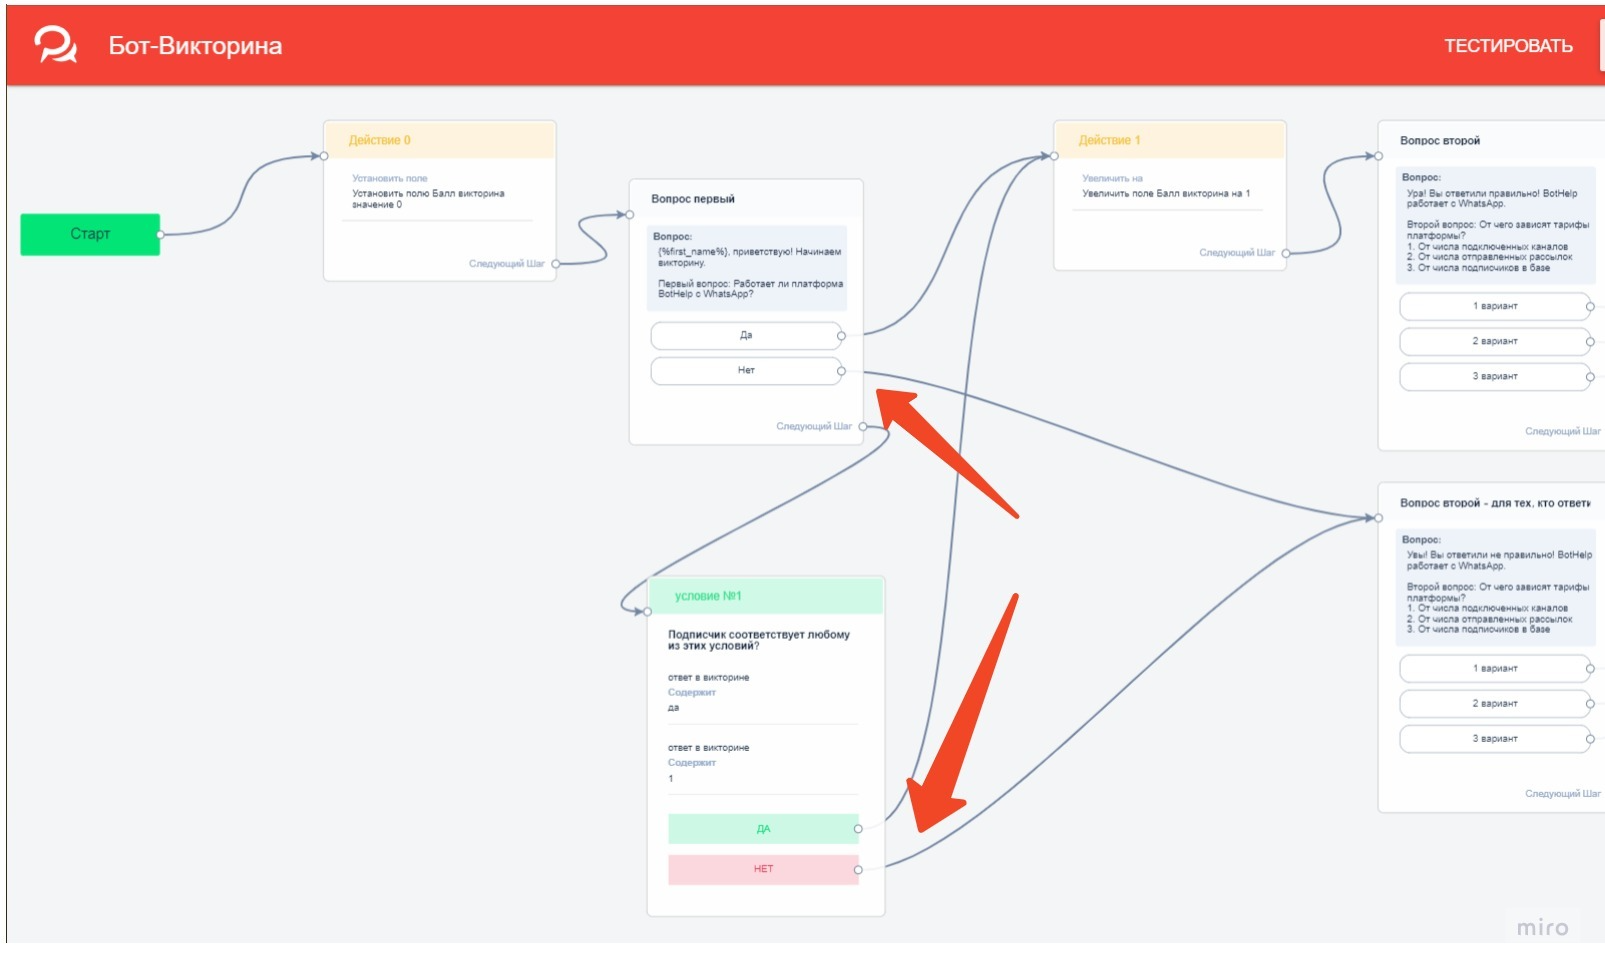
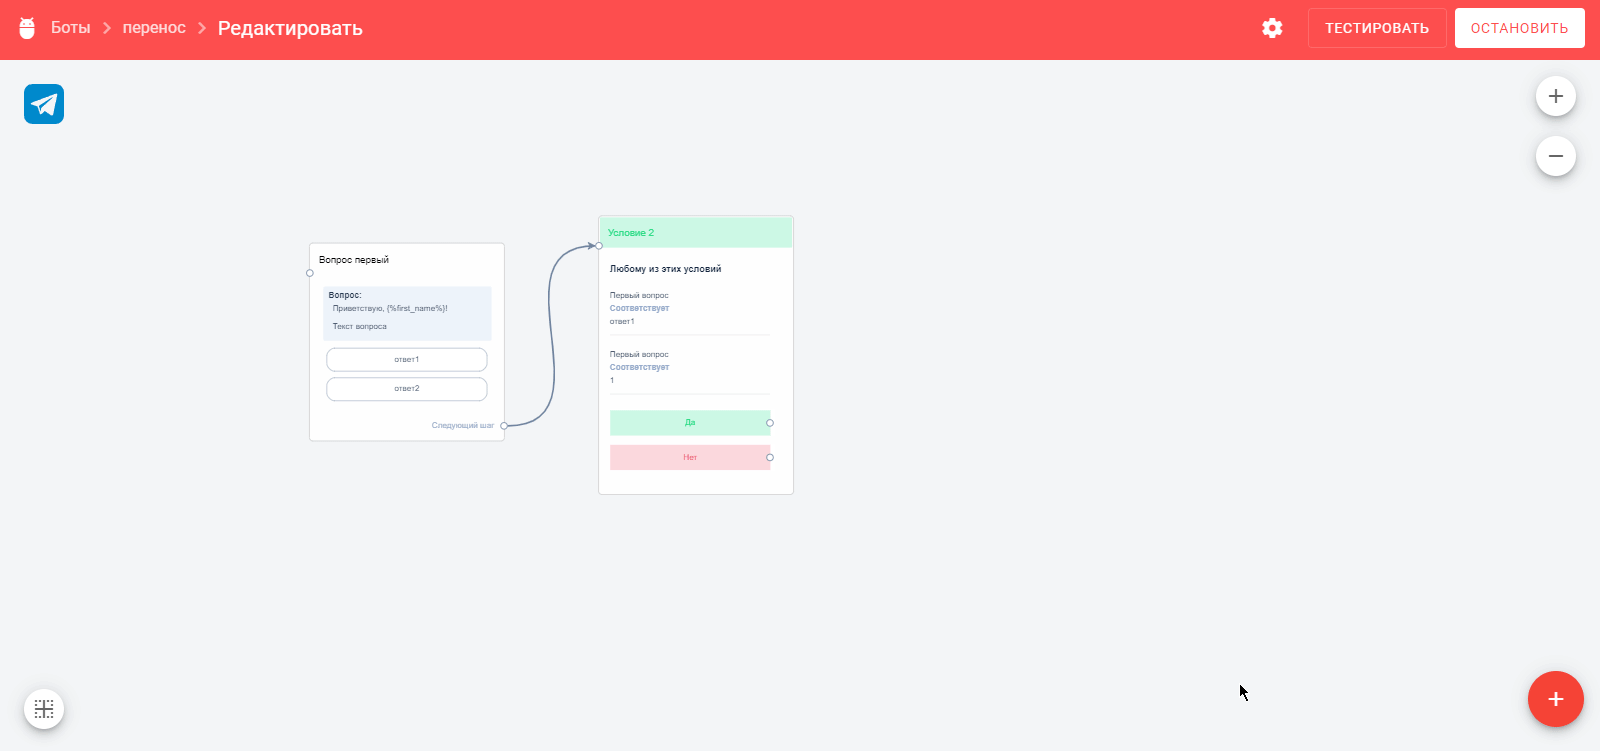
6. Add a condition to check for manually written answers
To count handwritten answers, add a condition.
It should contain a rule: The "quiz answer" field contains (the correct answer option). It is better to write several rules with different spelling options. For example, a person can put the number "1", meaning the first answer option, or write "first".
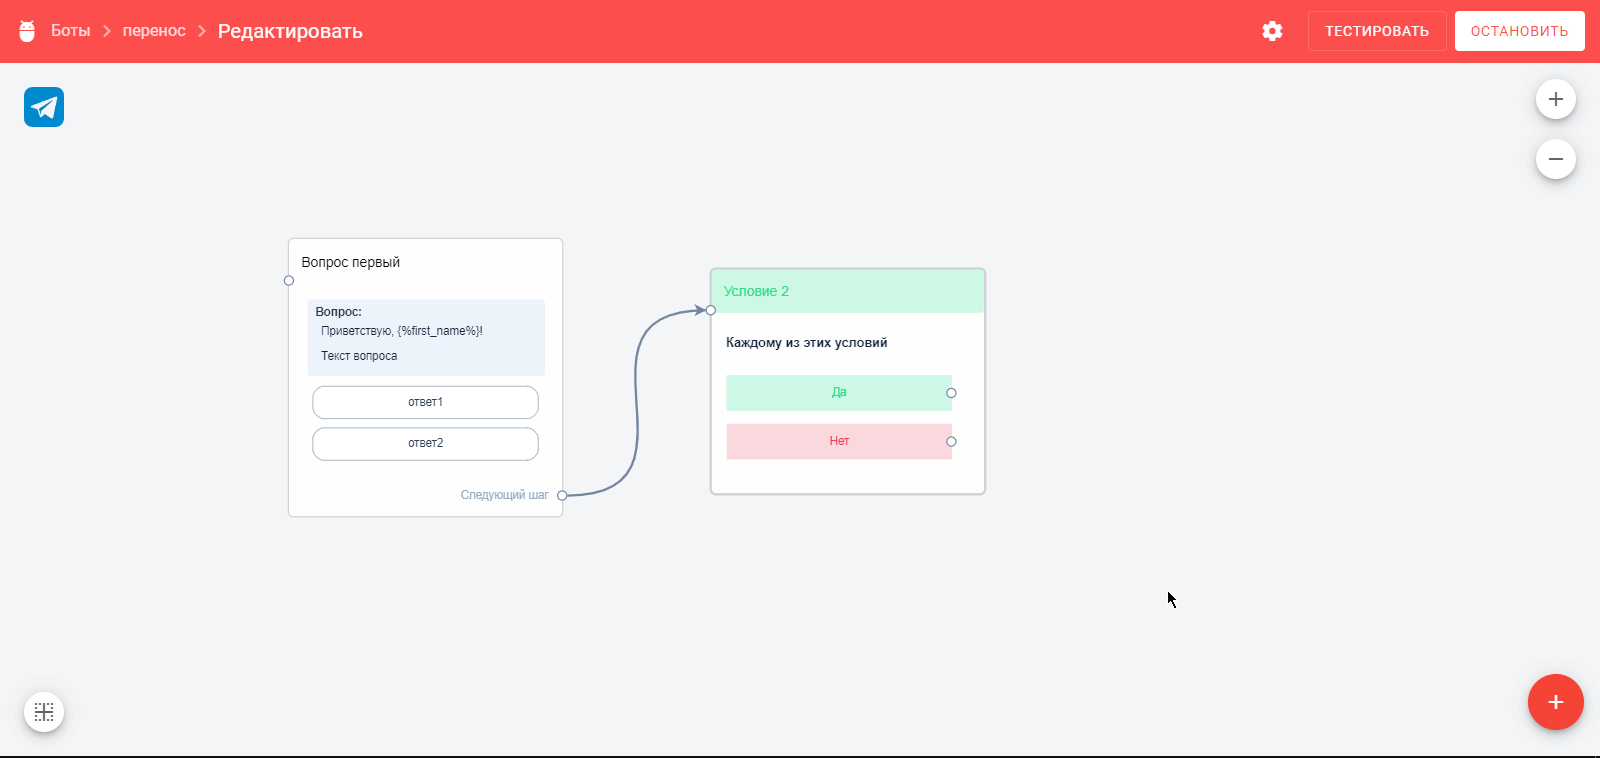
If the person’s answer corresponds to this condition (YES), then we lead to “Action No. 1”, if it does not correspond, then we lead immediately to the second question.
Read more about the terms and conditions in the platform at BotHelp here: terms and conditions .
7. Create a new step for the "correct" answer
In the "question" block, write to the subscriber that he answered correctly, and after a line, immediately ask the next question (this can be done with separate "text" and "question" cards). Connect "Action #1" with the second question.
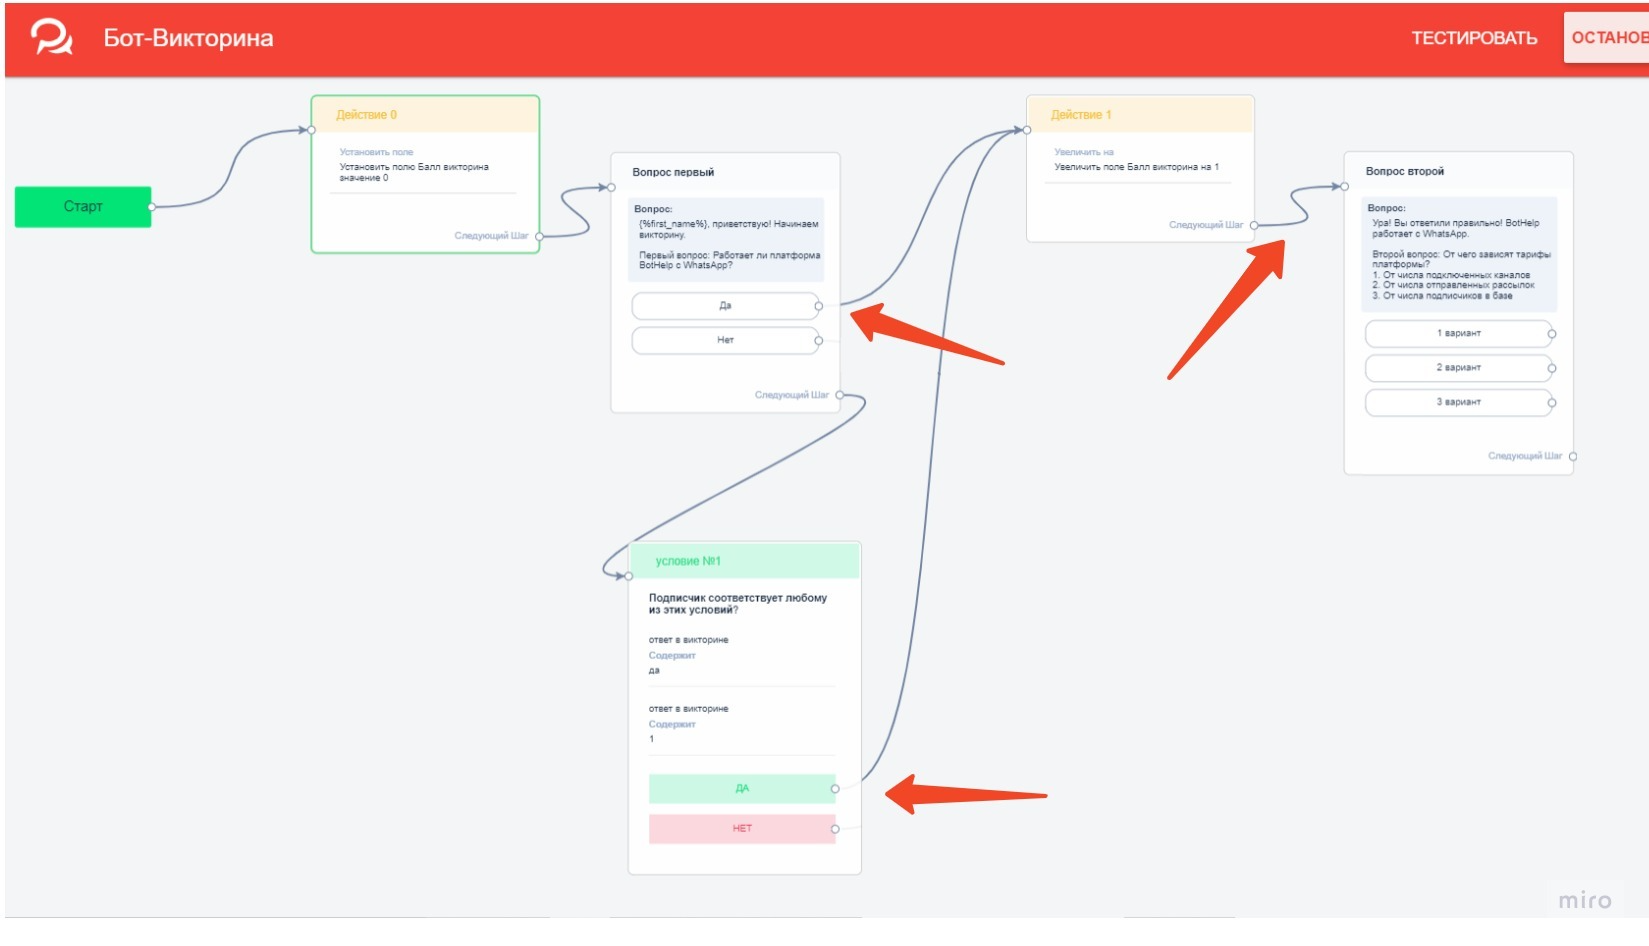
8. Create a new step for the "wrong" answer
- In the "question" block, write to the subscriber that he answered incorrectly (and also indicate the correct option, if necessary), and after a line ask the next question.
- Connect the "wrong" answer options to this step, and also connect from the condition if the "quiz answer" field does NOT contain the correct answer.
9. Create Next Steps - Questions
- New messages with questions.
- Actions in which you increase the value of the "score" field.
- Conditions for checking hand-written answers.
You can copy the necessary elements of the bot: select them with the left mouse button, holding down the Shift . Copy with Ctrl+C and paste with Ctrl+V. Move to the desired distance, change the texts...
10. Scoring at the end of the quiz
field "score" is greater than or equal to" in it , that is, the minimum value for the highest score. Set up a transition to the step for people who scored the highest score.
If it does not match, then create a transition to the next condition, where you specify the rule:
The subscriber matches each rule: " the "score" field is less than" (the previous score option) and the rule " the "score" field is greater than or equal to ..." - we cover the average number of points." If the subscriber does NOT match the rules, i.e. scored less points, he goes to the third step for those who failed the quiz.
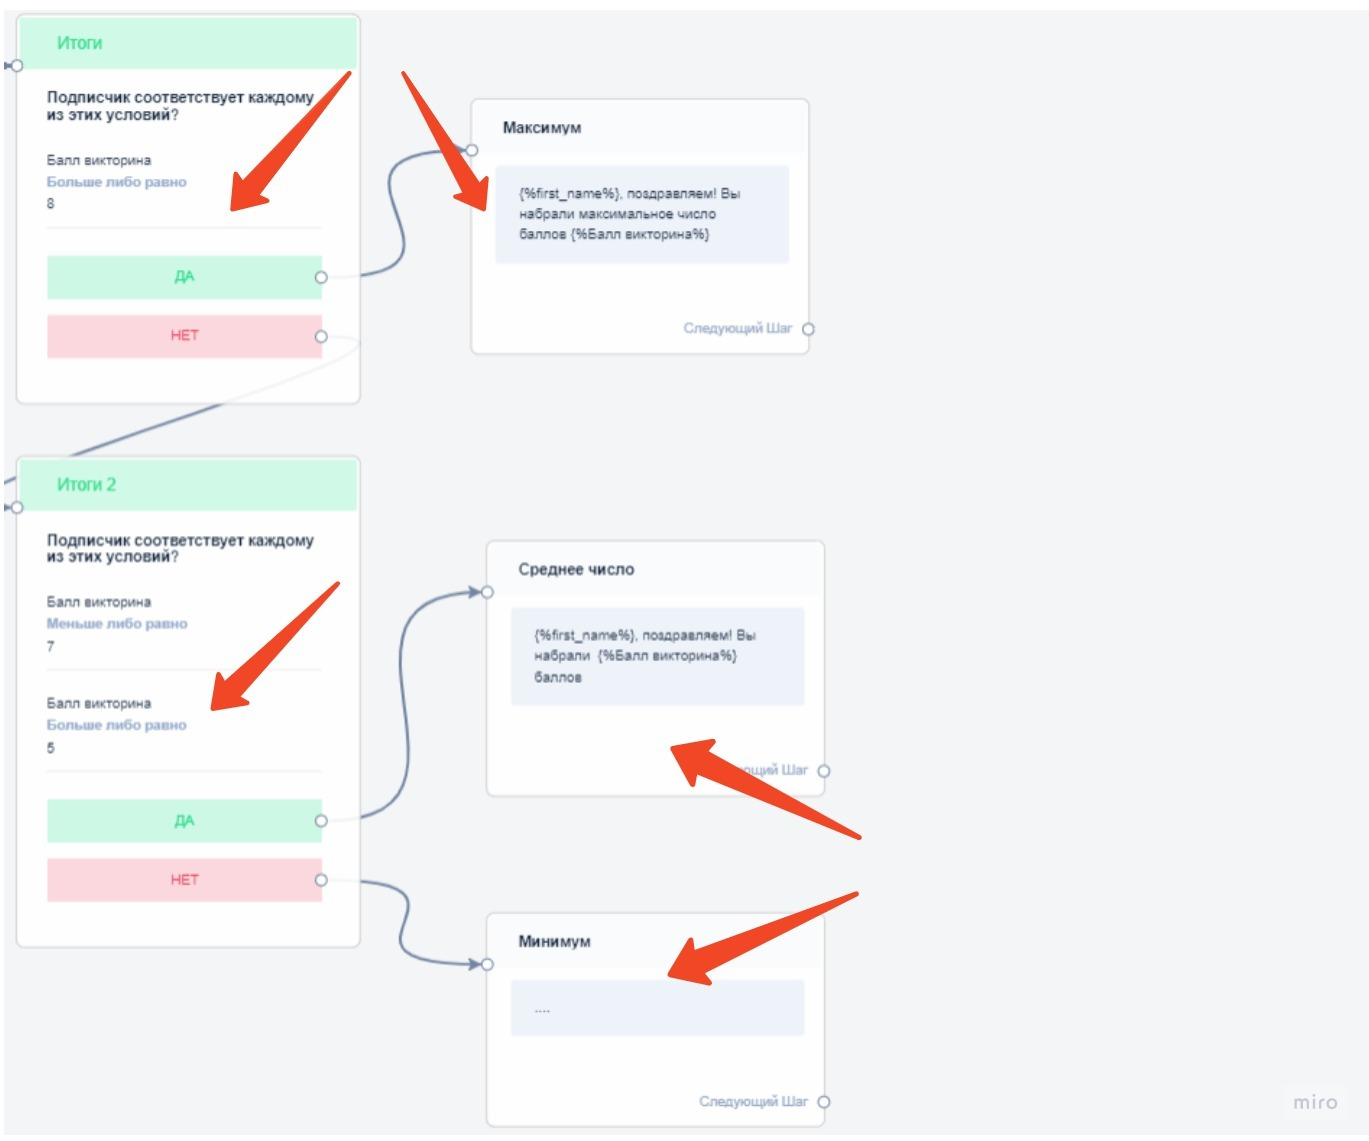
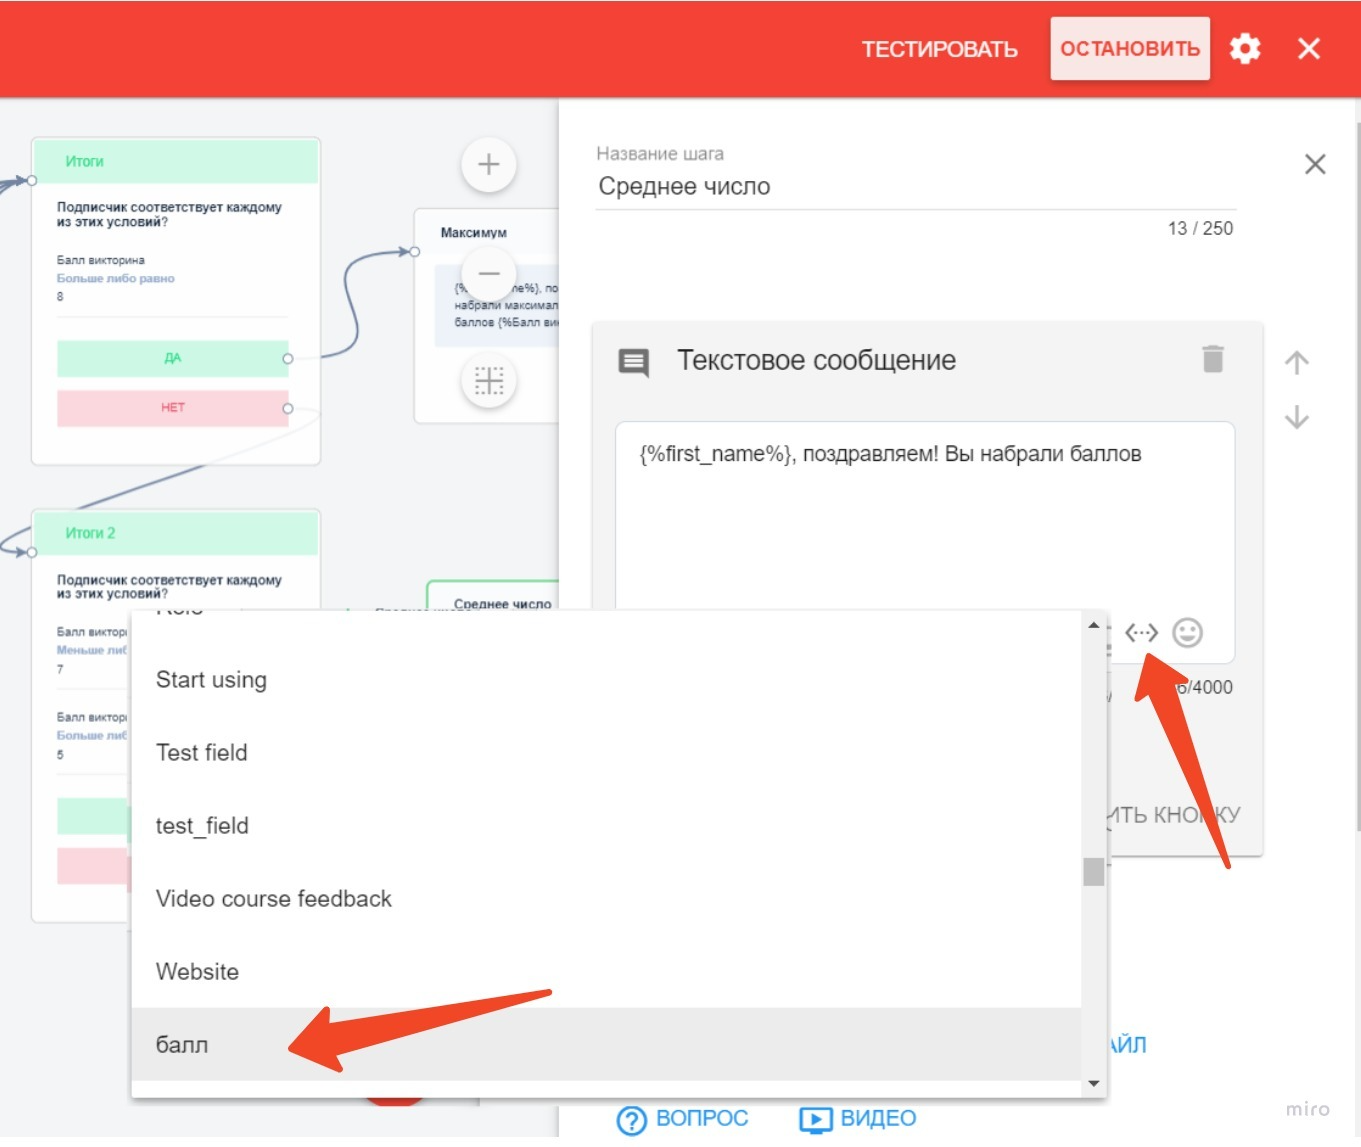
11. Create quiz summary messages
- For people who scored the highest score.
- For people who scored average.
- For people who failed the quiz.
You can specify the number of points scored using the variable selection icon "<…>».
Important! Activate the bot to start working.
To learn how to launch the bot after activation, read the article Launching the bot .
You can watch a video tutorial on how to create a quiz bot:
To give a person the opportunity to return to the beginning of the bot and go through it again , create an automation by keyword. How to set it up, read here: Keywords .
You can convert the quiz bot for other messengers using the instructions Converting multi-step bots .
If you have not found the answer to your question, ask us in the chat inside your account or write to BotHelpSupportBot or to hello@bothelp.io
Get 14 days of full functionality of the platform for creating mailings, autofunnels and chatbots BotHelp.