With the help of processes, it is possible to send information about the subscriber and their order from GetCourse to BotHelp in order to interact with the subscriber via the bot. As an example, the process and bot settings can be used to track whether the subscriber has confirmed their email in GetCourse.
Setting up in BotHelp
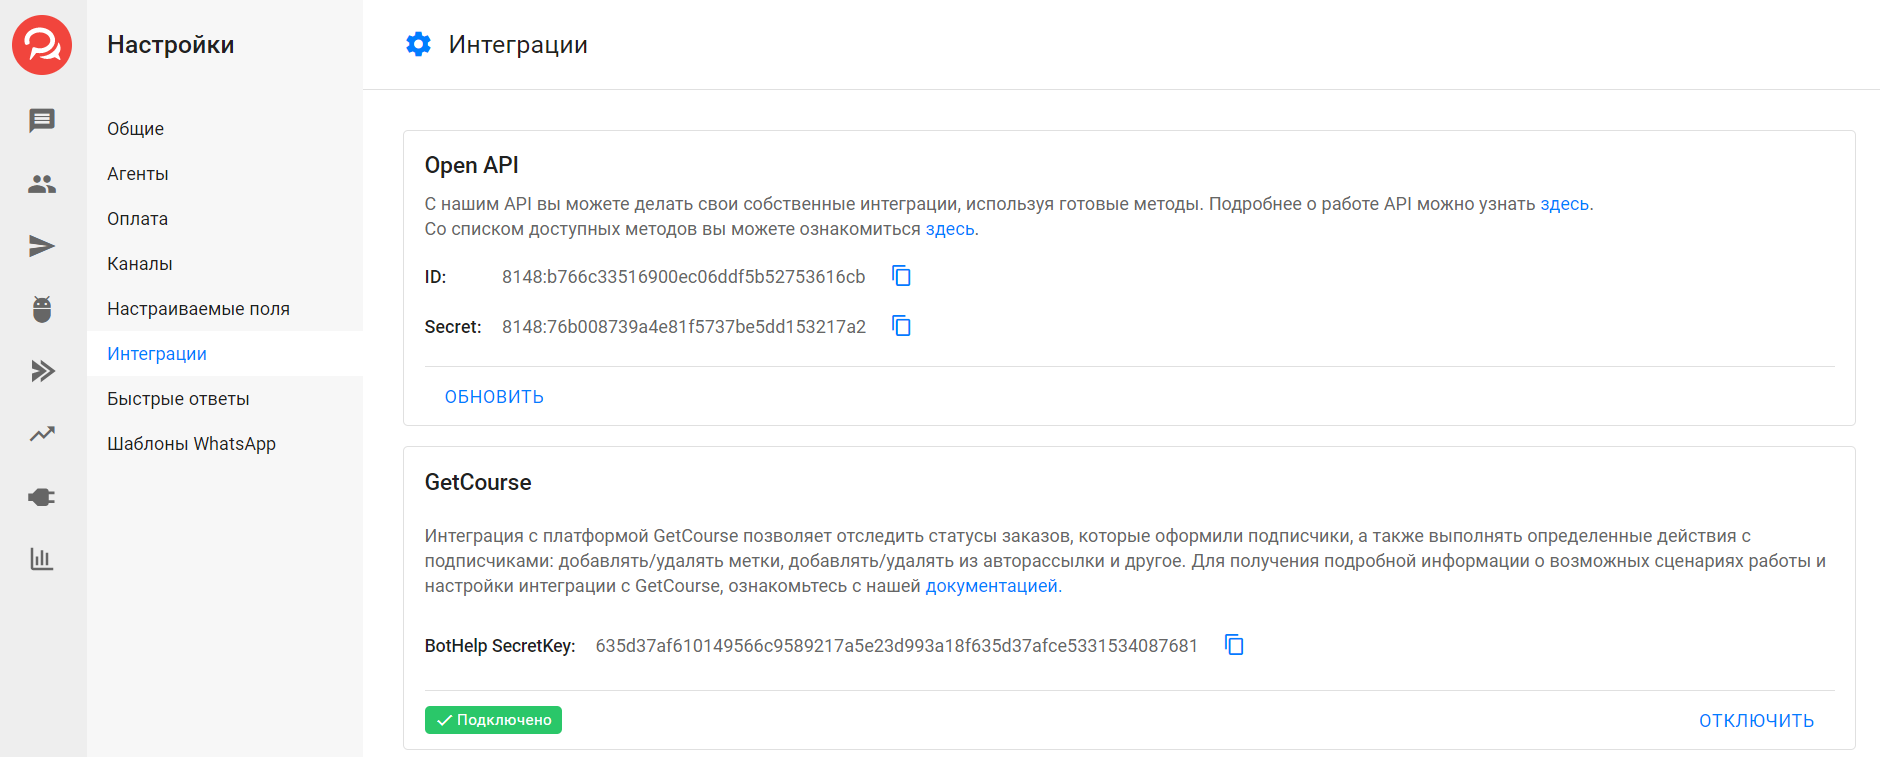
1. Obtaining a SecretKey for integration with GetCourse
- Go to the "Settings" section in the navigation panel of your account.
- Open the Integrations tab.
- Find the GetCourse block and click the Add Integration .
- Copy the received BotHelp SecretKey - you will need it for further configuration.
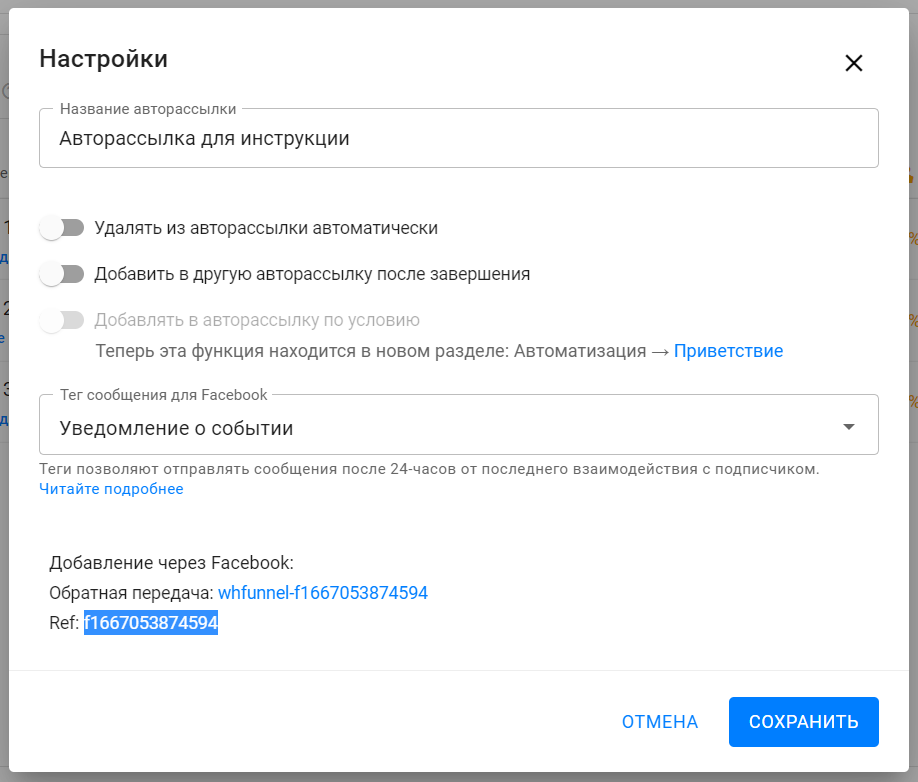
2. Setting up automatic mailing
- Create or open an existing auto-mailing list.
- Click on the Settings in the upper right corner.

- At the very bottom of the window that opens, find the field called “Ref” - this is the auto-dispatch identifier.
- Copy it, you will need the ID for further configuration.
- The value to copy in our example is
f1667053874594.
- The value to copy in our example is
GetCourse setup steps
In GetCourse, you need to set up a process that will subscribe all subscribers with unconfirmed email in GetCourse to the BotHelp auto-mailing list after a specified time. To set up this process, follow the instructions below.
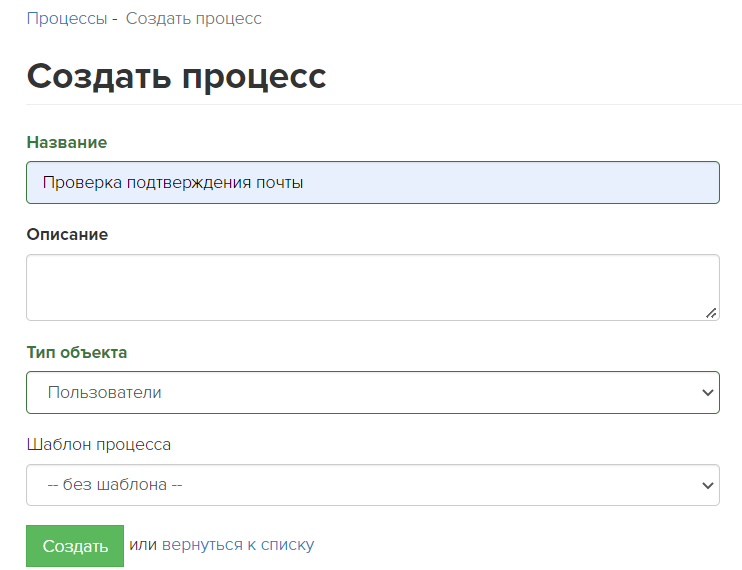
1. Creating a process
- Go to the "Tasks" - "Processes" section and click on the Create process .
- Please specify the name of the process.
- Select the object type "Users".
- There is no need to specify anything in the “template” field - the “no template” option.
- Click the Create .
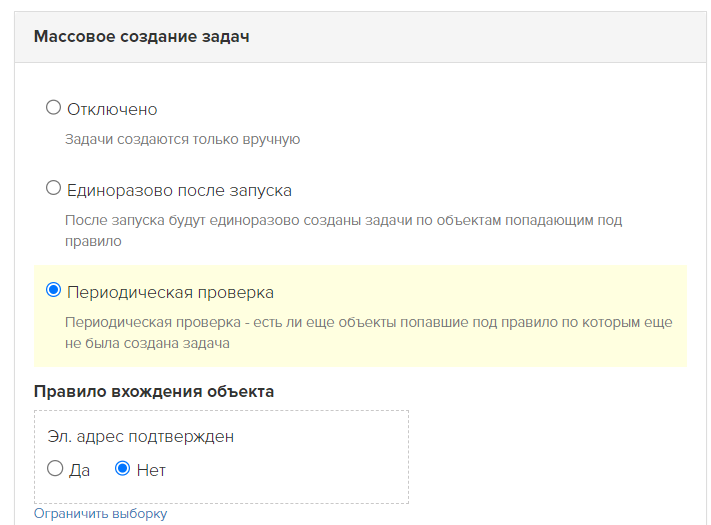
2. Setting up the process
- In the settings of the created process, in the "Bulk task creation" section, select the "Periodic check" option.
- In this case, the created process will automatically “pull” suitable users into itself.
- In the object entry rules, select the property "Email address confirmed" and set the value to "No".
3. Creating process logic
Only subscribers with an unconfirmed email address will be automatically included in this process.
- In the settings of the created process, go to the "Process" tab to configure the logic of the process itself.
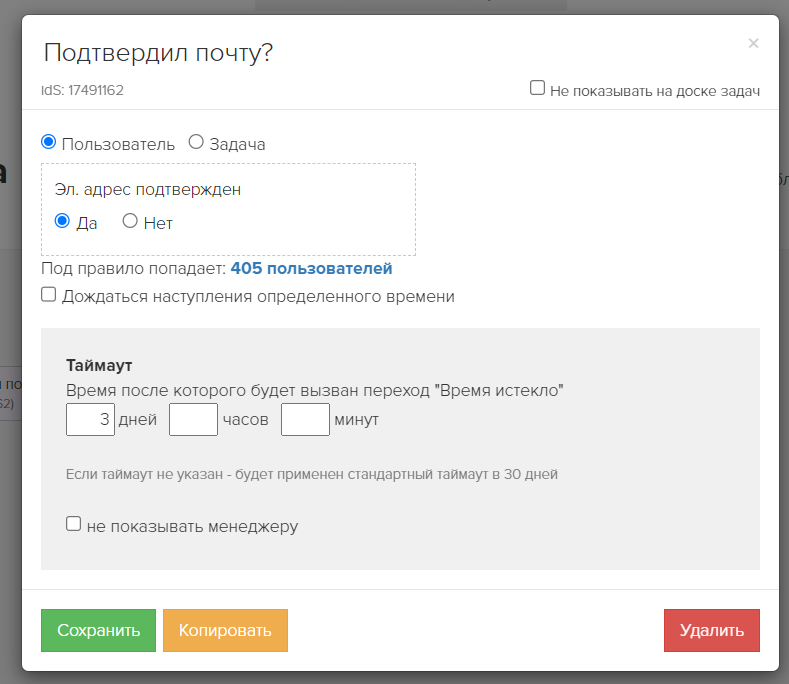
- Add a "Wait for condition" block.
- Select the condition "Email address verified", value "Yes".
- Set a timeout for 3 days.
- Save this block.
- Add the Operation block.
- The block must work according to the User.
- Operation type: "Call URL".
- In the block settings you need to select the “POST” method.
- In the URL field you need to insert one of the links :
To identify a subscriber by his email:
https://gc.bothelp.io?domain_name={%Your domain in Bothelp%}&token={%Your SecretKey from the BotHelp account%}&email={object.email}&phone={object.phone}&actions[add_to_funnel]={%Ref of your auto-distribution%}
To identify a subscriber by their CUID. For this method, you must first pass the subscriber's CUID from BotHelp to GetCourse.
https://gc.bothelp.io?domain_name={%Your domain in Bothelp%}&token={%Your SecretKey from the BotHelp account%}&idBotHelp={object.bothelp_id}&actions[add_to_funnel]={%Ref of your auto-mailing%}
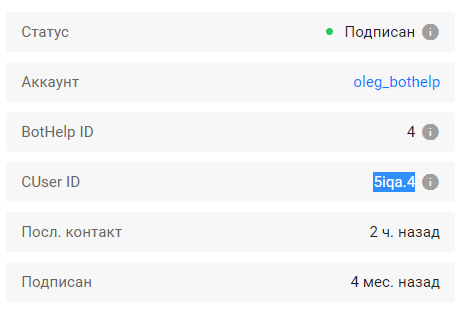
CUID (customer user ID) is a unique subscriber identifier in the BotHelp platform. Its value can be found in the subscriber profile in the "CUser ID" column.
- Important!
- In the field
domain_nameinstead of the text {%Your domain in Bothelp%} you need to specify the domain of your account in BotHelp. Curly brackets {} and % signs need to be removed. The final entry will be in this format:domain_name=mybhaccount. - In the
token, instead of the text {%Your SecretKey from the BotHelp account%}, you must specify the BotHelp SecretKey from the integration settings of your account (see the first point of the instructions). Curly brackets {} and % signs must be removed. The final entry will be in this format:token=qwerty123456. - In the
actions[add_to_funnel], instead of the text {%Ref of your auto-mailing%}, you must specify the Ref of the auto-mailing to which you need to add the subscriber (see the second point of the instructions). - The curly brackets {} and % signs need to be removed. The final entry will be in this format:
actions[add_to_funnel]=f987654321. - Example of a ready link:
- In the field
https://gc.bothelp.io?domain_name=mybhaccount&token=qwerty123456&email={object.email}&phone={object.phone}&actions[add_to_funnel]=f987654321
- What is this link for?
- With it, Getcourse sends data about the subscriber and the type of action so that BotHelp can perform the specified action on the selected subscriber.
- This link specifies the necessary data about the subscriber and the action:
- idBotHelp — a unique subscriber identifier in the BotHelp database, by which BotHelp finds a specific subscriber in its database. In the subscriber's account, this field is called CUID. It is required when identifying a subscriber by CUID.
- email — the subscriber's email. BotHelp uses it to find a specific subscriber in its database. This is a required field when identifying a subscriber by email.
- domain_name — the name of your account in BotHelp. This field helps BotHelp understand in which account to look for a subscriber with such an email. This is a required field.
- token — the secret key of your BotHelp account, which ensures the security of the integration. This is a required field.
- phone — subscriber's phone. BotHelp can also use it to find a specific subscriber in its database if there are several subscribers by email. This is an optional field.
- actions[add_to_funnel] — a parameter that denotes the “Add to auto-mailing” command. The parameter value specifies the identifier of the auto-mailing to which the subscriber should be added. This is a required field.
- Save this block.
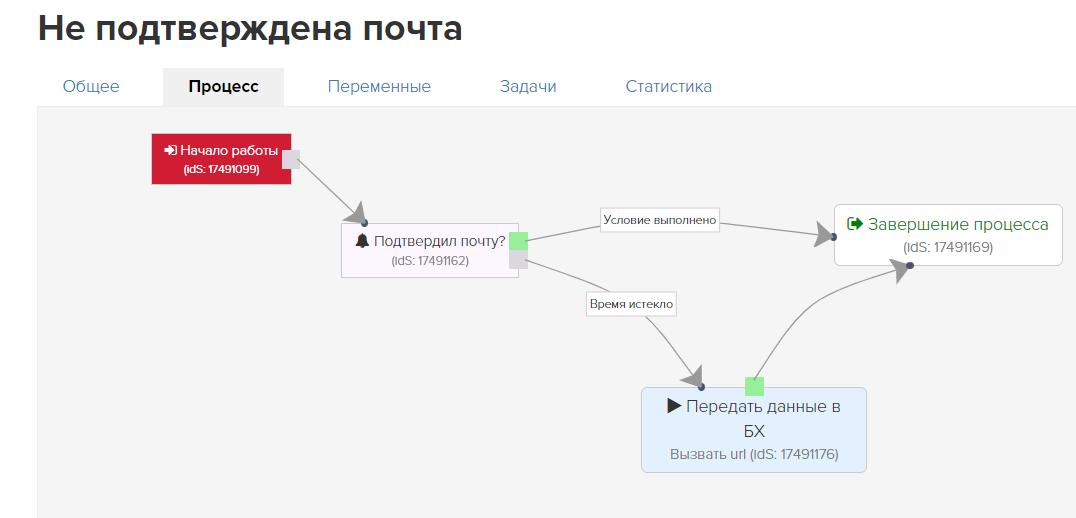
- Add a "Process Completion" block and draw links between the blocks.
- The final process should look like this:
- Important! On the General tab of the process being created, activate the Approved checkbox and click the big green Run .
Done! Now, if your subscribers do not confirm their email within 3 days of registering with GetCourse, they will be automatically added to the BotHelp auto-mailing list, in which you can tell them about the importance of email confirmation.
Important! You can also improve the process by adding another similar step "check email confirmation + add to autofunnel". To do this:
- After the "Send data to BotHelp" block, add another condition wait block. Its settings are the same as the "Confirmed email?" block.
- If the condition is met, establish a connection with the "Process Termination" block.
- After the new block with the condition wait, add another block "Operation". In terms of configuration and content, it is the same as the block "Send data to BotHelp".
- Connect the block to the "Process Termination" block.
- In essence, such a process will check after 3 days whether the subscriber has confirmed his email after receiving the first automated mailing. And if he has not confirmed it again, he will receive another one.
If you have not found the answer to your question, ask us in the chat inside your account or write to BotHelpSupportBot or to hello@bothelp.io
Get 14 days of full functionality of the platform for creating mailings, autofunnels and chatbots BotHelp.