Register on Tilda using a special link and get 1 month of free access.
Registration link: https://tilda.ru/?r=1663408
This instruction will help you to set up data transfer from Tilda zero-block and UTM tags to the subscriber profile in BotHelp.
To transfer data from zero-block forms and UTM tags to the BotHelp subscriber profile, set up a work scenario:
- The subscriber goes to the Tilda page with a data collection form.
- Fills out the form and clicks the confirm button.
- Automatically redirects to the "Thank you" page.
- On the “Thank you” page, the subscriber opens and launches the BotHelp bot via the Tilda button.
- Done! The form data and UTM tags have been successfully saved to the subscriber profile .
Setting up data transfer from zero-block forms and UTM tags to the BotHelp subscriber profile
Preparing a page with a data collection form
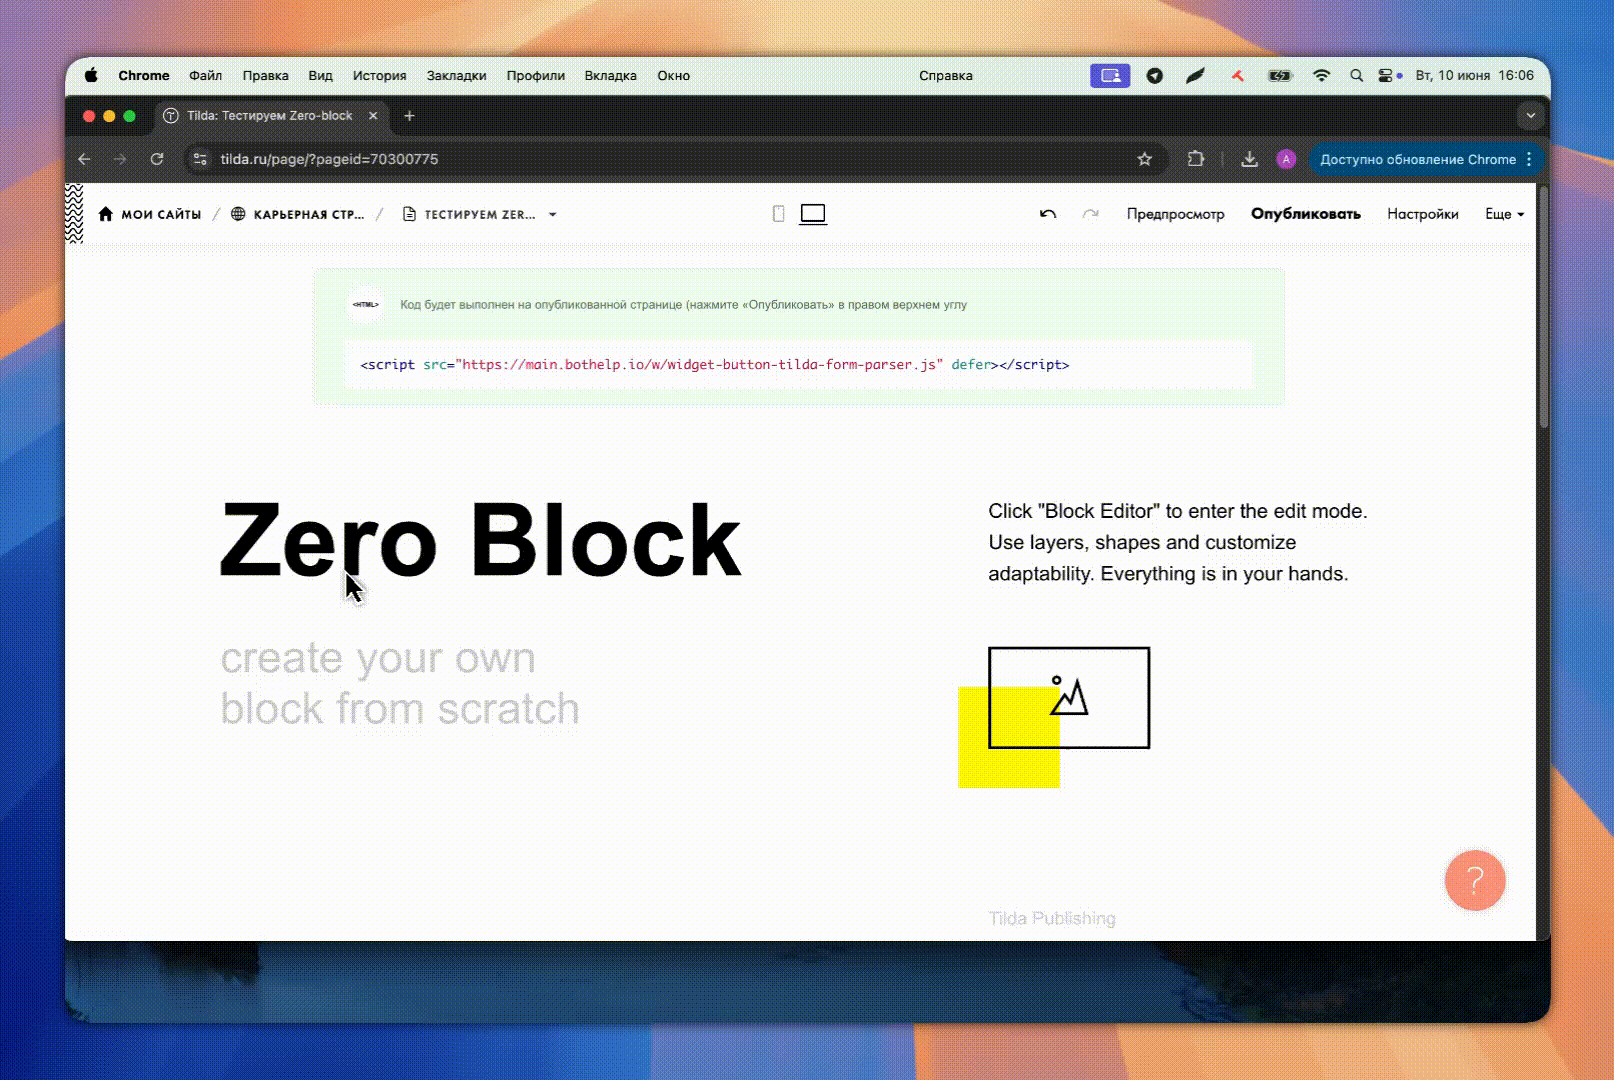
- In the Tilda website builder, create a page and add the
T123“HTML code” block to it and insert JavaScript into it:
<script src="https://main.bothelp.io/w/widget-button-tilda-form-parser.js" defer></script>

2. Add a Zero Block with the required forms that you want to pass to BotHelp
IMPORTANT:
- Do not change the values in the
VARIABLE NAMEfor the fields: email , name , phone . Otherwise, the data from the form will not be written to the standard subscriber fields in BotHelp. - Any other text field will be written to the corresponding custom field (if it is previously created in BotHelp). To do this, in
VARIABLE NAMEyou need to specify the name of the BotHelp custom field (case-sensitive). - IMPORTANT! BotHelp custom field must not contain spaces:
- The pass will not work when the variable is called, for example,
"Place of work". Right"Place_of_work"
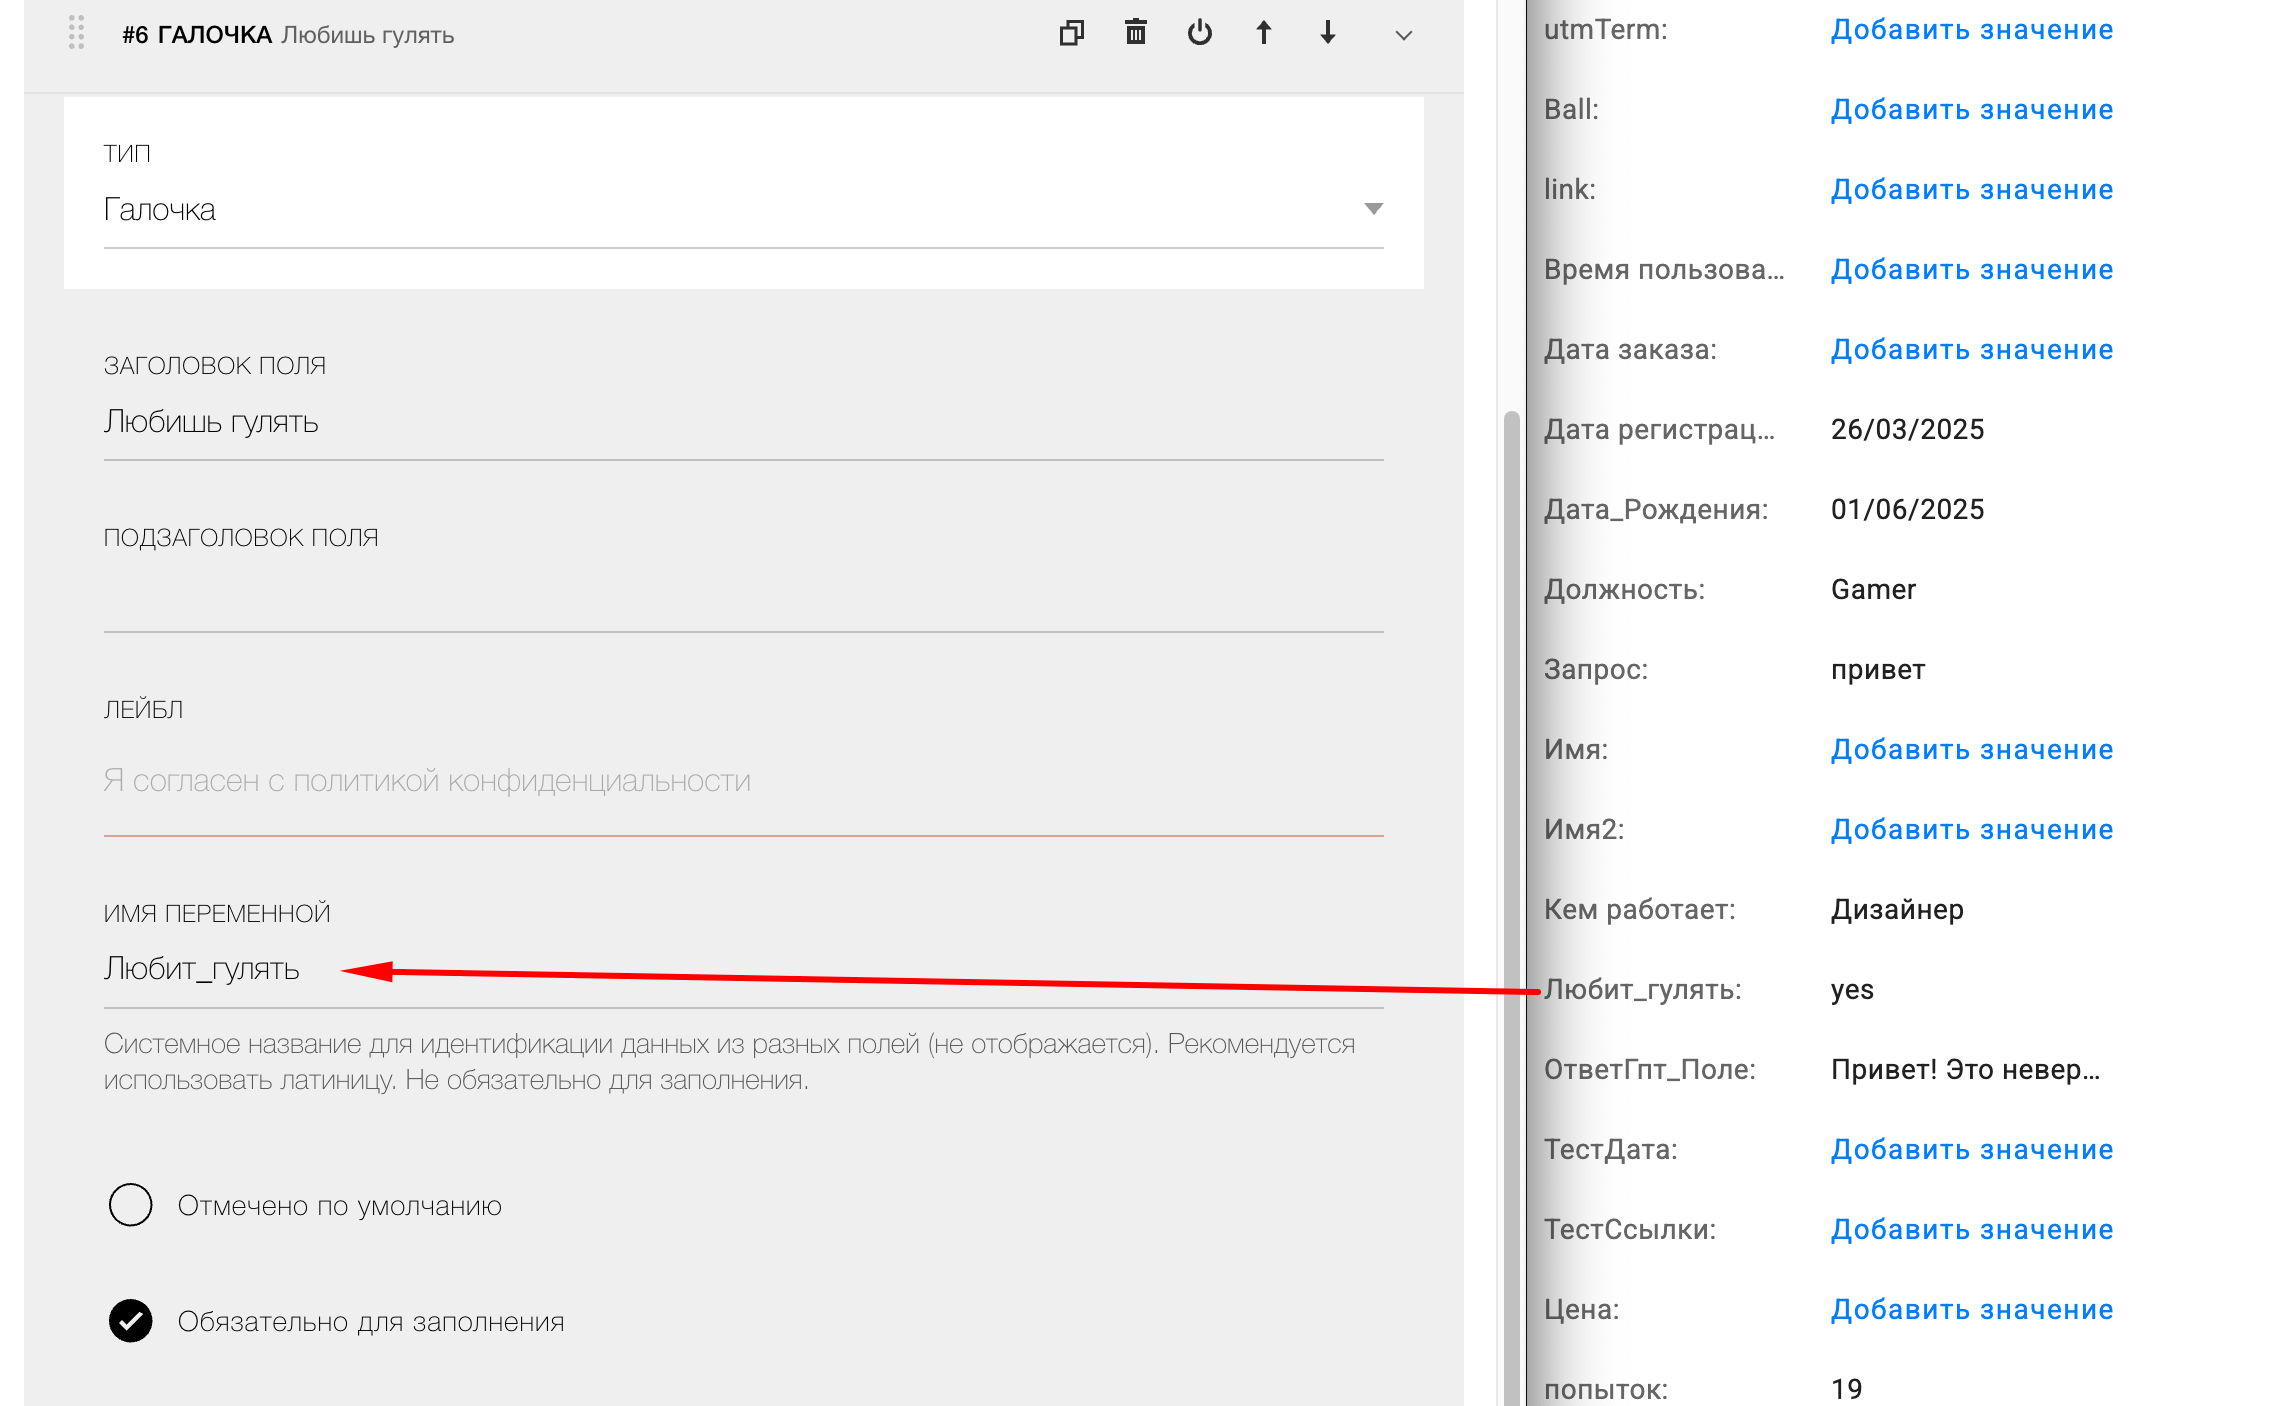
For a checkbox :
- in
VARIABLE NAMEspecify the corresponding BotHelp user field -
If the checkbox is selected, the value
"yes" -
If the checkbox is not selected, the value is not transmitted.
- The pass will not work when the variable is called, for example,
- For a field of type Date and time:
-
Supported masks:
DD-MM-YYYYandYYYY-MM-DD. - Separators allowed:
"-"or"." -
To pass date and time use:
-
VARIABLE NAME="date_and_time"for date, -
VARIABLE NAME="date_and_time-bh-time"for time - both fields will be combined and written to one field of type "date and time" in BotHelp.
-
-
- For the Phone , you need to specify the mask type "Automatic mask with country code" or configure your mask so that you can enter a phone number only in the international format:
+79161234567. You can add additional auxiliary fields with the type "Field for entering multiple lines".
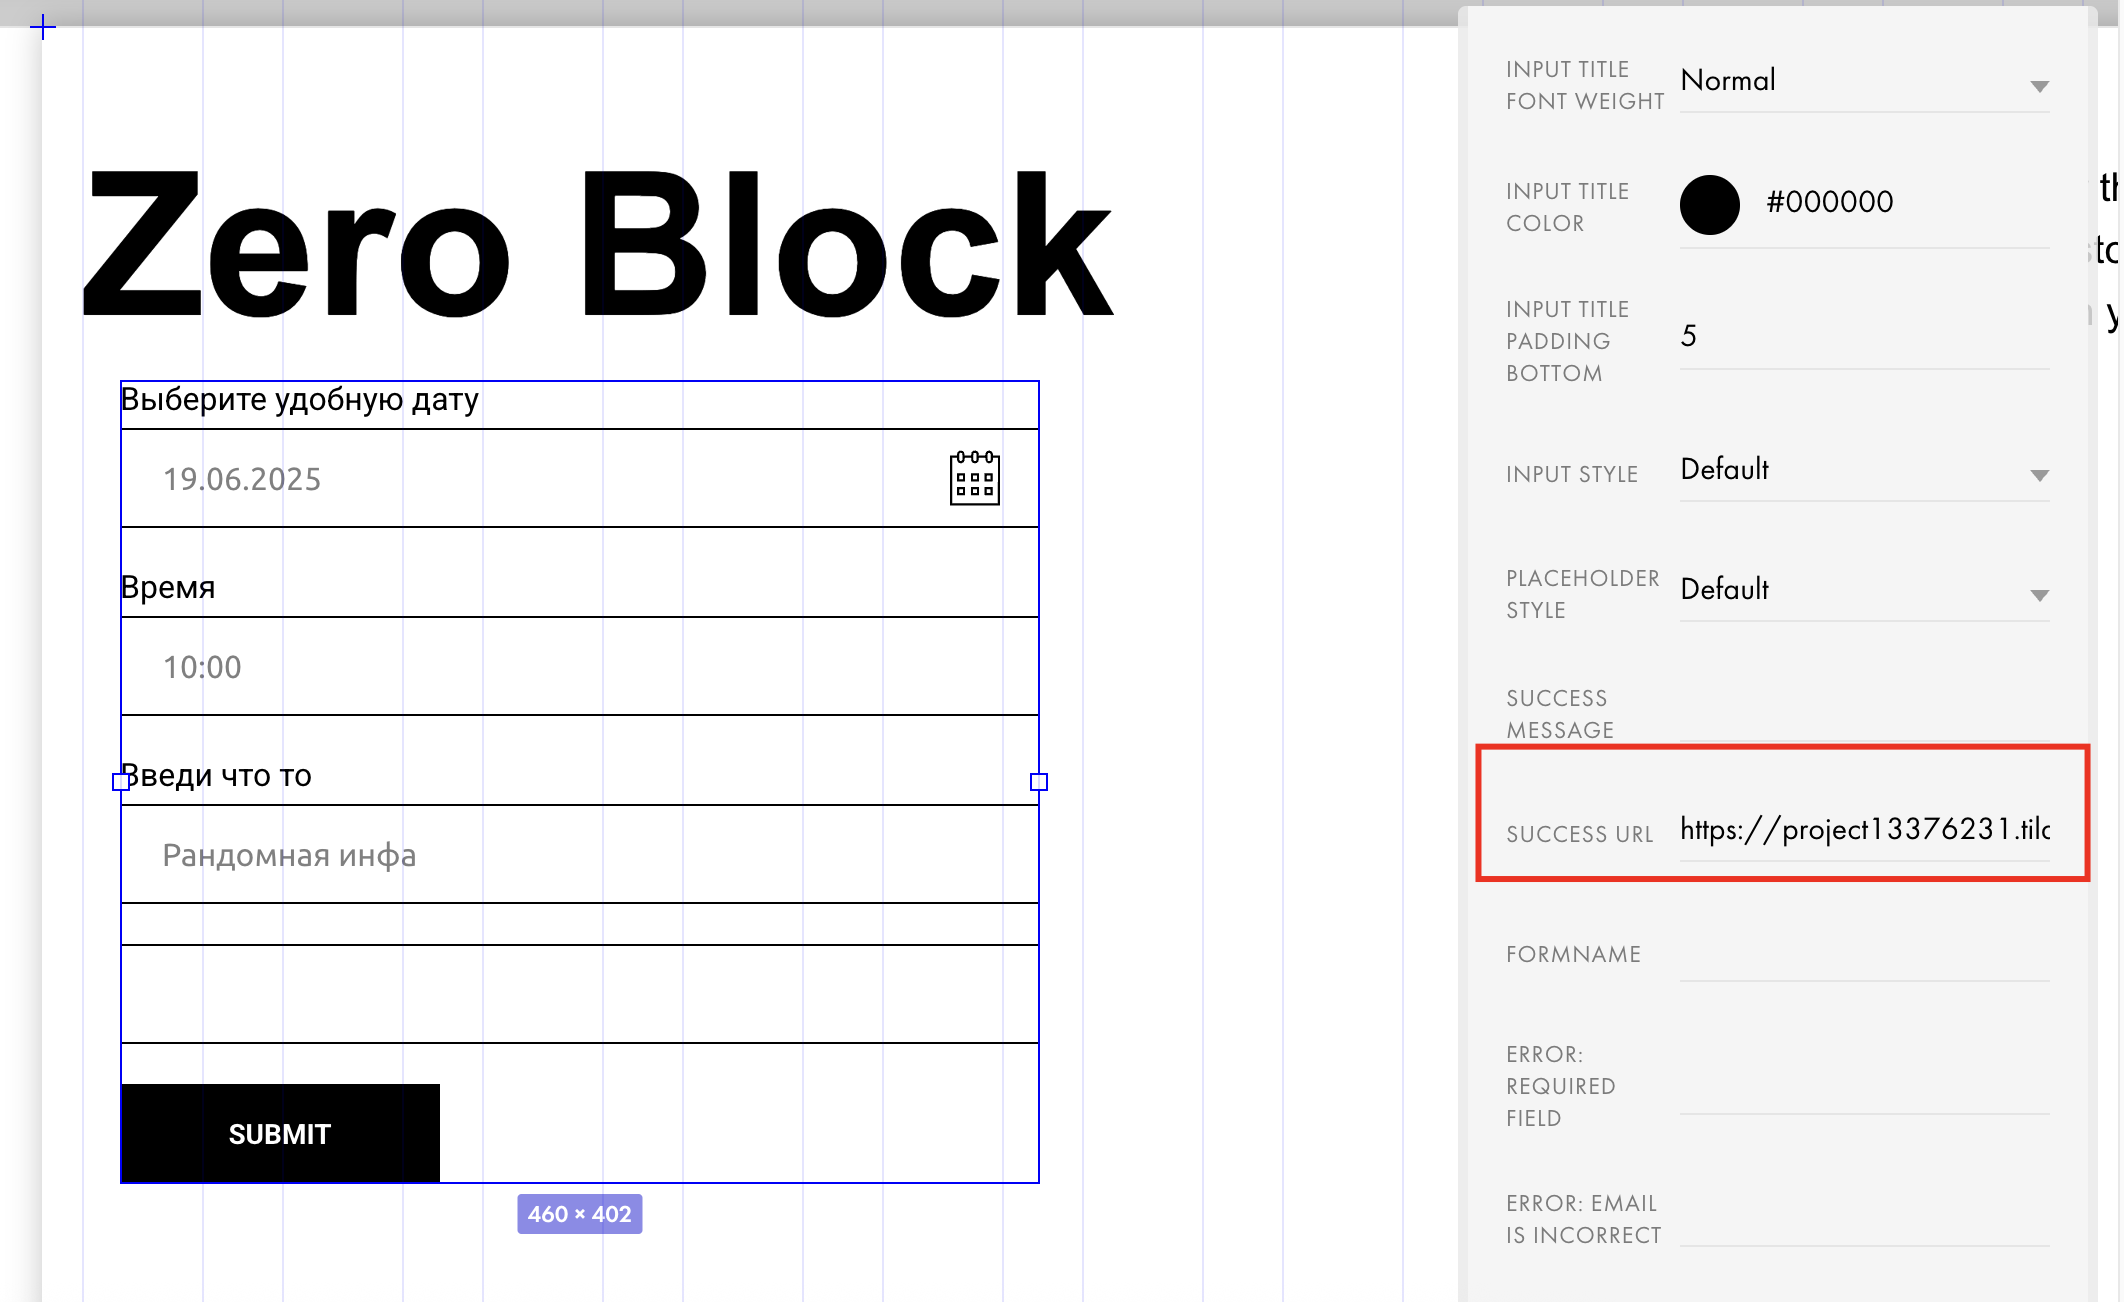
3. In the “SUCCESS URL” field, enter a link to your “Thank You” page, from which subscribers will be redirected to the bot.
Preparing the Thank You Page
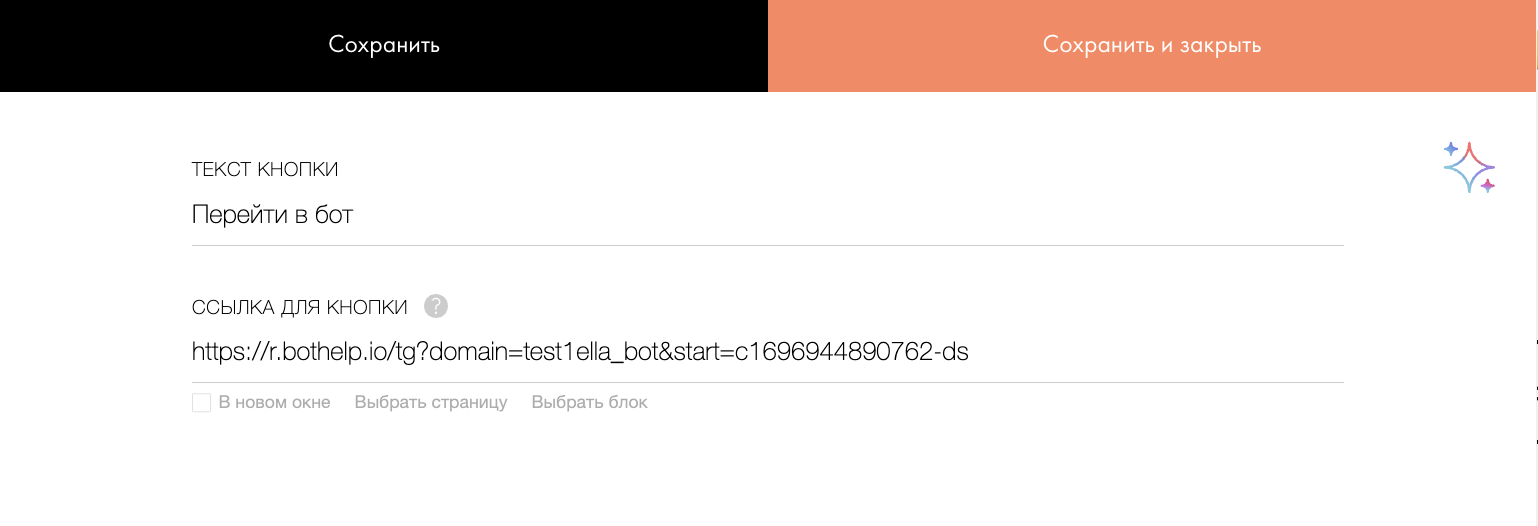
- Collect a special link to the bot like https://r.bothelp.io/
1.1 Copy the direct link to the bot. You can find it in the bot constructor settings.
1.2. From the copied link, take the part after the sign «?».
Example: from the link tg://resolve?domain=test1ella_bot&start=c1742897965948-ds
→ Copy the part: domain=test1ella_bot&start=c1742897965948-ds
1.3. Add https://r.bothelp.io/tg?
Example of a ready link:
https://r.bothelp.io/tg?domain=test1ella_bot&start=c1742897965948-ds
The link is now ready to use!
3.Add a block with a button to the page and insert the previously collected special link to the bot into it.
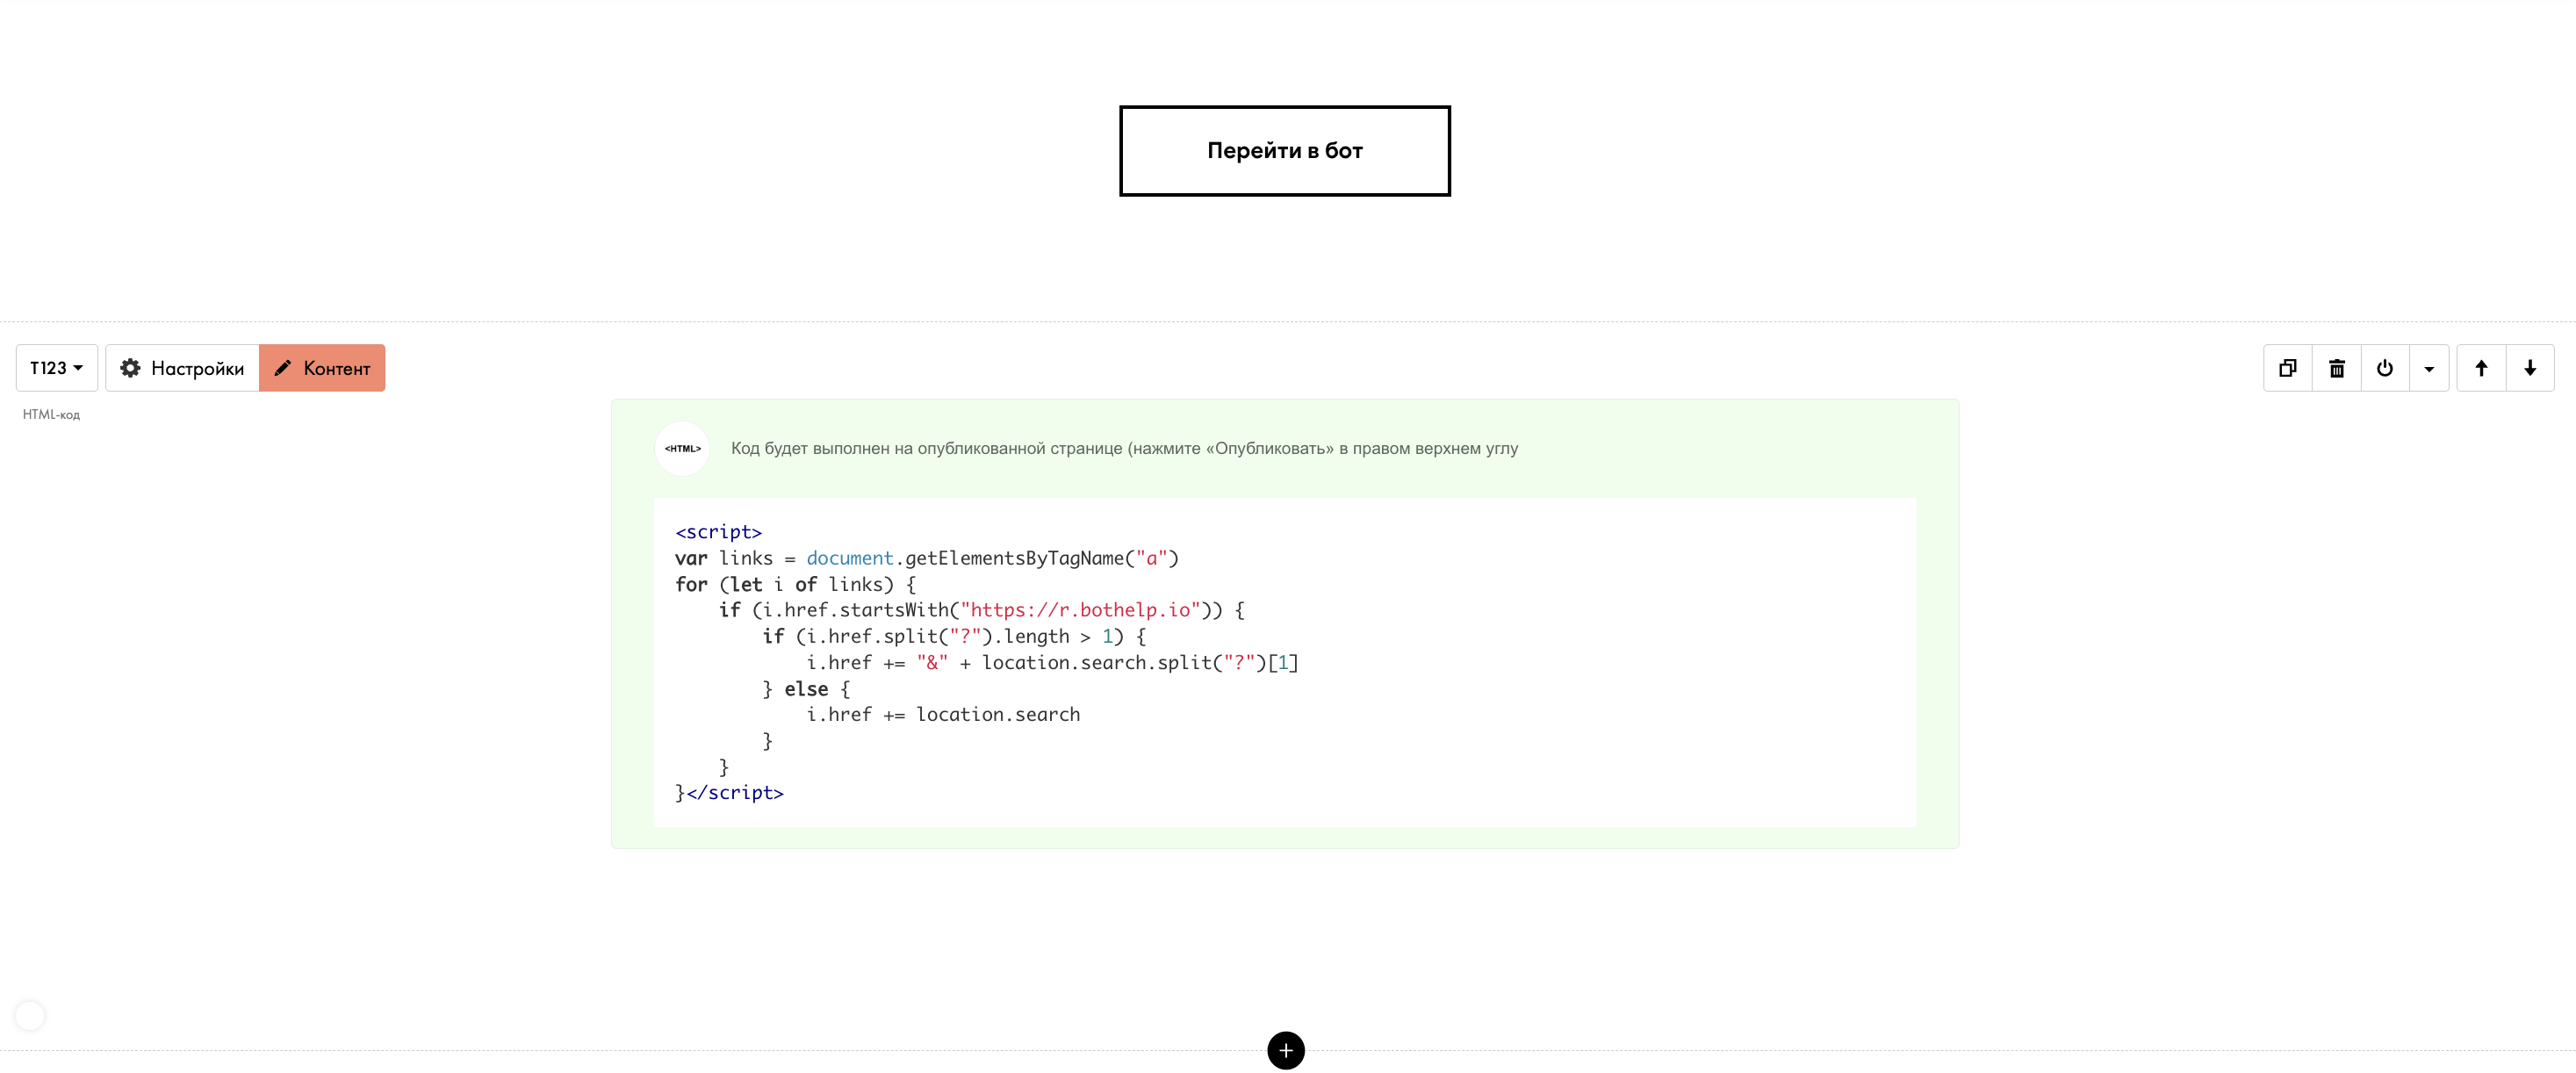
4. Add block T123 "HTML code" and insert JavaScript into it:
<script> var links = document.getElementsByTagName("a") for (let i of links) { if (i.href.startsWith("https://r.bothelp.io")) { if (i.href.split("?").length > 1) { i.href += "&" + location.search.split("?")[1] } else { i.href += location.search } } }</script>
Important! This block with the script must be located below the button that users will click to go to the bot.
Done! Publish your landing pages and test passing labels and parameters before sending the link to users.
If you have not found the answer to your question, ask us in the chat inside your account or write to BotHelpSupportBot or to hello@bothelp.io
Get 14 days of full functionality of the platform for creating mailings, autofunnels and chatbots BotHelp.