Albato is a no-code service that allows you to connect various cloud services in five minutes.
Use the promo code when signing up for Albato and receive 1000 free transactions for your customers.
Promo code: bothelp1000
The service allows you to connect BotHelp to more than a hundred other platforms. Among them: Bitrix24, amoCRM, GetCourse, Bizon365, Binotel and others. See the full list on the Albato website.
Different functions are available for each service. Data from BotHelp is transmitted using a webhook or after the chat ends.
Connecting BotHelp to Albato
To set up the integration, you will need a chatbot created on BotHelp. The data will be transmitted from the flow via the webhook to the service you need. Use our instructions for creating a flow.
1. Log in to Albato.
2. Go to the “Connections” section and find BotHelp in the list.
3. Click the Add Connection button.
4. Give a name to the connection. We recommend that you enter the name of the flow. There will be separate connections for different flows.
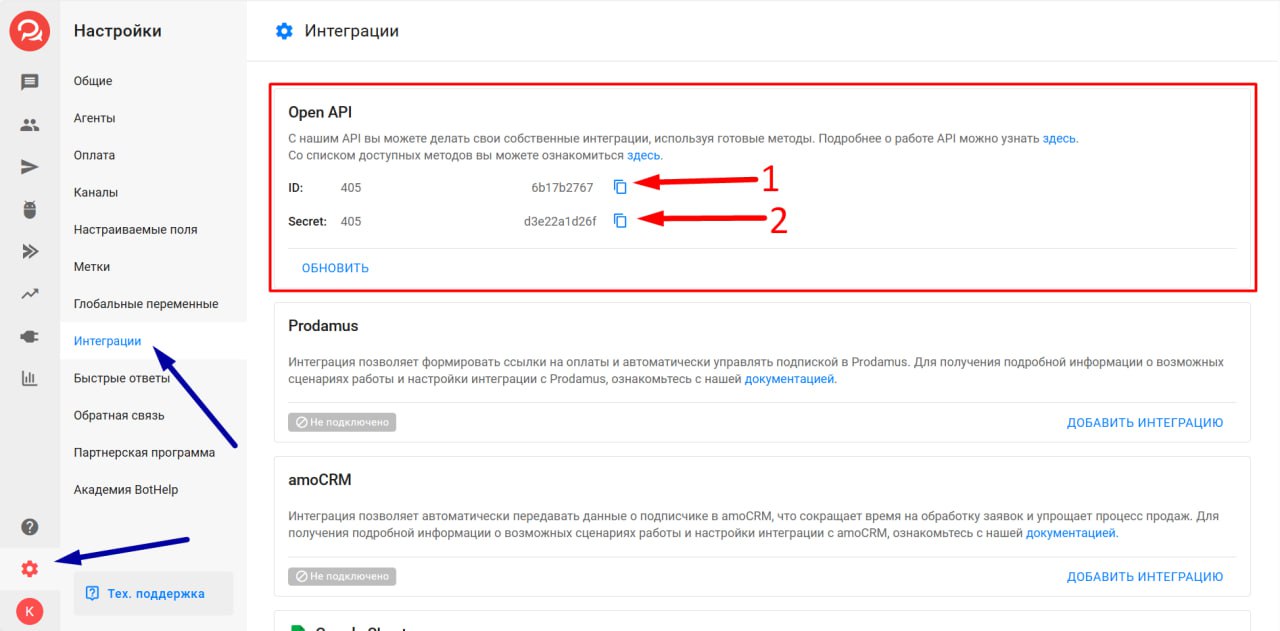
5. Paste the Client ID and Client Secret into the appropriate fields, you can copy them from your BotHelp profile in the settings of the “Integrations” section.
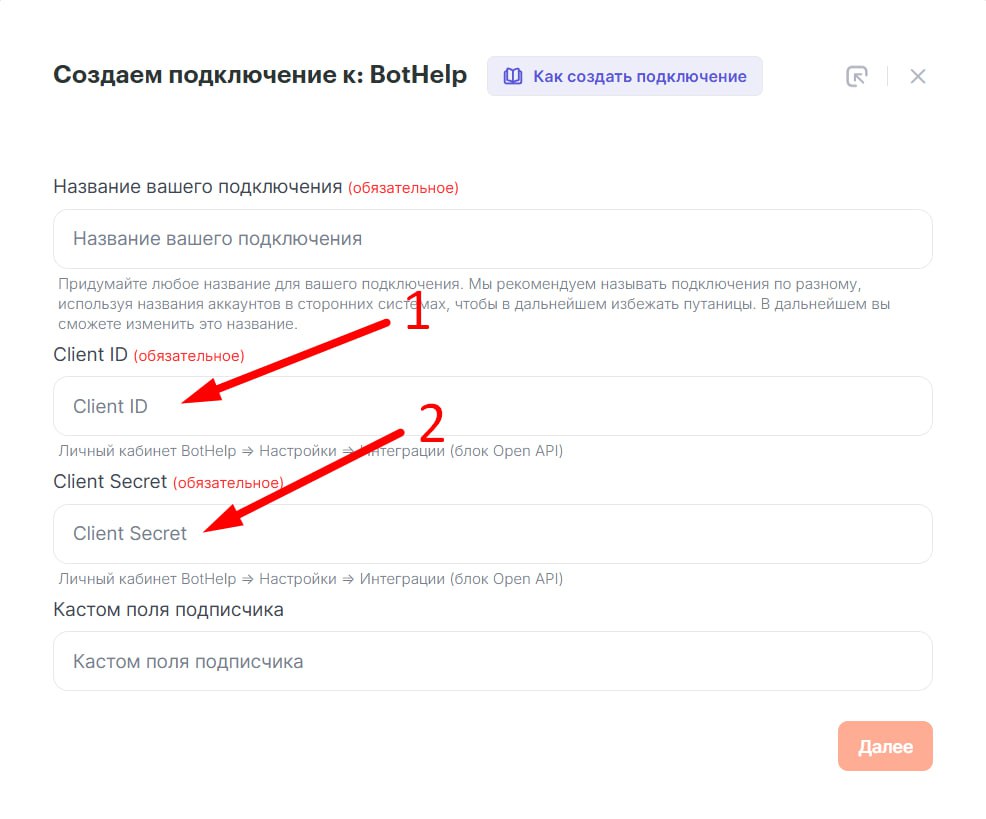
6. Click the Continue button.
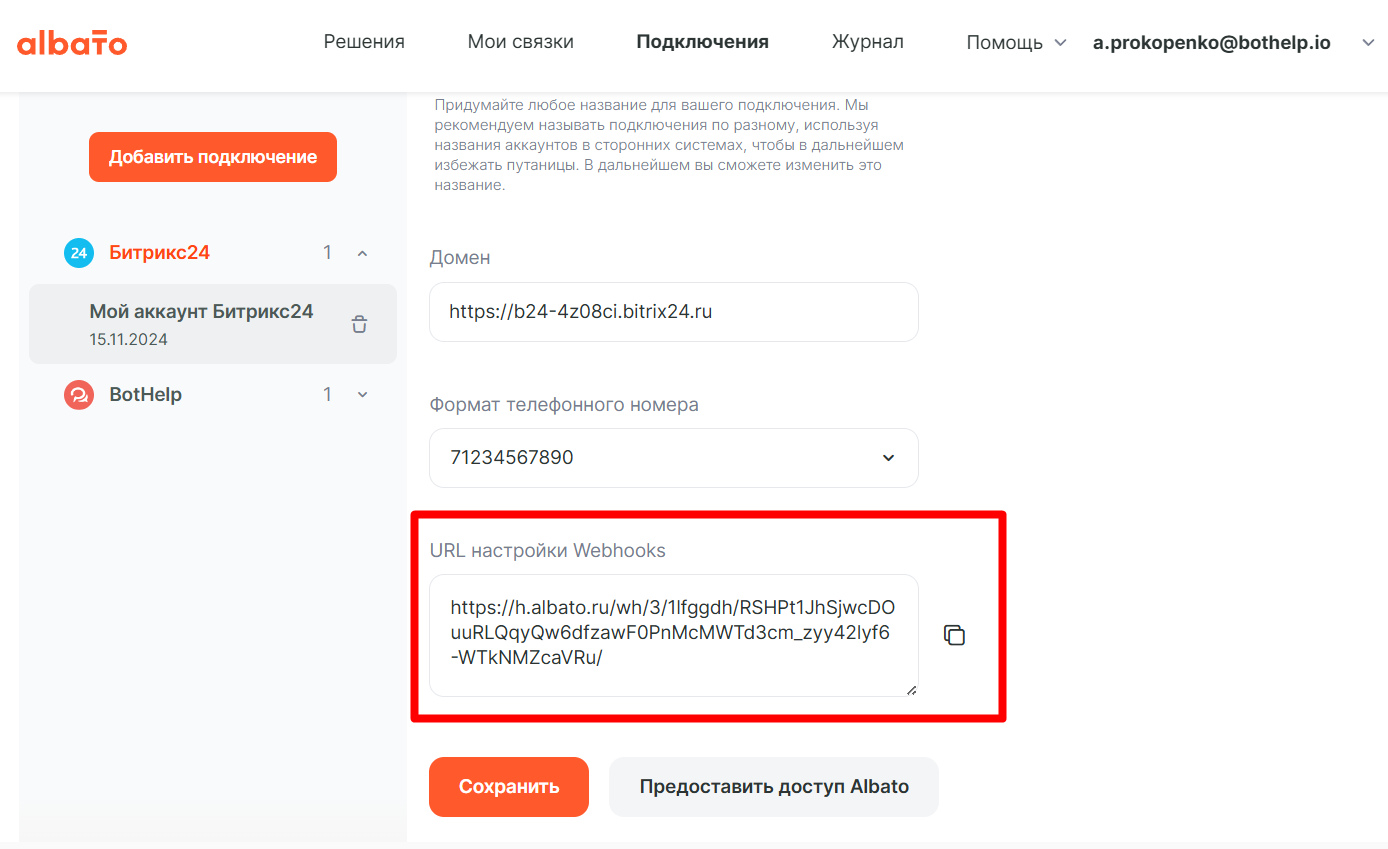
7. In a few seconds, a URL for configuring webhooks will be generated. Copy it.
8. Click the Got it button.
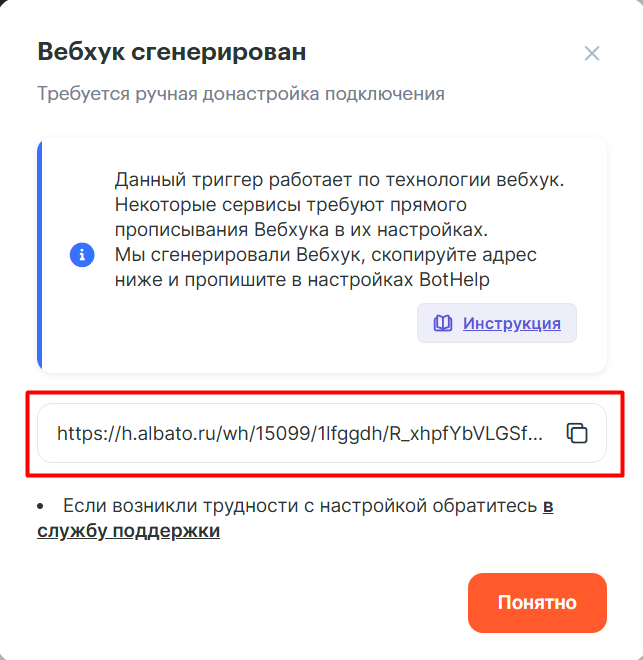
9. Paste the copied webhook URL into the appropriate action field in the flow.
You have connected the flow to Albato.
Connecting your service
After connecting BotHelp, you have to connect the service that you plan to integrate with. Go to Connections and select the necessary service.
In this article, we will explore the integration using Bitrix24 as an example.
Connecting Bitrix24
First, you have to install the Albato app in your Bitrix24.
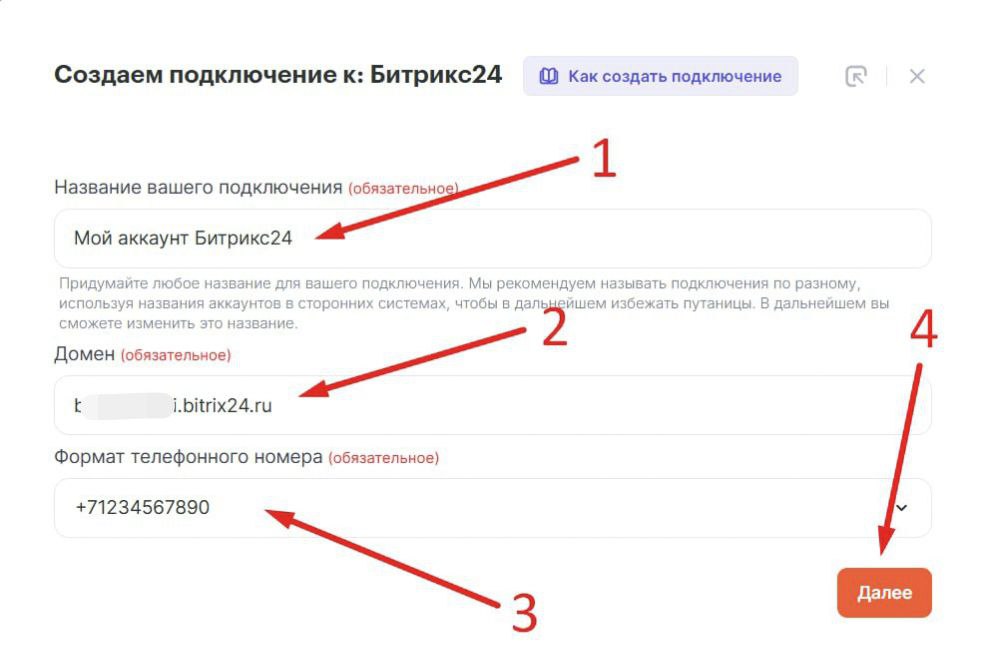
Create a new connection.
- Enter any connection name.
- Enter your domain on Bitrix24.
- Select the phone format.
- Click Continue and grant access to Albato.
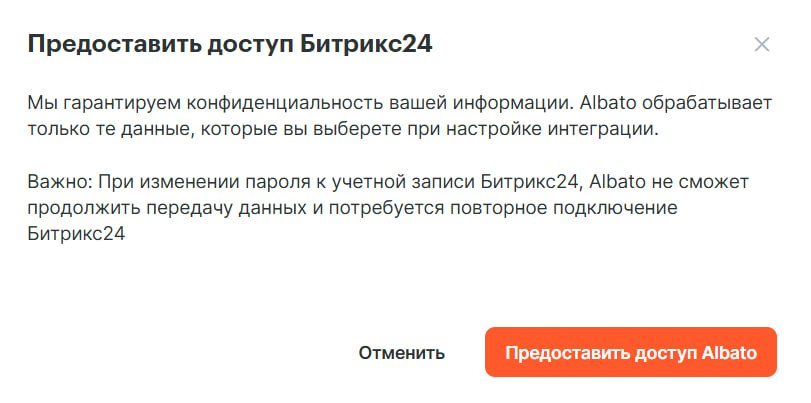
Once the connection is completed, all the data from Bitrix24 will be loaded automatically.

Setting up a link
After you have created at least two connections (BotHelp and the service you need), you can create a link between them. To do this:
- Go to the “My Links” section.
- Click the Create New Link button.
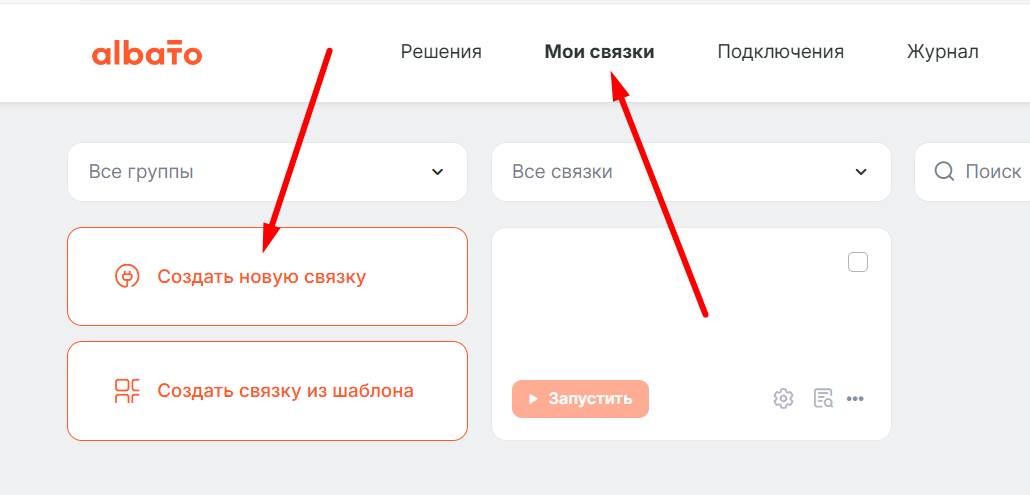
Select the systems that you want to link. In our case, these are BotHelp and Bitrix24.
Step 1. Where we send it from
- The first step is to configure where the data will be sent from. Select the BotHelp service from the list.
- Event. Select the event that triggers the integration and the target action that will be performed. Only the chat termination event and a person’s new data are available for BotHelp. The first one works in conversations, and since we need to transmit data from the person, we choose the second one.
- Connection selection. Select the flow that you connected earlier.
- Click Continue.
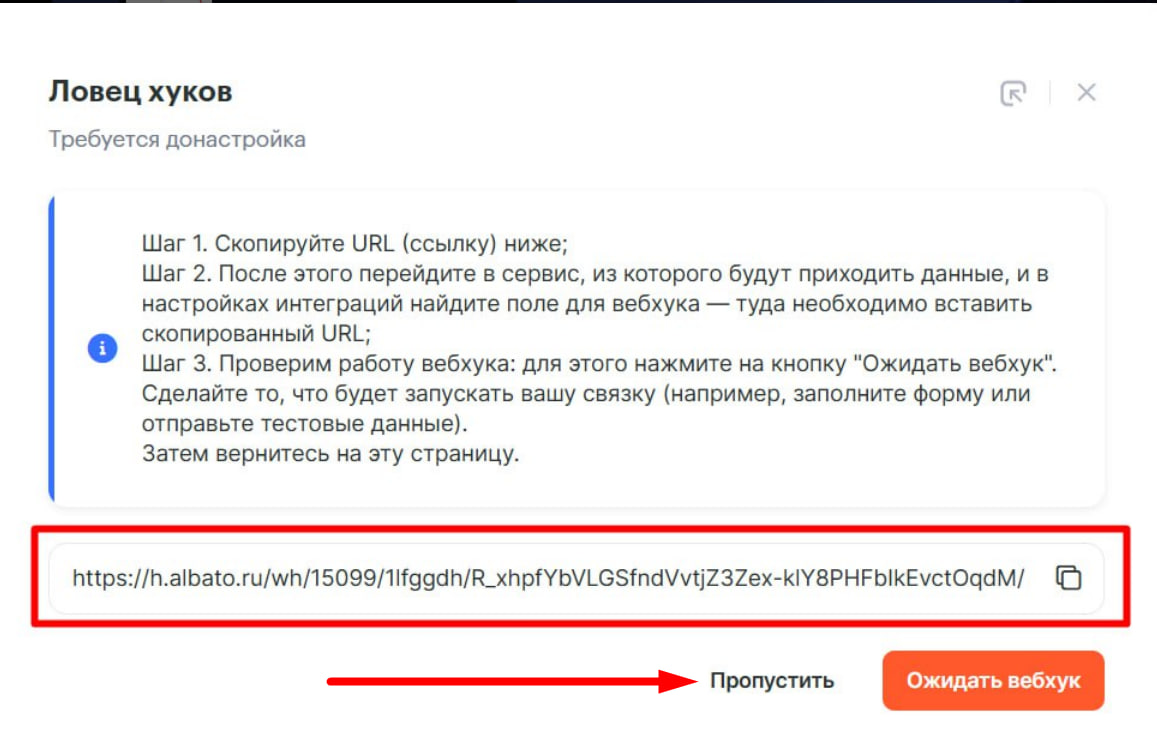
The Hook catcher
You will find yourself on the next step — the Hook catcher. This again shows the webhook that has to be inserted in the “Flow Action” step. Skip this step for now and click Skip.
Step 2. Where we send it to
- Select the Bitrix24 service from the list.
- Event. There are several types of events for Bitrix24. For other services, there may be even more or fewer of them. You can choose to create a deal, a new contact or a lead — choose the one you need. I select the “New Lead” event.
- Connection selection. Select a Bitrix24 account.
- Click the Continue button.

Step 3. Data
At this step, you have to select the data that will be transmitted to Bitrix24 from BotHelp.
The fields will be automatically pulled up from Bitrix, you will only have to specify which data from BotHelp to insert into these fields.
To do this:
- Click the BotHelp button in the field.
- Select the necessary data from the drop-down list.
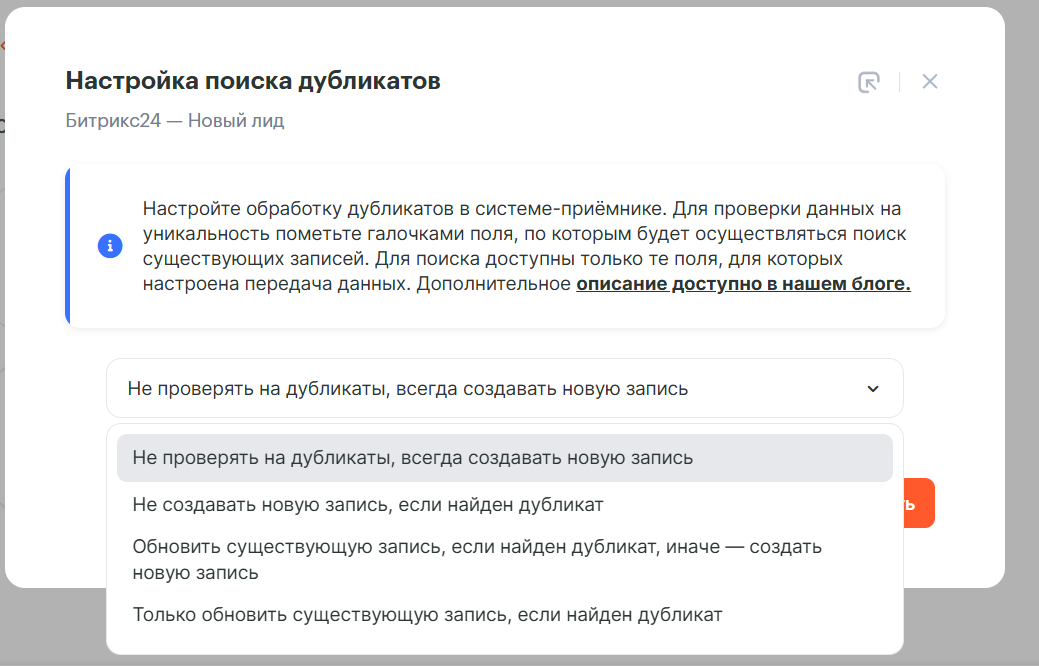
Step 4. Duplicates
Choose how to handle duplicate records.
The following options are available:
- Do not check for duplicates and always create a new record.
- Search for duplicates and do not create a new record if they are found.
- Search for duplicates and update the fields of the found record instead of creating a new one.
If you select options 2 or 3, tick the boxes where you want to search for duplicates. Please note that only the fields for which data transmission was set up in the previous step are available for search.
If you have chosen to search for and update duplicates, then in the sixth step you should configure how to update the fields of the found record exactly. The form is similar to the fourth step.
Expect a webhook
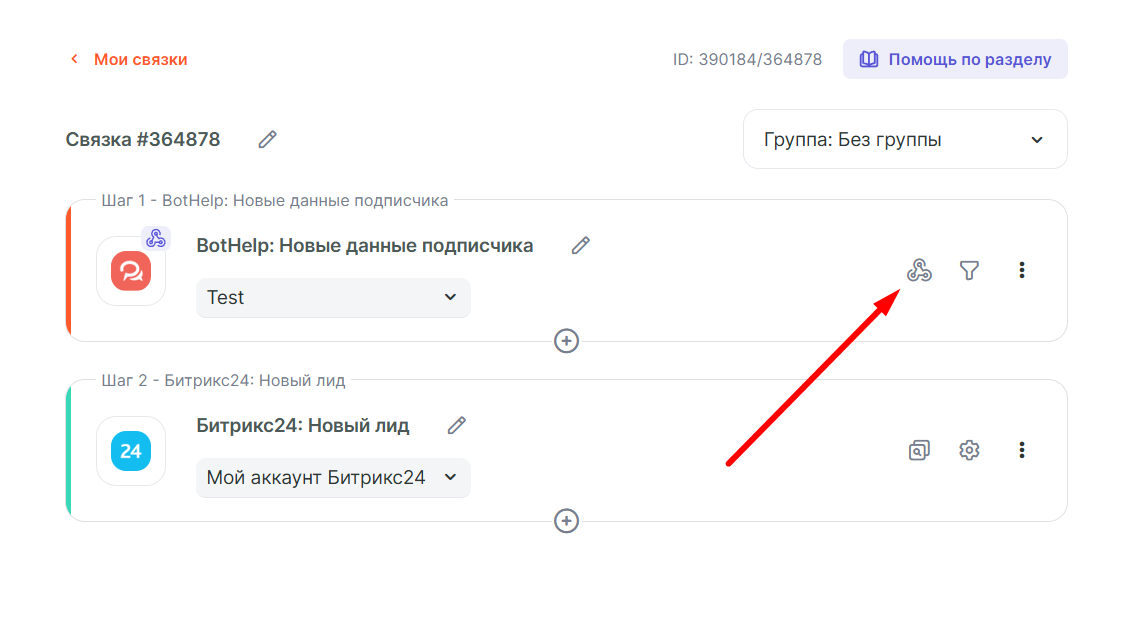
After creating the link, you have to check its operation. Open the created link, click on the “Hook Catcher” icon.
Click the Expect Webhook button. The webhook that needs to be inserted into the flow is shown here once again.
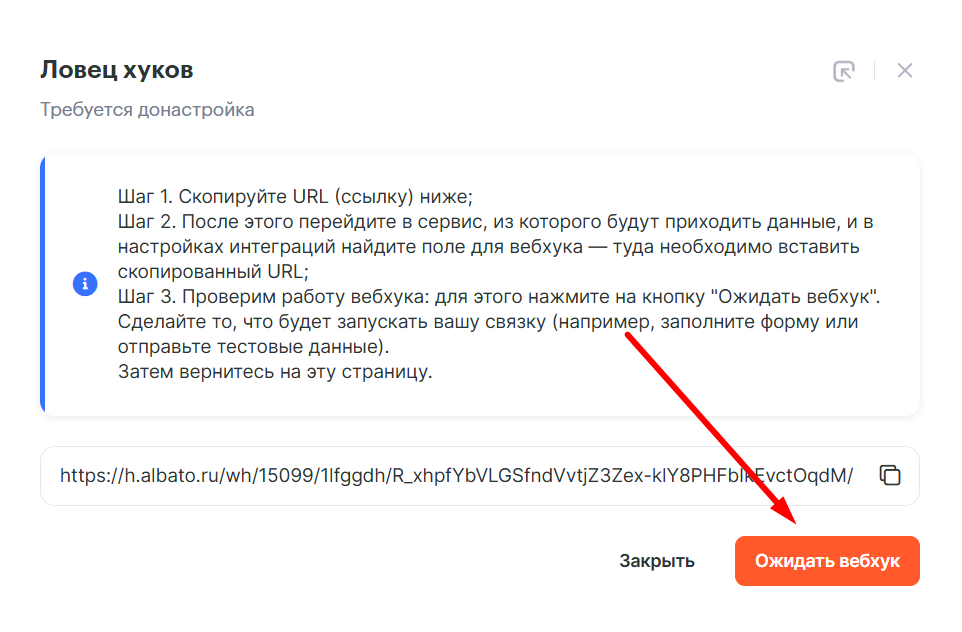
When you have clicked the button, go to your flow, click Test and go through its chain until the webhook is sent.
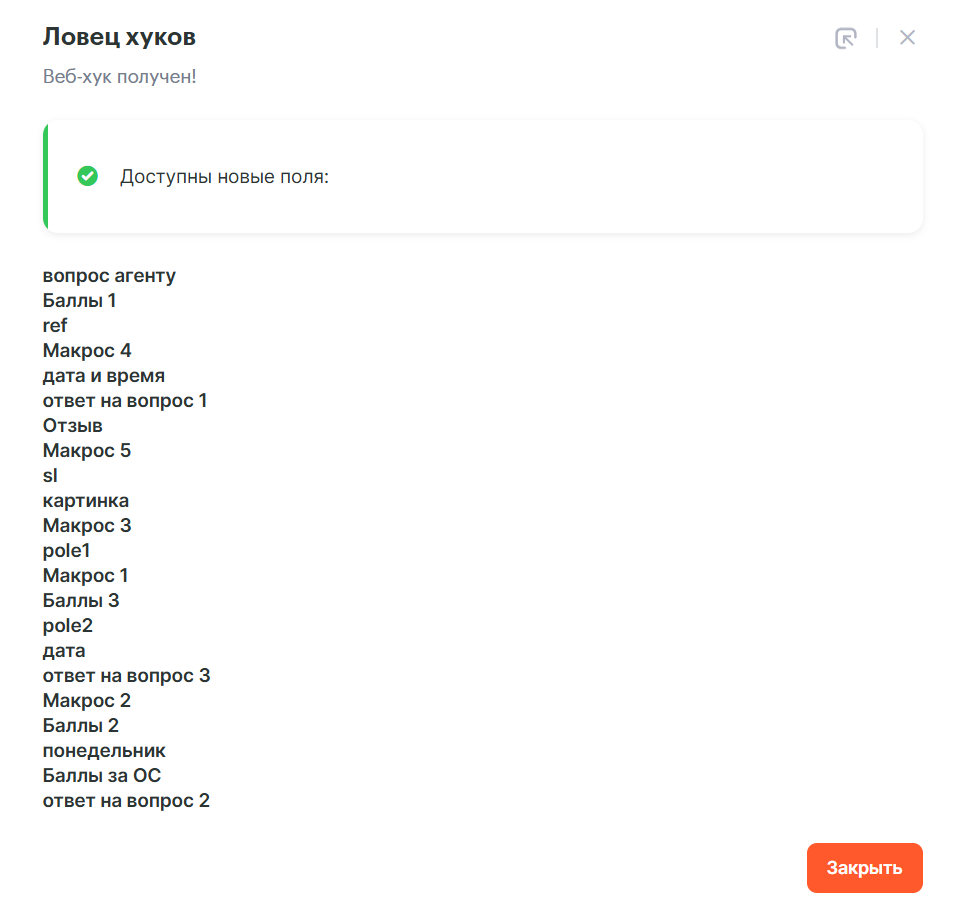
After completing the flow chain, go to Albato and make sure that the webhook is received. You will see that your custom fields and UTM tags have also appeared. You can add this data to the Bitrix24 connection settings.
If you have difficulties at this stage, make sure that you have entered the correct webhook URL and that you have reached the moment of sending the webhook in the flow.
If you did everything correctly, but the data was not transmitted, contact Albato Help Center.
Please note: The link to transmit the webhook is copied from the connection settings. This link may differ from the Hook catcher link.
The link has been created
You can add more steps to the link if necessary. For example, you can send data to other systems. Give the link a name.

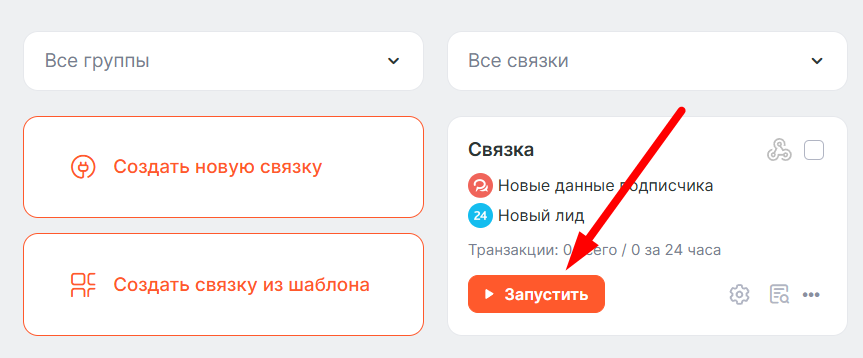
Launching the link
Go to the My links page and click the Launch Link button.
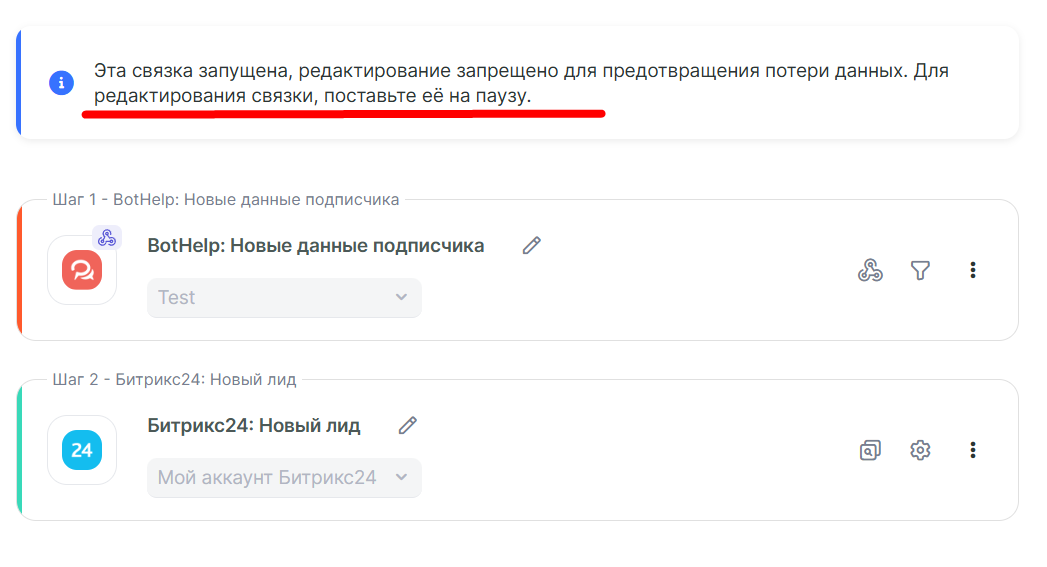
The link is running, and its status has changed. To edit a link, you have to pause it.
Testing the link
Log into your flow, run the chain again, and go through it until the webhook is transmitted. Check the display of the new lead in Bitrix24.
Integration with Google Sheets
Integration with amoCRM
The Albato integrator service allows you to connect other platforms to BotHelp, e.g., GetCourse or Bizon365. If you have set up and are using another link, please send us a video and we will add it to the instructions.
If you haven’t found the answer to your question, contact us in the chat in your profile or email hello@bothelp.io😃
Get 14 days of full functionality of BotHelp, a platform for creating broadcasting, autofunnels, and chatbots.