Bizon365 is a platform where you can broadcast your online workshop or webinar.
Sign up for Bizon 365 using a special link and get 30 days of free access to the platform.
Sign-up link: http://bothelp.tb.kassa.bizon365.ru/bizon
Thanks to the integration of BotHelp and Bizon365, you will be able to launch different conversations depending on whether the person attended the webinar or not.
Generate a token
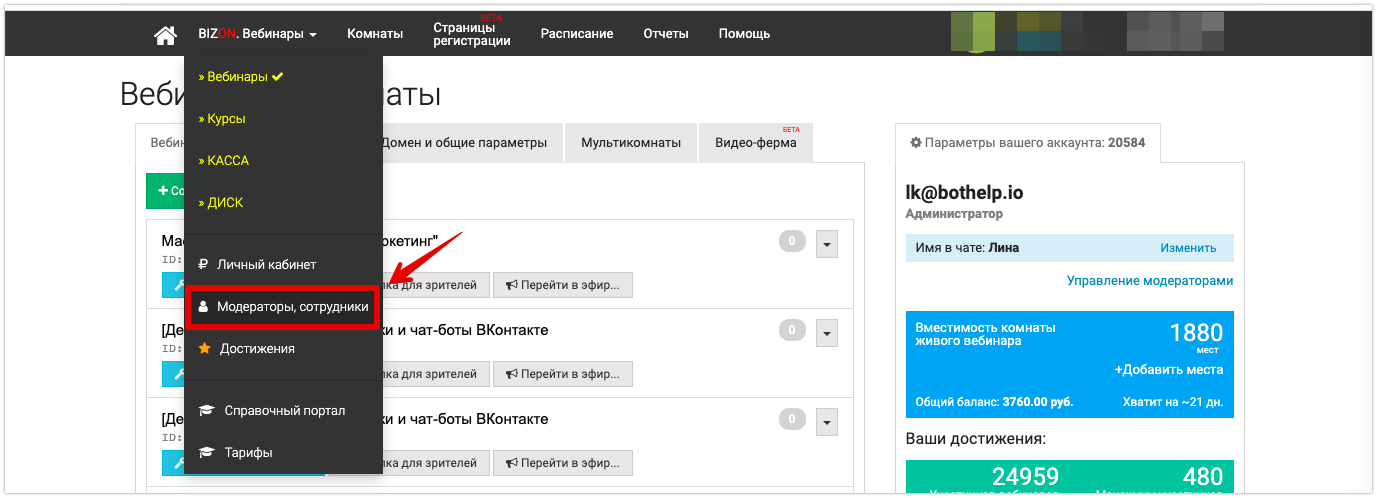
1. Go to the “Moderators, Staff” section.
2. Select an employee with the “Administrator” role and click on the Change Data and Configure Access button.

3. In the “Basic” section, generate an API token.
In the “Security” field, select “Login without confirmation”.
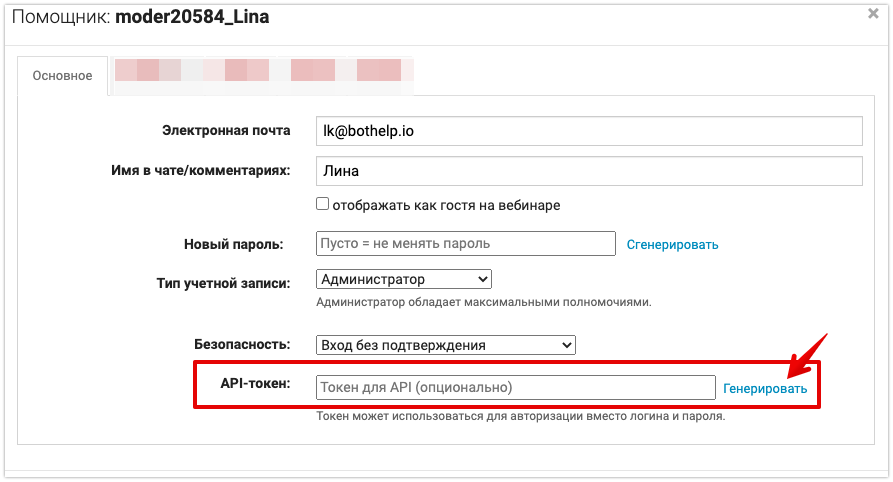
4. Copy the resulting token.

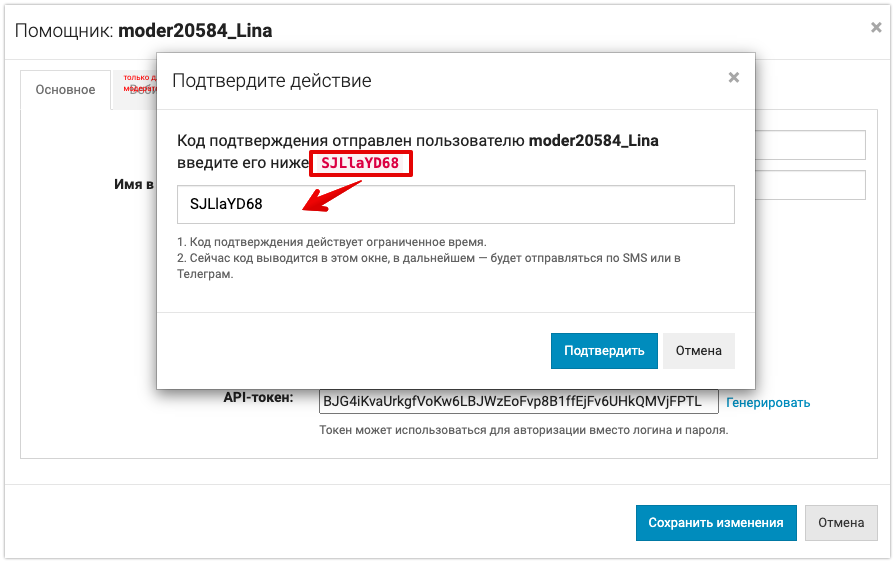
5. Save the changes and confirm the action.
To confirm the action, enter the generated code in the field.
Connect to BotHelp
One Bizon365 account can be connected to one BotHelp account. There can be an unlimited number of webinars in this account.
One Bizon365 account can be connected to multiple BotHelp profiles.
1. Go to the “Integrations” section in your BotHelp account.
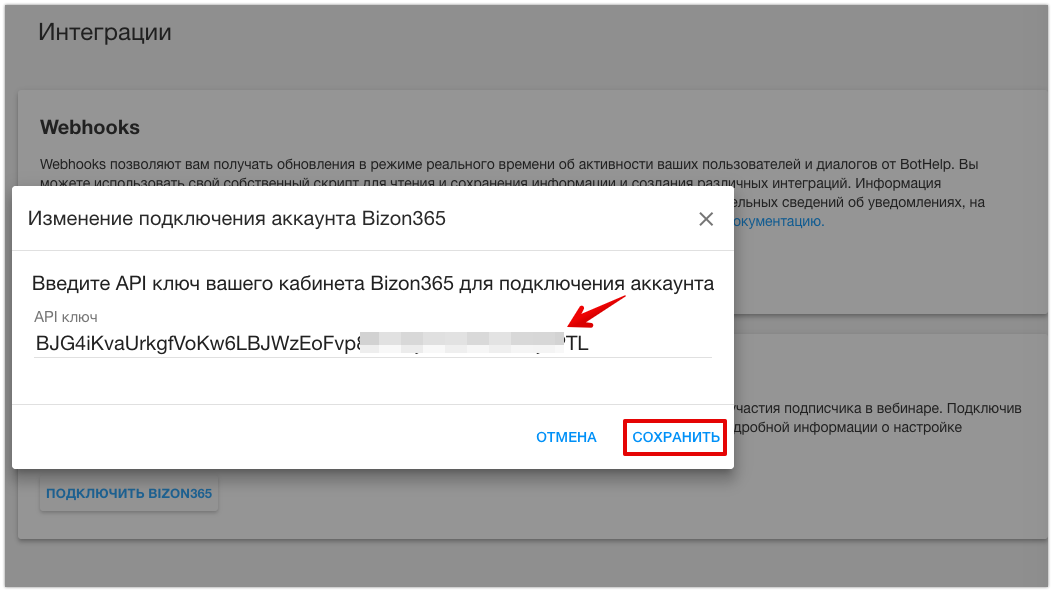
2. Find Bizon365 in the list of integrations and click Connect Bizon365.
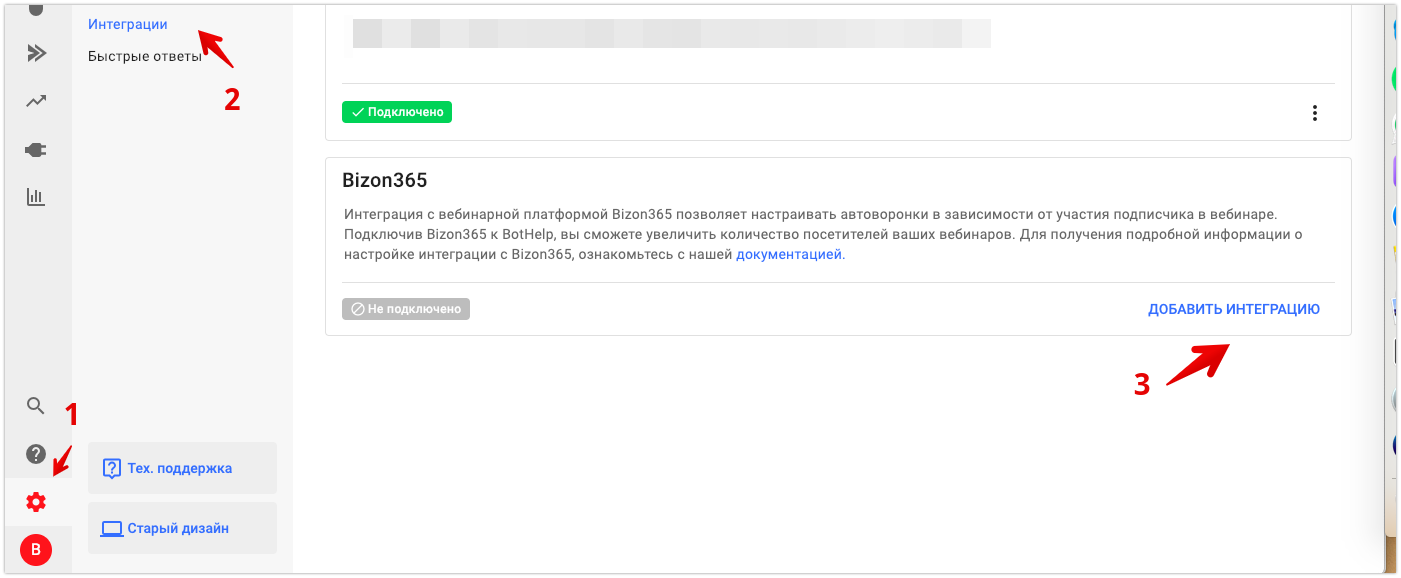
3. Paste the copied token into the field and save it. In the future, you can edit the connection if necessary.
Set up the URL of the webinar room
1. Go to the room settings.

2. In the “Access” tab, enter the “bhid” value in the “Your URL parameter” field. Save the changes.

Setting up inside the flow
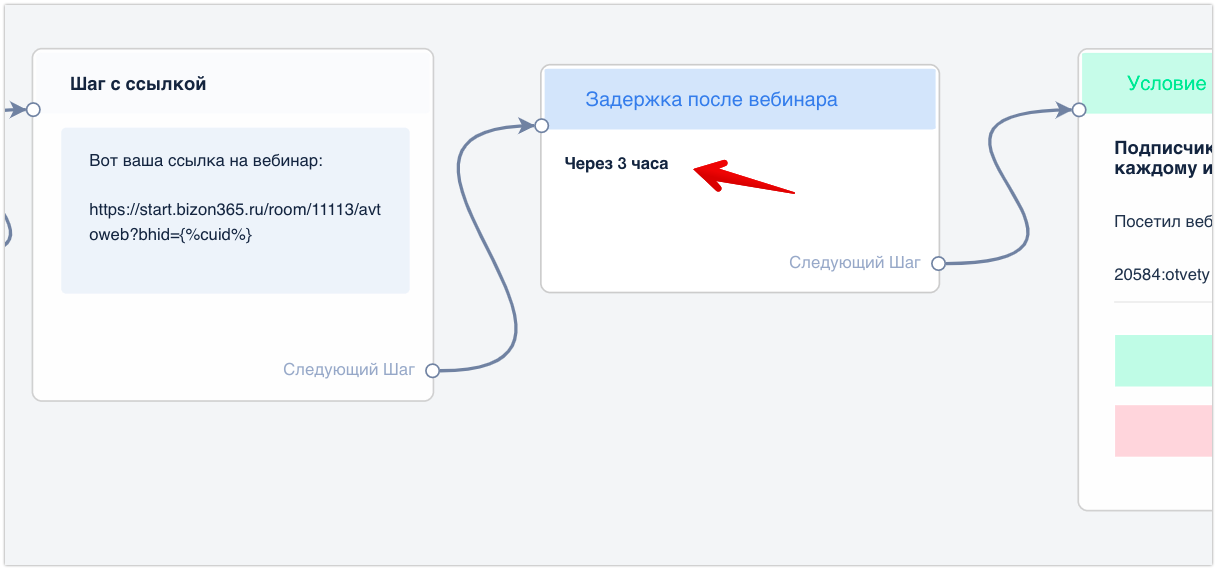
The picture below shows an example of a flow chain in which webinar attendance verification is configured. Let’s break down the steps one by one.
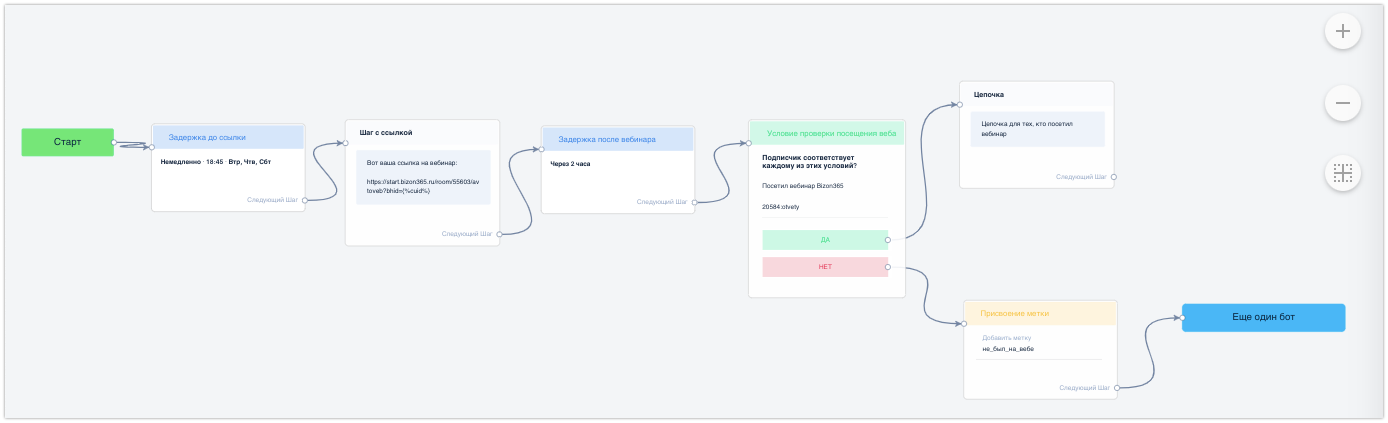
The step with the link to the webinar
Before this step, you can configure other steps, for example, add steps with warming content. You can also use a delay to send a step with a link only on certain days and times. This does not affect the integration settings. The main thing is to correctly register the link itself and transfer the user’s CUID.
{%cuid%}
This is a macro that has an individual user ID inserted into it in BotHelp. Thanks to it, the system detects which of the people clicked on the link.
This macro should be added to the end of the link to the webinar.
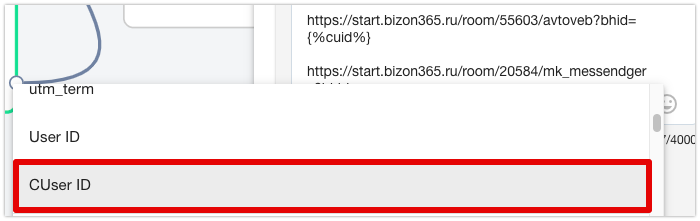
You can find the CUser ID macro in the text block by clicking <…>.
How to enter UTM tags in the link correctly to send them to Bizon365
In the link, the first parameter always opens with the “?” sign, and the second and other parameters are separated by the “&” sign. The end of the link with the Bizon365 integration macro and UTM tags will look like this:
Example: ?bhid={%cuid%}&{%ref%}
Link to the webinar
1. Click on the Viewer Link button.

2. Copy any of the links.
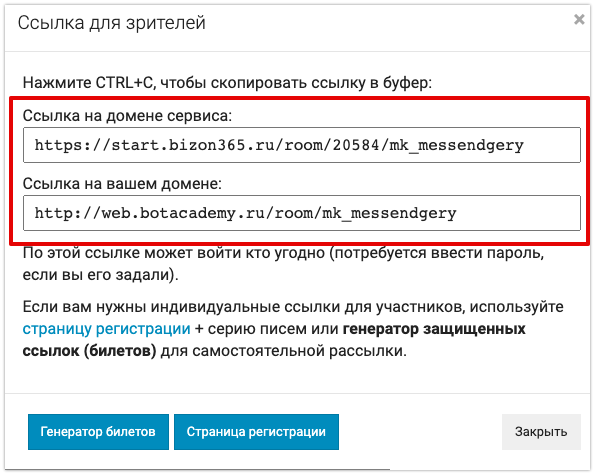
3. Add ?bhid= at the end of the link and insert the macro {%cuid%}.
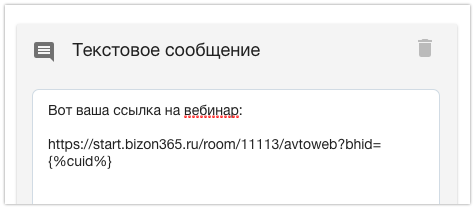
This is the final link that you should get:
https://start.bizon365.ru/room/11111/avtoweb?bhid={%cuid%}
4. Paste the link into the text of the message or into the URL button.
Important: You cannot shorten the link to the webinar using any third-party services. In this case, BotHelp will not see the CUID and ref macros, so the data for correct integration will not be transmitted, meaning the condition will not work.
Important: The link in the image caption does not transmit data. For it to work correctly, use a text block.
Delay during the webinar
After the link, you have to set a delay.
The fact is that the data about the webinar attendance will be transmitted only 30 minutes after it is finished. Therefore, you have to set a delay before checking: the time before the start of the broadcast + the time of the webinar itself + the time to receive data into our system (approximately 40 minutes).
For example:
- you’ve sent the link at 18:40;
- the webinar starts at 19:00 and lasts 2 hours;
- we add another 40 minutes after the end;
- in total, you need a delay of 3 hours.
You can set the delay time to “After 3 hours” or specify the exact time to “Immediately at 21:40.” Thus, the webinar attendance condition will work 3 hours after sending the link.
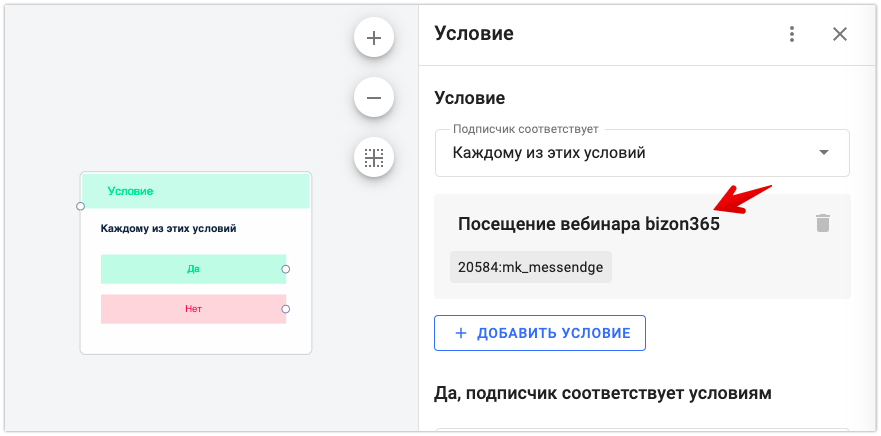
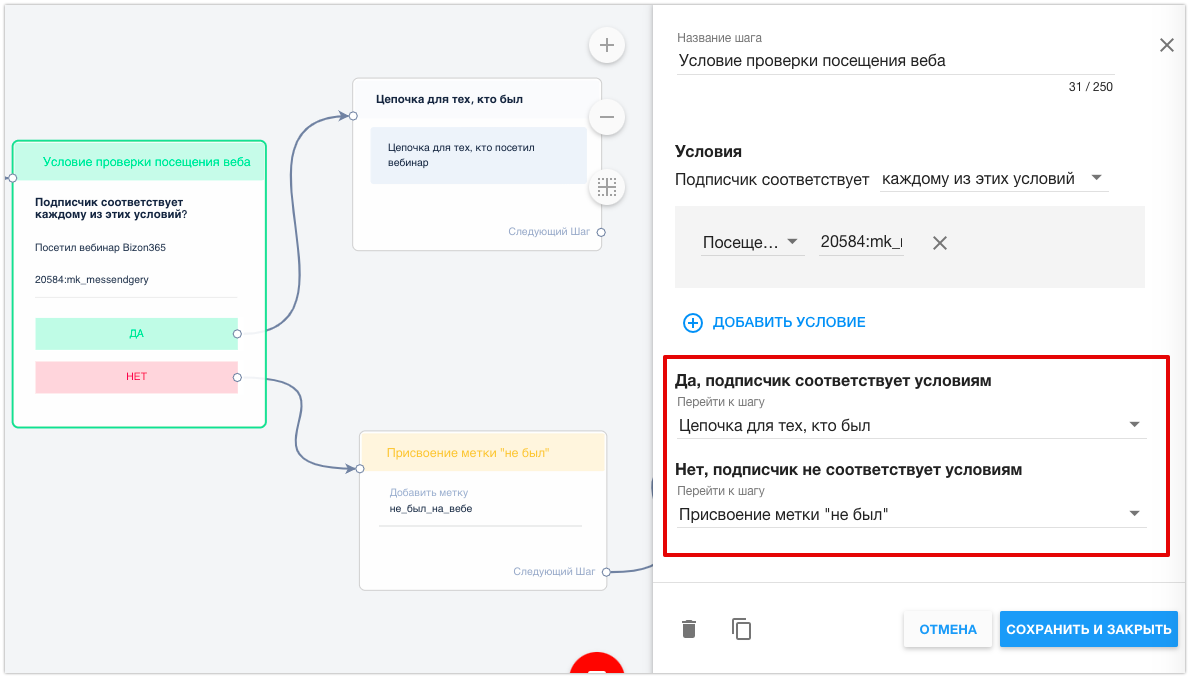
Attendance verification condition
1. Add a block with the “Bizon365 webinar attendance” condition.
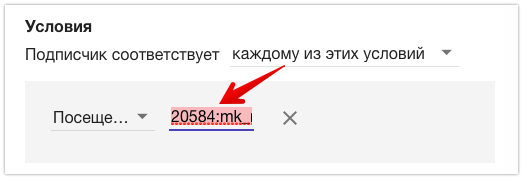
2. Copy the room ID.

3. Insert the room ID in the conditions field.
4. Set up the following steps: “Yes” — attended the webinar, “No” — did not attend.
Please note that condition verification is only available in a multi-step flow. You can also send the link to the webinar in the broadcast message. But you can only check the attendance and divide it into different chains according to the condition inside a multi-step flow. Therefore, we recommend sending a link and checking the webinar attendance condition in one flow.
The way to set up a reminder message in the flow on the day of the webinar is described in our article.
Next steps for segments
Thanks to the attendance verification condition, you can divide the audience into two segments: those who attended the webinar and those who did not attend it.
Follow the instructions carefully while setting up the integration: even if you skip just one step (e.g., if you forget to add a delay or a question mark before “bhid”), the integration will not work!
If you haven’t found the answer to your question, contact us in the chat in your profile or email hello@bothelp.io😃
Get 14 days of full functionality of BotHelp, a platform for creating broadcasting, autofunnels, and chatbots.