Direct integration with Google Sheets allows you to use the “Action” block in the flow constructor in the following ways:
- automatically send BotHelp person data to your Google Sheet,
- read data from the spreadsheet,
- enter it in person fields,
- and update the data already entered in the spreadsheet.
Setting up Google Sheets
Preparing the spreadsheet
- Create a spreadsheet.
- If necessary, you can create multiple sheets in one spreadsheet.
- IMPORTANT! After enabling integration and configuring actions in the flow, do not change the names of the sheets. If you have changed the name of a sheet, then update the action settings in the flow.
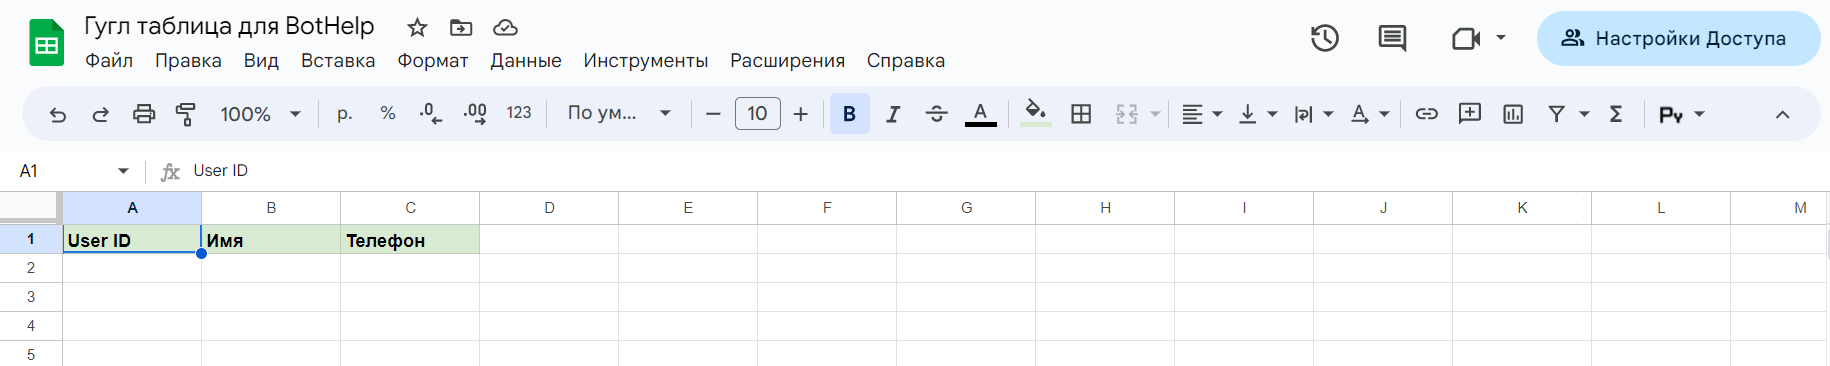
- In the first row of the spreadsheet, be sure to specify the names of the columns which the data will be entered in. The header names will be required when configuring data transfer from BotHelp.
- There are no requirements for column names — you can name them as you like.
- There should be no empty columns between the columns of your spreadsheet. If there are columns without headers in the spreadsheet, then BotHelp will only recognize columns up to the first empty column without a header.
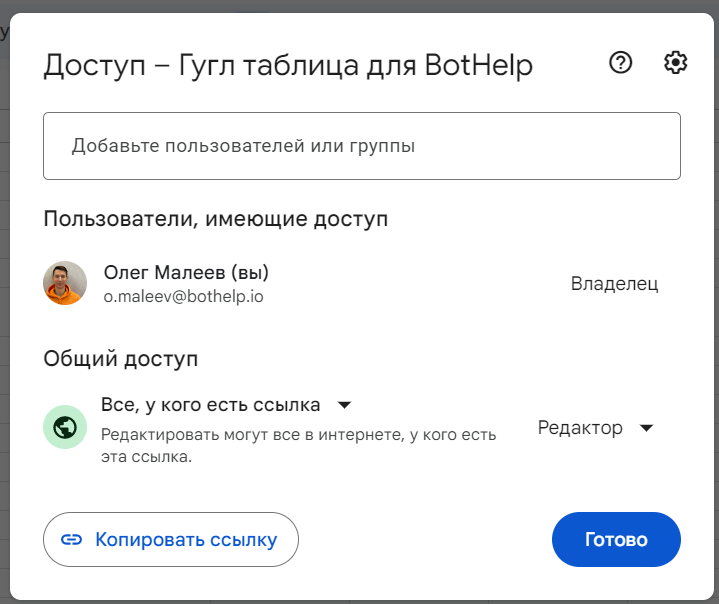
- In the access settings of the spreadsheet, make sure that you are the owner of the spreadsheet, and in the sharing settings, the option “Anyone with the link” and “Editor” is selected.
(!) Requirements for the Google Sheets fields where we send and receive data:
- There is a limit of up to 255 characters in the field name in Google Sheets, the same limit is for the field name in BotHelp.
- The data value in a Google Sheets cell must not exceed 1000 characters.
Setting up BotHelp
Enabling integration
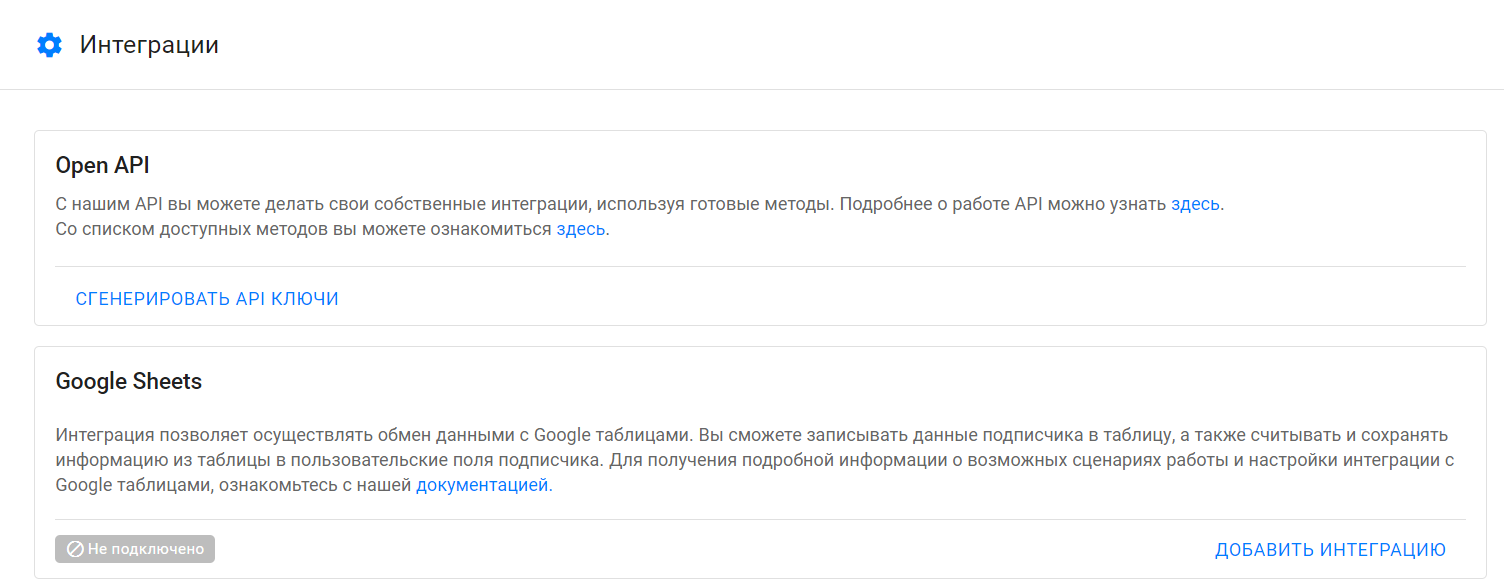
1. To enable integration, go to the “Integrations” subsection in your profile settings.
2. Find the “Google Sheets” block in the list of integrations and click Add Integration.
3. After clicking on the button, the Google authorization page will pop up. Select an account from the list or log in to your Google account.
- You have to select the account with the drive where the spreadsheets you will be working with will be stored.
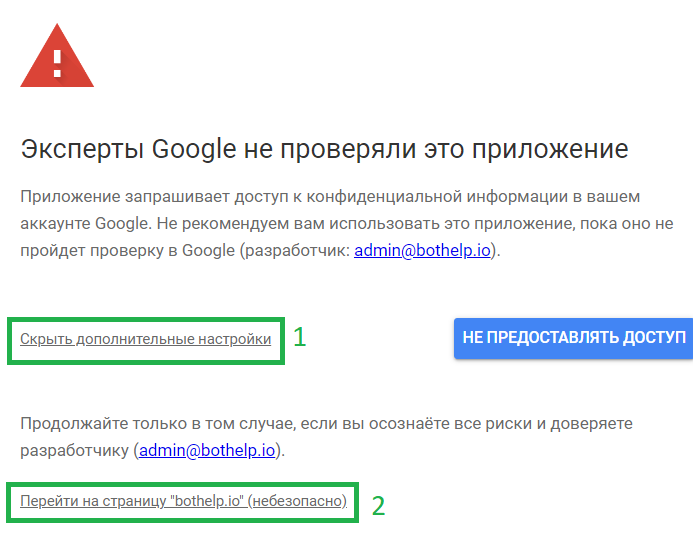
4. To complete the connection:
- Open the advanced settings by clicking the Advanced Settings button (1).
- Click on Go to page bothelp.io (2).
5. In the window that pops up, click the Allow button to give BotHelp access to your Google Sheets.
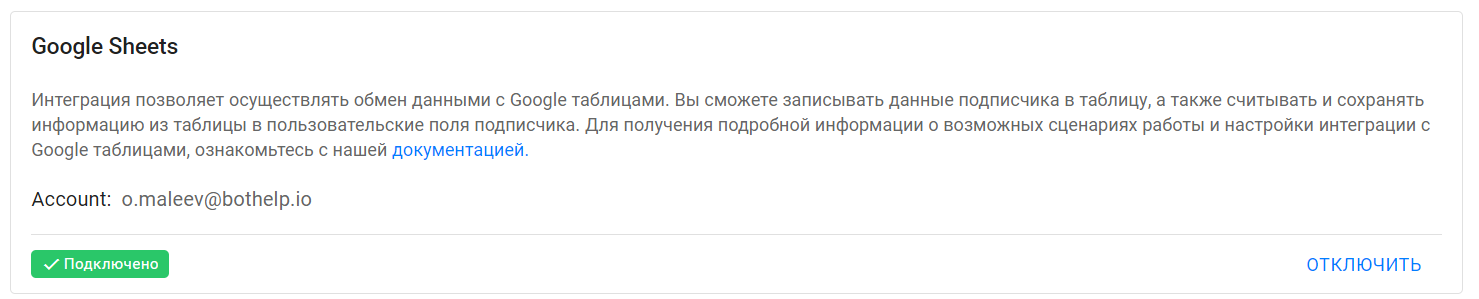
6. If everything is successful, the connected Google account and the “Connected” status will be displayed in the “Integrations” with Google Sheets section in your Bothelp profile.
Setting up the “Send data to spreadsheet” action
Using this action, you can transfer person data from BotHelp to a Google Sheet.
Work features
- You can send the following person information: name, email, phone number, CUser ID, and all custom fields.
- Person data is recorded in one row of the spreadsheet.
- Each new entry is added to the next row of the spreadsheet.
IMPORTANT! We recommend that you always transfer the person’s CUser ID, which is the unique person ID in your profile. By using it, you can update a row in the spreadsheet for a specific user or read their data from the spreadsheet for transferring it back to BotHelp.
Setting up an action
1. Go to the flow constructor and add the “Action” block.
2. In the list of actions in the “Actions with Google Sheets” subsection select the “Send data to spreadsheet” action.
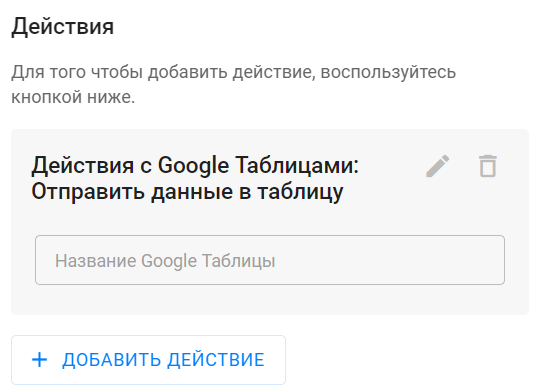
3. Click on the “pencil” icon to set up the action.
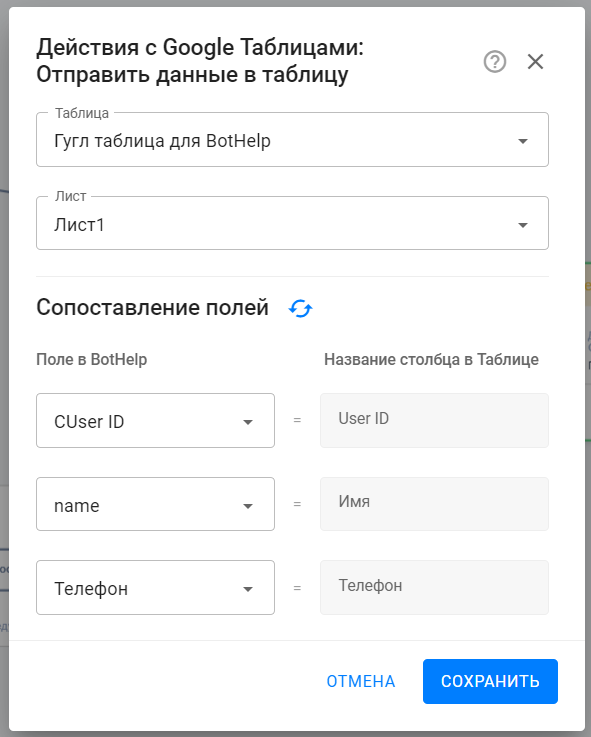
- Paste the link to the Google Sheet which you want to transfer the data to.
- Select the sheet which the transmitted data will be recorded in.
- IMPORTANT! After enabling integration and configuring actions in the flow, do not change the names of the sheets. If you have changed the name of a sheet, then update the action settings in the flow.
- Fill in the “Field matching” section.
- In this section, you have to specify which person data will be transferred to each of the columns in the spreadsheet.
- IMPORTANT! All the specified person data will be recorded in one row, with each value in its own column. The next entry in the spreadsheet will be created in the next row.
4. Click Save in the current settings window for the “Send data to spreadsheet” action.
5. Click Save and Close in the settings of the entire “Action” step.
6. It’s done! You have set up the integration, and you can check it.
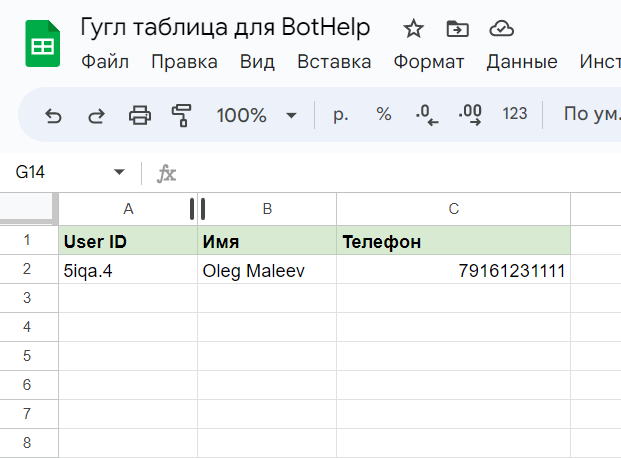
After testing the flow, person data appeared in the spreadsheet, and each new entry is made in the next row.
Setting up the “Receive data from spreadsheet” action
Using this action, you can read data from a Google Sheet and enter it in the person’s custom fields in BotHelp.
Work features
- The data from the spreadsheet is read line by line.
- The search for the row which the data is to be read from is performed by the specified value in the specified column (an example is below).
- In the found row, the value of each cell is transferred to a separate custom field of the BotHelp person.
Setting up an action
1. Go to the flow constructor and add the “Action” block.
2. In the list of actions in the “Actions with Google Sheets” subsection select the “Receive data from spreadsheet” action.
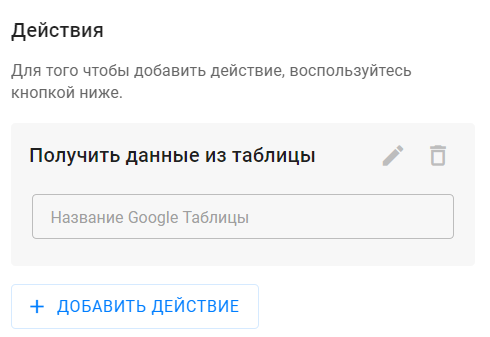
3. Click on the “pencil” icon to set up the action:
- Select the Google Sheet which you want to read the data from.
- Select the sheet which the data will be read and transmitted from.
- IMPORTANT! After enabling integration and configuring actions in the flow, do not change the names of the sheets. If you have changed the name of a sheet, then update the action settings in the flow.
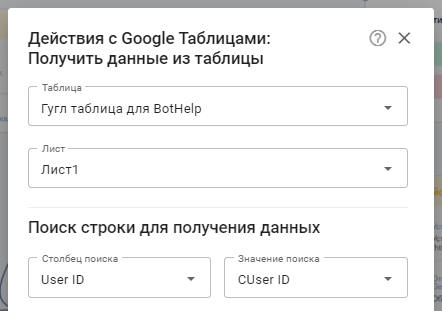
- Fill in the “Search for a row to receive data” section.
- In the “Search value” field, select a custom field the value of which will be searched in the Google Sheet.
- In the “Search column” field, select the column of the Google Sheet in which the value of the custom field specified in the “Search value” will be searched.
- An example in the screenshots:
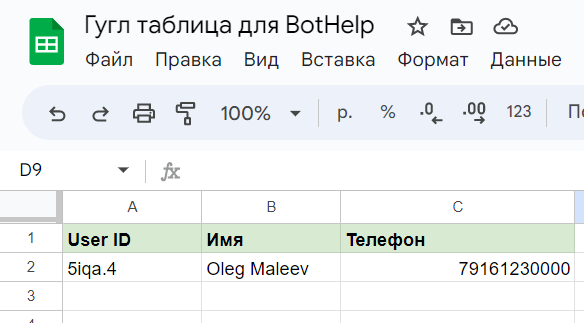
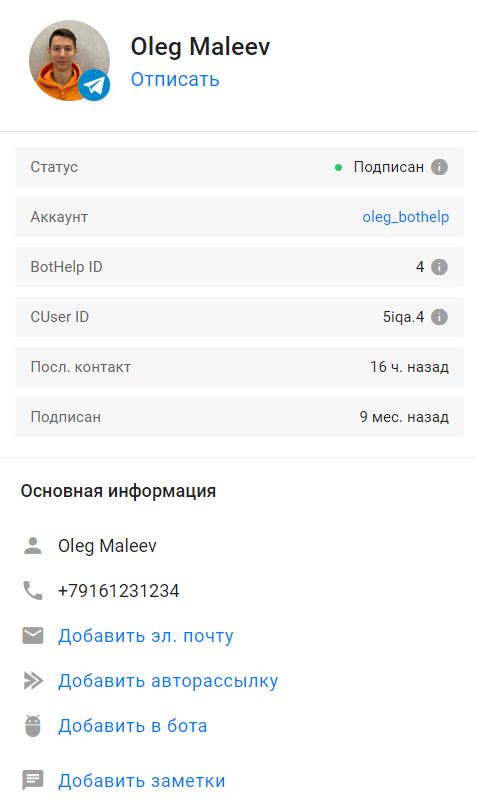
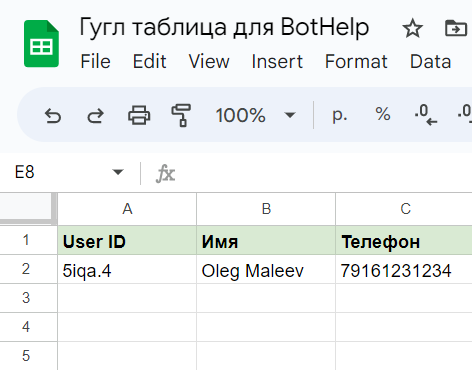
- We are looking for a row that has the value of the custom field “CUser ID” in the “User ID” column.
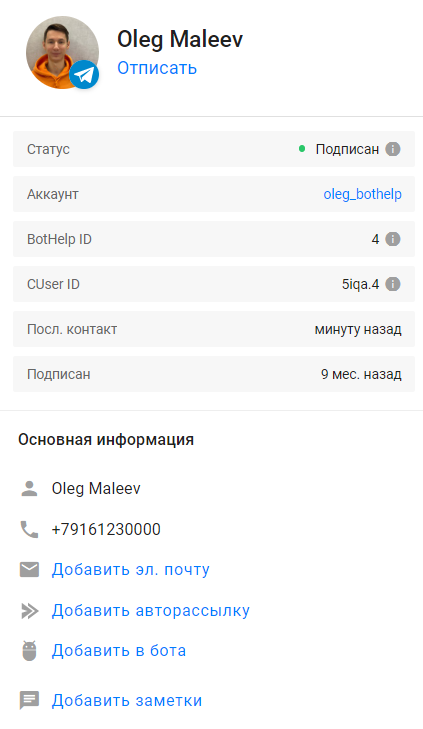
- Thus, for a user who has CUser ID = 5iqa.4, Row #2 of the spreadsheet will be selected.
- IMPORTANT! If there are several rows with the specified value in the specified column in the spreadsheet, then the data of the first row will be transmitted to BotHelp.
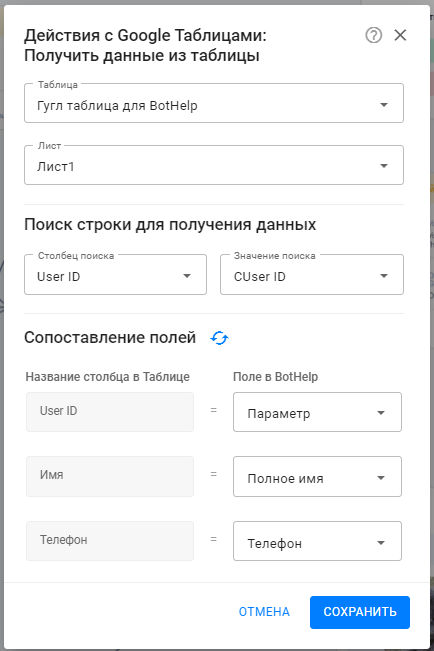
- Fill in the “Field matching” section.
- In this section, you have to specify which columns of the found row the data will be taken from and which custom fields of the person the data will be entered in.
4. Click Save in the current settings window for the “Receive data from spreadsheet” action.
5. Click Save and Close in the settings of the entire “Action” step.
6. It’s done! You have set up the integration, and you can check it.
Before testing, we changed the value in the “Phone” column.
After testing the flow, the data from the spreadsheet was transferred and entered in the specified custom fields of the person. The phone number has changed, and the value from the “User ID” cell has been entered in the “Parameter” field.
Setting up the “Update data in spreadsheet” action
Using this action, you can update the data already recorded in the Google Sheet.
Work features
- The search for the row which the data will be overwritten in is performed by the specified value in the specified column (an example is below).
- You can send the following person information: name, email, phone number, CUser ID, and all custom fields.
- Person data is recorded in one found row of the spreadsheet.
Setting up an action
1. Go to the flow constructor and add the “Action” block.
2. In the list of actions in the “Actions with Google Sheets” subsection select the “Update data in spreadsheet” action.
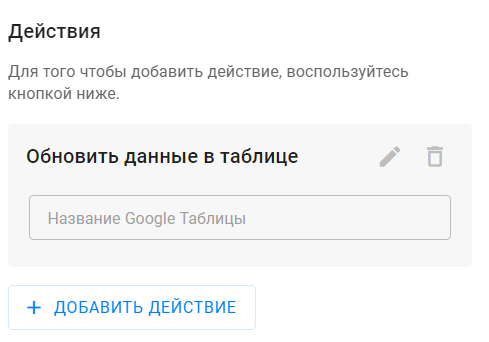
3. Click on the “pencil” icon to set up the action.
- Select the Google Sheet where you want to update the data.
- Select the sheet where you want to search for a row to update the data.
- IMPORTANT! After enabling integration and configuring actions in the flow, do not change the names of the sheets. If you have changed the name of a sheet, update the action settings in the flow.
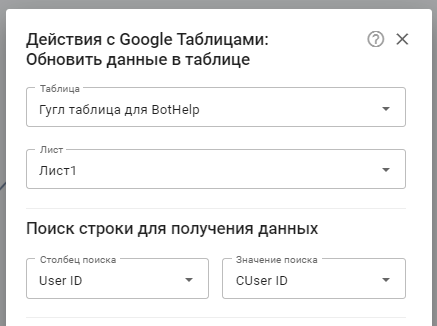
- Fill in the “Search for a row to update data” section.
- In the “Search value” field, select a custom field the value of which will be searched in the Google Sheet.
- In the “Search column” field, select the column of the Google Sheet in which the value of the custom field specified in the “Search value” will be searched.
- An example in the screenshots:
- We are looking for a row where the value of the custom field “CUser ID” will be found in the “User ID” column.
- Thus, for a user who has CUser ID = 5iqa.4, Row #2 of the spreadsheet will be selected.
- IMPORTANT! If several rows are found in the spreadsheet with the specified value in the specified column, the data will be overwritten for the first row.
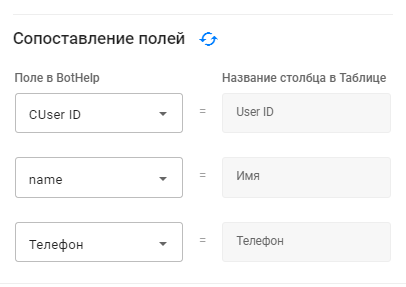
- Fill in the “Field matching” section.
- In this section, you have to specify which person data will be transferred to each of the columns of the found row.
4. Click Save in the current settings window for the “Receive data from spreadsheet” action.
5. Click Save and Close in the settings of the entire “Action” step.
6. It’s done! You have set up integration, and you can check it.
Before testing, we will change the phone number in the person’s card.
After testing the flow, the person’s phone data in the spreadsheet was updated.
Setting up the “Enter in cell” action
Using this action, you can transfer person data from BotHelp to a Google Sheet.
Work features
- The following person data can be transferred: name, email, phone number, CUser ID, all custom fields, and UTM tags.
- Person data is recorded in a specific cell.
- The value of one field is entered in one spreadsheet cell.
- The address of the cell which the data will be entered in can be specified manually or through macros of custom fields.
Setting up an action
1. Go to the flow constructor and add the “Action” block.
2. In the list of actions in the “Actions with Google Sheets” subsection, select the “Enter in cell” action.

3. Click on the “pencil” icon to set up the action:
- Select the Google Sheet to transfer the data to.
- Select the sheet in which this data will be recorded.
- IMPORTANT! After enabling integration and configuring actions in the flow, do not change the names of the sheets. If you have changed the name of a sheet, then update the action settings in the flow.
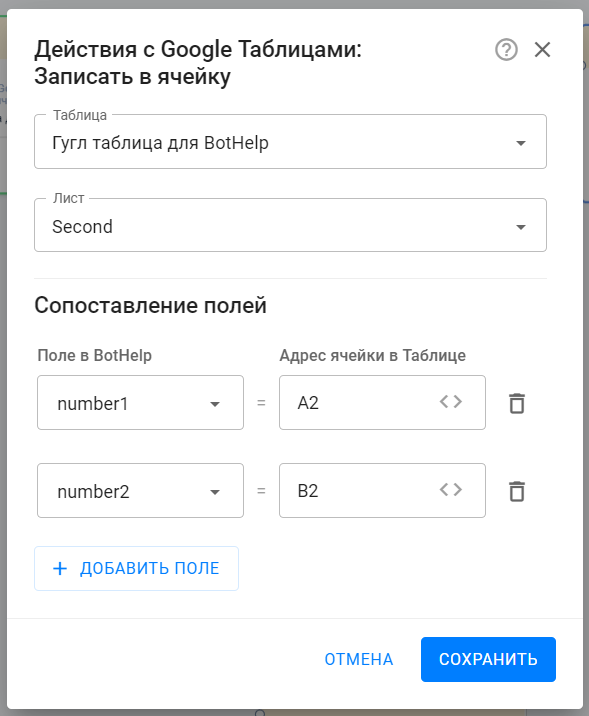
- Fill in the “Field matching” section.
- In this section, you have to specify which person data will be transferred to which cell of the spreadsheet.
4. Click Save in the current settings window for the “Enter in Cell” action.
5. Click Save and Close in the settings of the entire “Action” step.
6. It’s done! You have set up data transfer for entering in a spreadsheet cell.
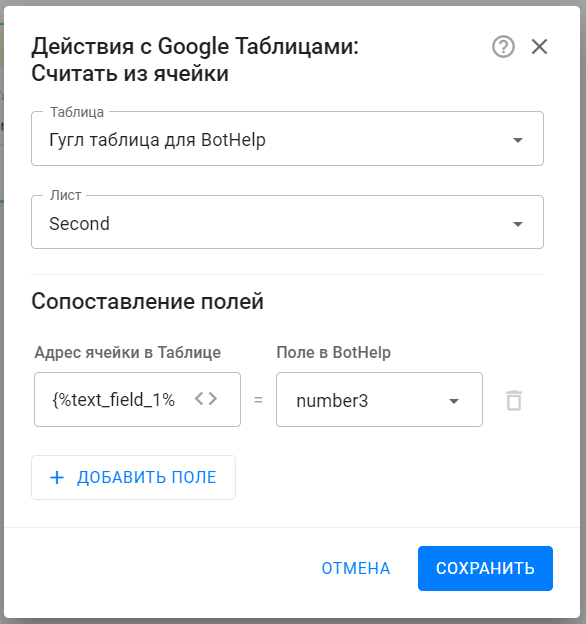
Setting up the “Read from cell” action
Using this action, you can read data from specific Google Sheet cells and enter it in the person’s custom fields in BotHelp.
Work features
- The data from the spreadsheet is read from the specified cells.
- The cell is searched by the entered cell address. The cell address can be specified manually or through macros.
- The value of each cell is transferred to a separate custom field of the BotHelp person.
Setting up an action
1. Go to the flow constructor and add the “Action” block.
2. In the list of actions in the “Actions with Google Sheets” subsection, select the “Read from cell” action.
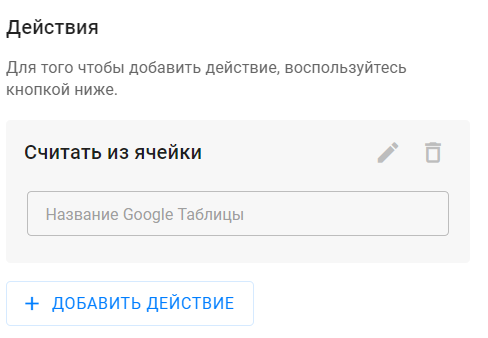
3. Click on the “pencil” icon to set up the action.
- Select the Google Sheet which you want to read the data from.
- Select the sheet which the data will be read and transmitted from.
- IMPORTANT! After enabling integration and configuring actions in the flow, do not change the names of the sheets. If you have changed the name of a sheet, then update the action settings in the flow.
- Fill in the “Field matching” section.
- In this section, you have to specify which cells of the spreadsheet the data will be entered in and which custom fields of the person it will be transferred to.
- In the example below, the value
{%text_field_1%}2is entered in the cell address field. In the person field, you can type a Latin letter, e.g., C. Then this action will read the value of cell C3.
4. Click Save in the current settings window for the “Read from cell” action.
5. Click Save and Close in the settings of the entire “Action” step.
6. It’s done! You have set up data reading from the cell.
If you haven’t found the answer to your question, contact us in the chat in your profile or email hello@bothelp.io😃
Get 14 days of full functionality of BotHelp, a platform for creating broadcasting, autofunnels, and chatbots.