Yandex.Money → Yoomoney: a new brand and a new website.
Creating an account
If you don’t have an account, create a new one. Fill in the required information and, if necessary, complete identification in order to be able to transfer funds to your bank card and increase the limits.
Setting up the sending of payment notifications
Follow the link.
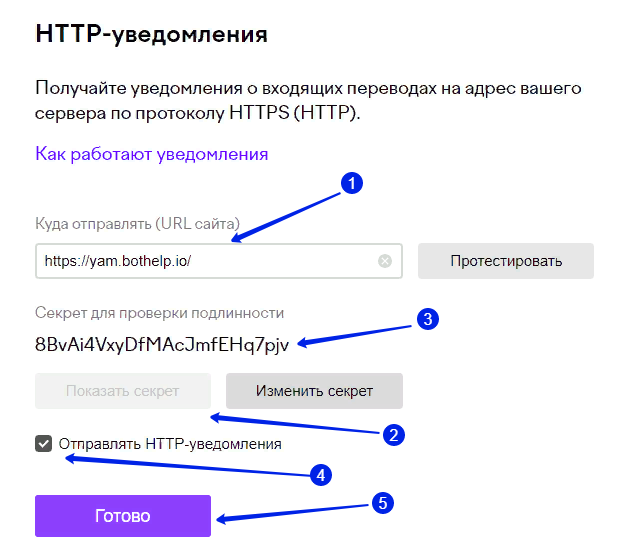
To set up notifications:
- Insert the link https://yam.bothelp.io/ in the first field.
- Click the Show Secret button.
- Copy the secret key.
- Activate the “Send HTTP notifications” checkbox.
- Click Done.
If you want to integrate payment acceptance via Yoomoney, but you already have HTTP notifications sent to another service, unfortunately, you will have to create a separate wallet. In the wallet settings, you can select only one address for sending HTTP notifications. Accordingly, you can integrate with only one service.
Creating a payment acceptance page
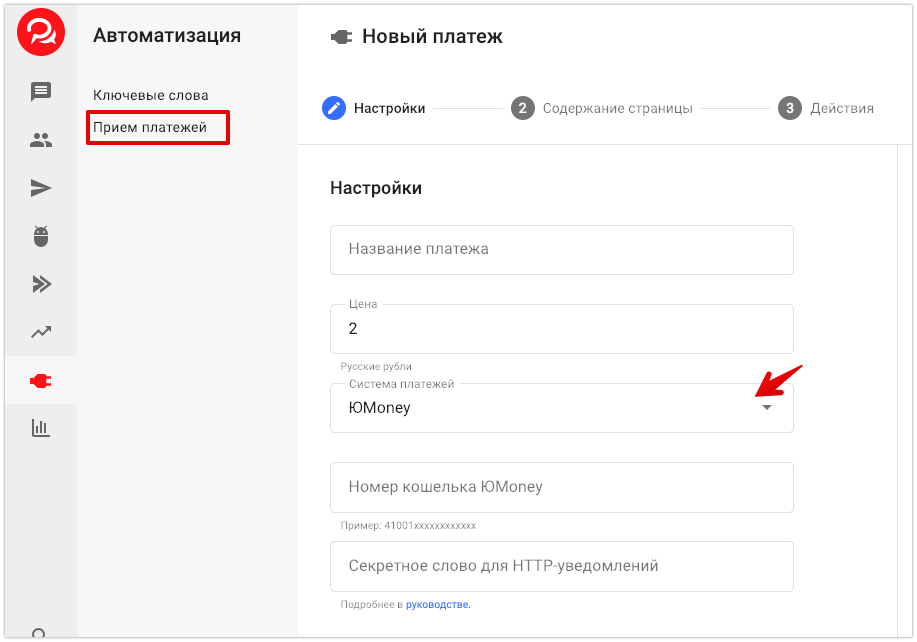
- In your BotHelp account, go to the “Automation” page — “Payment acceptance” and create a new automation.
- Enter the name of the payment: for example, “3 Photoshop lessons”. It will not be visible to people.
- In the “Price” field, enter the price in rubles. The minimum price is 2 rubles, the maximum is 15,000 rubles, according to the policy of Yoomoney.
- In the “Yoomoney wallet number” field, enter your wallet number. You can copy it from the “Settings” tab of the wallet.
- In the “Secret word for HTTP notifications” field, paste the secret key you copied earlier in the “HTTP Notifications” section.
In the “Page content” settings:
- upload an image for the landing page header. We recommend using low-height horizontal images, for example, 1200x300px, with a description of the product or service;
- enter the title and description of the product or service;
- enter the name of the button.
! The price of the product is NOT indicated on the landing page, so we recommend that you specify it in the name of the button. For example, “Pay 990 rubles.”

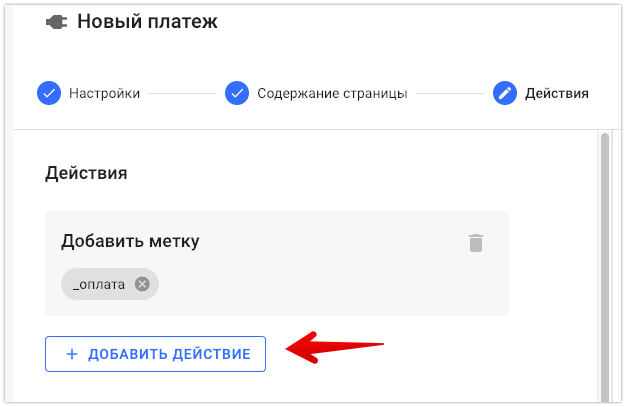
Actions
After creating the landing page, you can set up messages and actions for successful payment. For example, you can automatically add the desired tag, include and/or remove the user from an autofunnel, and send a message.
! The specified actions and messages will not work for Instagram* channels.
Testing
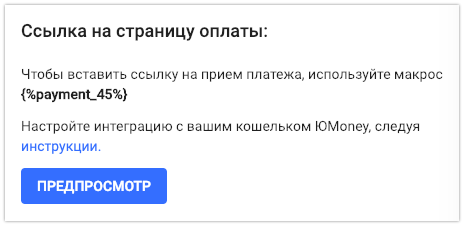
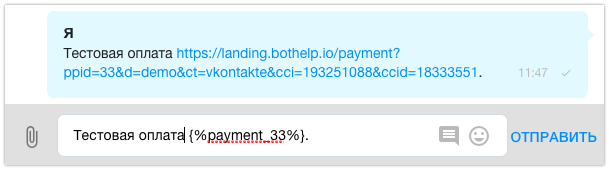
After setting up, be sure to check the automation operation. Go to the conversation with your profile and edit the macro of the created automation.
For example, {%payment_33%}. The macro is specified in the automation settings.
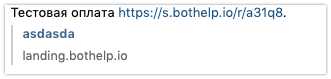
Example of a message:
Please note! The payment link is formed after sending the message and only works within the correspondence with this user. You cannot send this link in another messenger or to another user. You cannot use this link in another service. The payment works only through a macro.
Follow the link from the message in your messenger and test the payment. After a successful test, you can use this macro in other messages in the chain.
Tracking conversions and payments
Yandex Metrika and Google Analytics
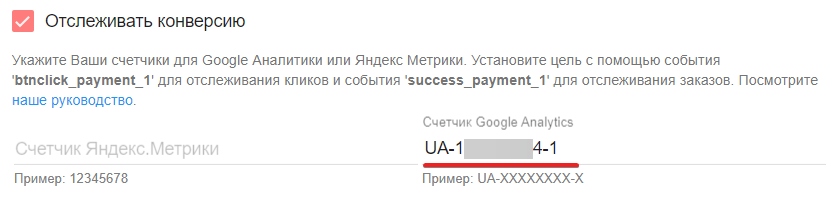
Add the counter codes to the payment page.
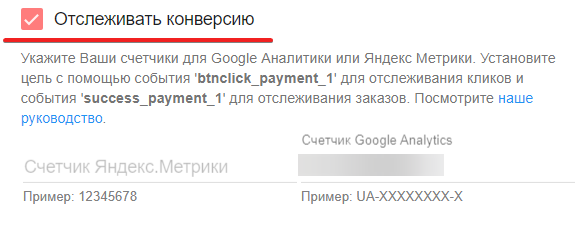
In the payment settings, activate the “Track conversions” checkbox, add your Yandex Metrika and/or Google Analytics tag numbers to the appropriate fields and click Save. You can find the tag number in the service account.
Set up goals in Yandex Metrika
Next, you need to set up the tracking of clicks on the subscription button using goals.
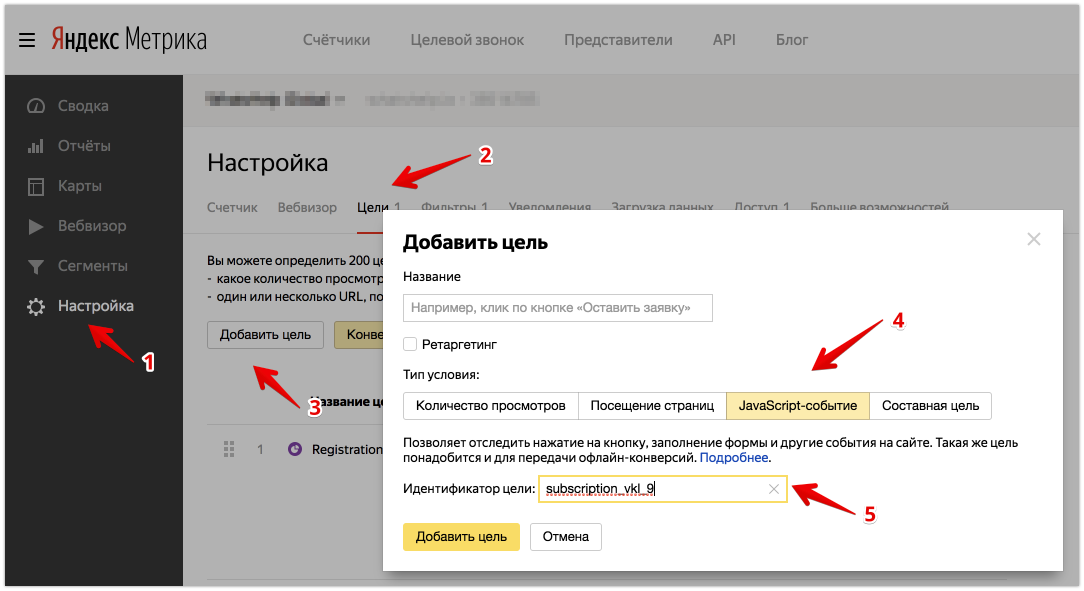
- Go to your Metrika account, then to “Settings” (1).
- Open the “Goals” tab (2) and create a new goal (3).
- Enter the goal name and select the “Javascript event” condition type (4).
- Then copy the event name from the prompt under the checkbox (see the previous screenshot) in the “Goal ID” field (5) and click Add Goal.
Events:
- btnclick_payment_N (where N is the ID of your payment page). This event is sent when a button is clicked on the payment page.
- success_payment_N (where N is the ID of your payment page). This event is sent when customers visit the successful payment page. To go here, the customer has to click the “Return to the store” link after payment. Therefore, it is likely that there will be a little more payments than sent events and counted conversions.
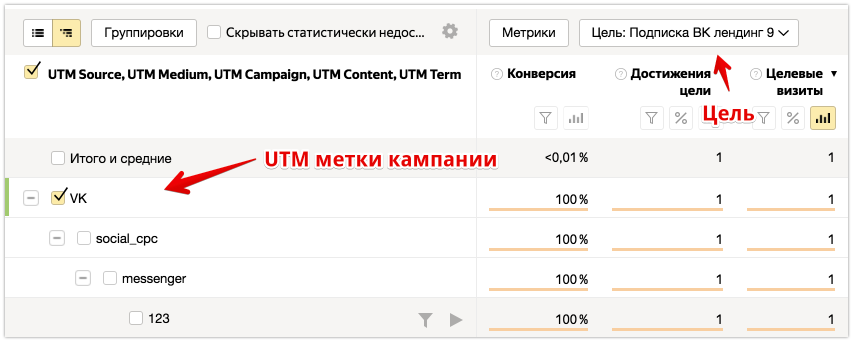
Next, in the “Conversions” report, you can see the number of conversions for each specific payment, and in the “UTM tags” report, if you select the appropriate goal, you can see the tags of the advertising campaign to evaluate the effectiveness.
Set up goals in Google Analytics
Copy the counter code: In Google Analytics, go to settings: “Administrator” — “Tracking” — “Tracking code”.
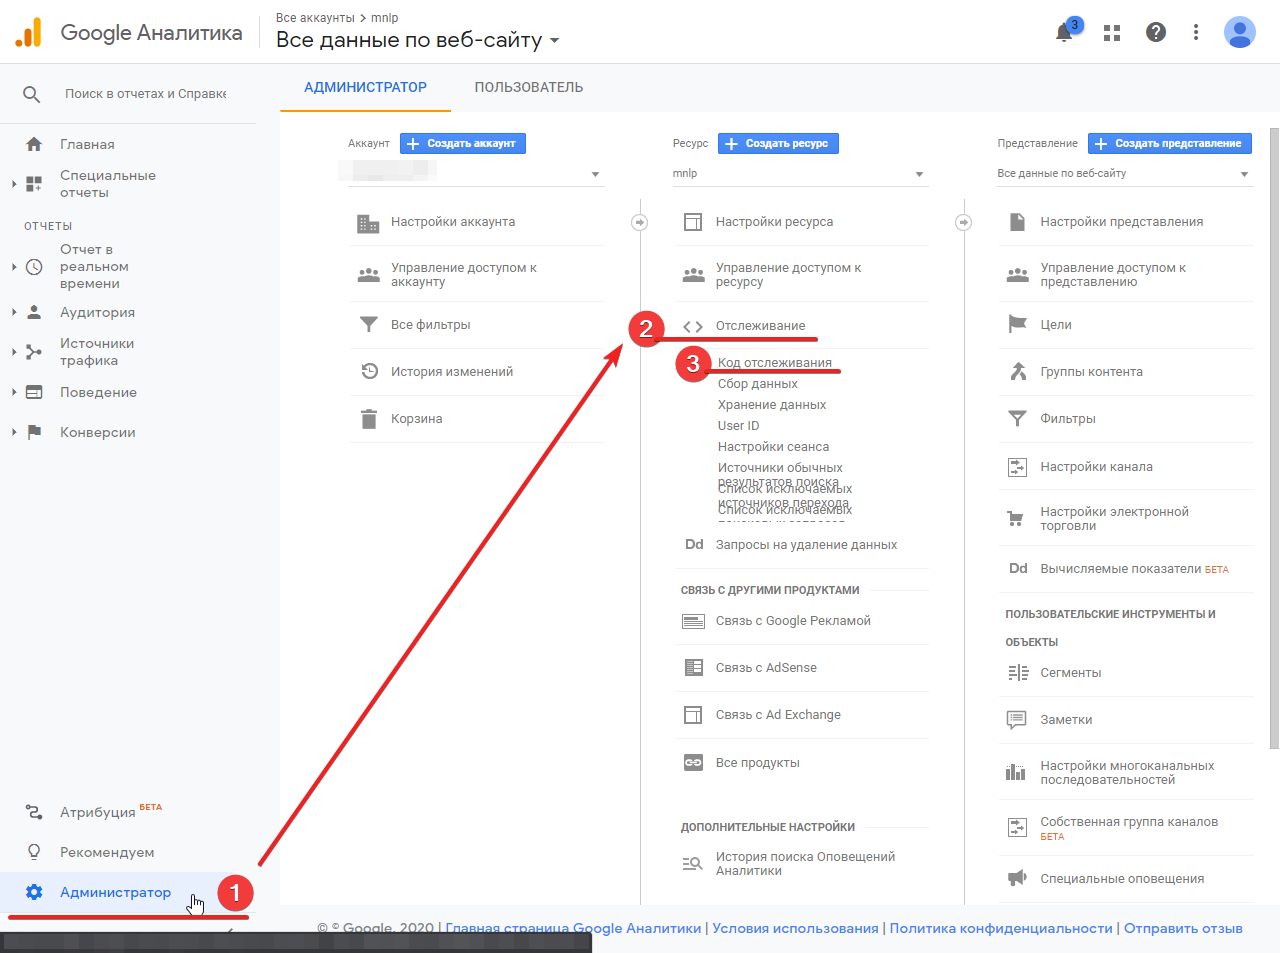
Copy the tracking ID.
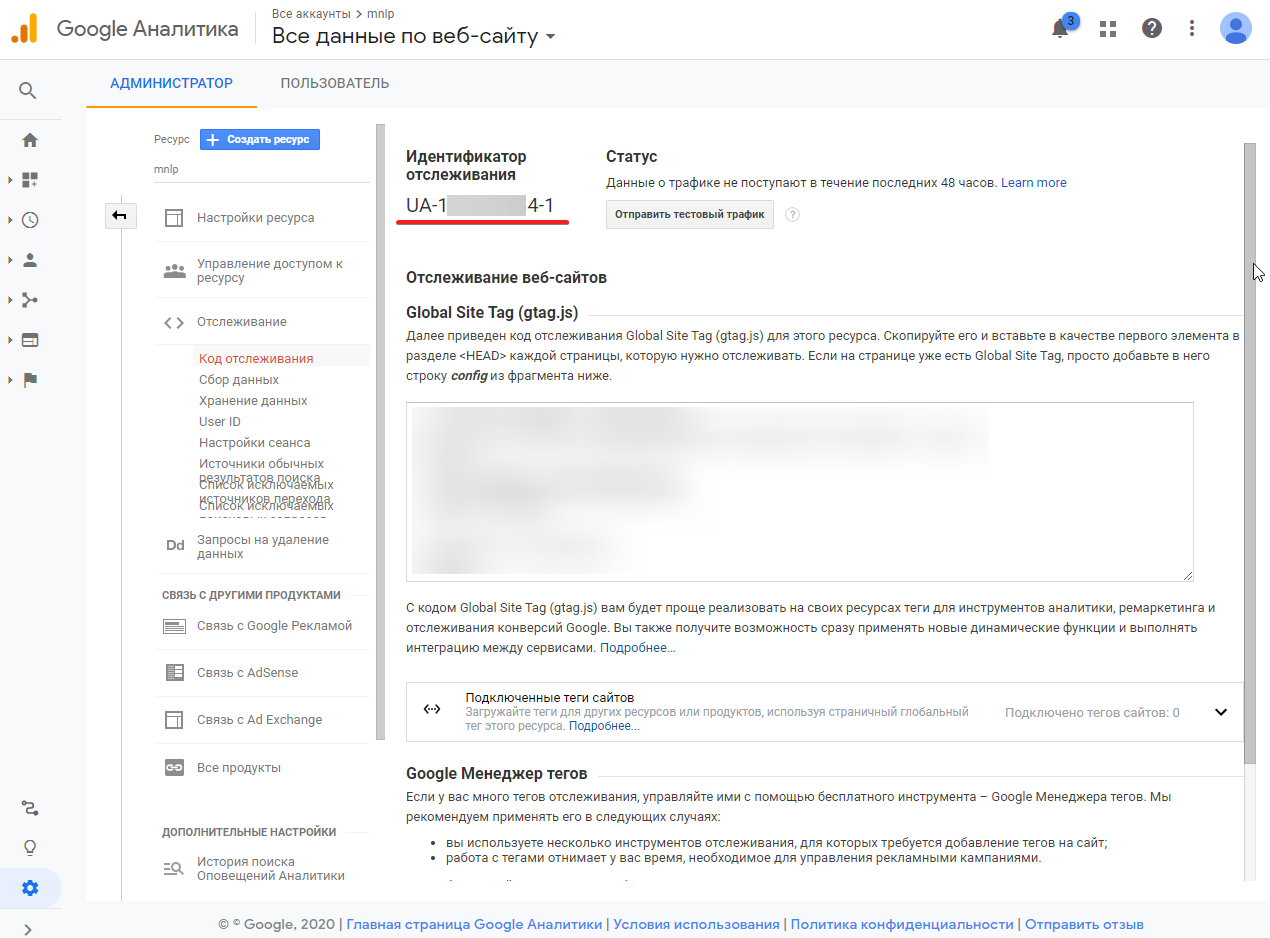
Insert the ID in the field.
Set up goals: In Google Analytics, you need to create an event-based goal.
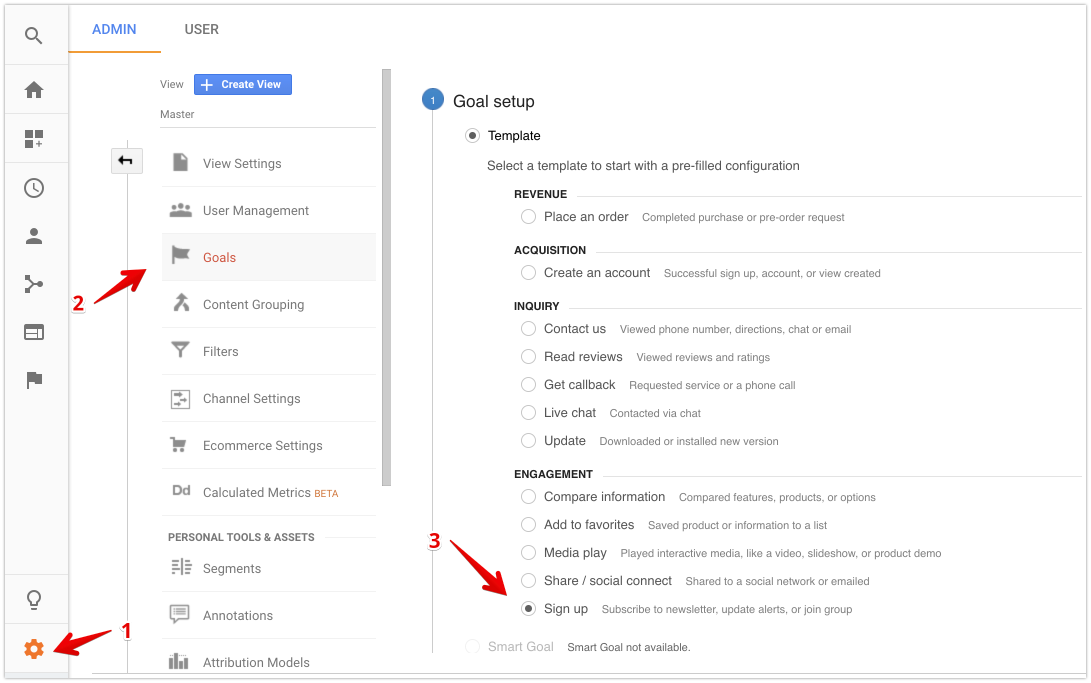
- To do this, open your Google Analytics account settings (1) and create a new goal (2).
- For the goal, you can select the “Sign Up” type (3) or “Place an order”.
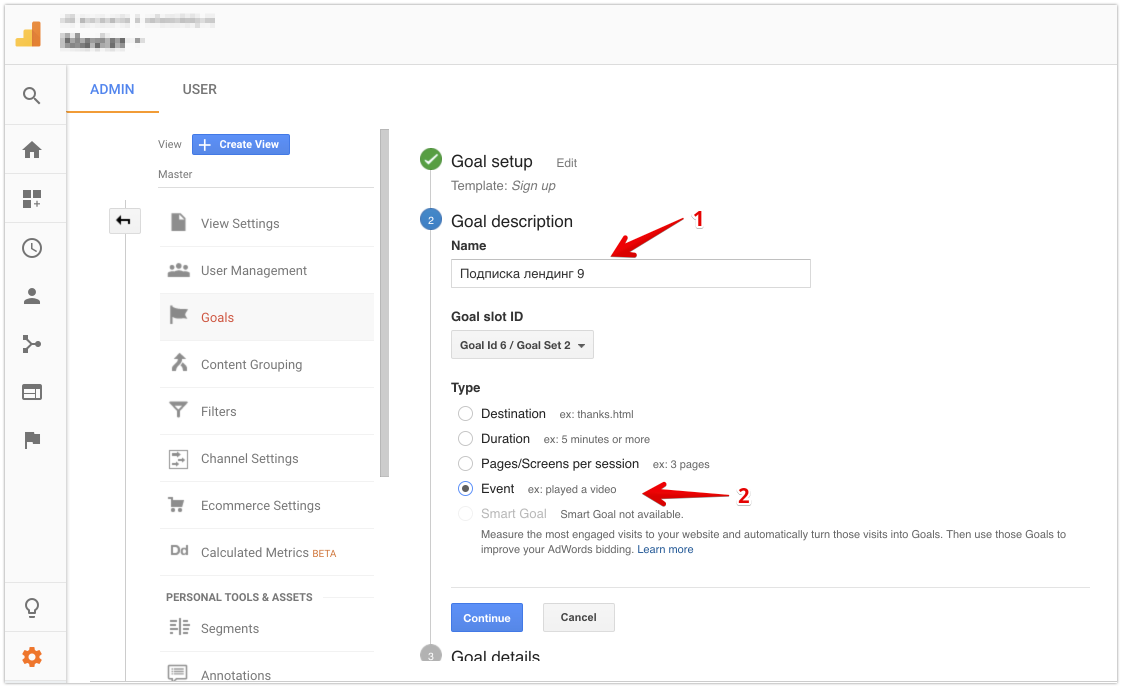
In the second step, enter the goal name (1) and select the Event goal type (2).
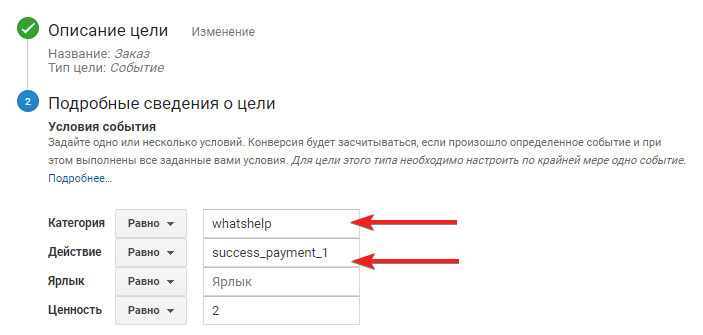
Then in the third step:
- in the Category field, enter the goal category “whatshelp” (1);
- in the Action field, enter the name of the click action or the name of the successful payment. The latter is indicated in the prompt on the payment settings page (see the screenshot in the section “STEP 1: Add the counter codes to the payment page”);
- save the goal.
After setting up, you can make sure that the events arrive in Google Analytics and everything is done correctly.
Try to pay for the test product.
Check for the goals in the Conversions section, select Goals — Overview.
Please note that the data in the reports is displayed with a significant delay (sometimes up to 24 hours).
Next, you can track effective campaigns and traffic sources in goal reports or traffic source reports.
* Owned by Meta, an organization recognized as extremist and banned in Russia.
If you haven’t found the answer to your question, contact us in the chat in your profile or email hello@bothelp.io😃
Get 14 days of full functionality of BotHelp, a platform for creating broadcasting, autofunnels, and chatbots.