With the help of processes, it is possible to send information about the person and their order from GetCourse to BotHelp in order to interact with the person through the flow. For example, the flow process and settings can be used to track webinar attendance.
GetCourse setup steps
1. Creating a product
- Go to the “Sales” — “Products” section and click Add Product.
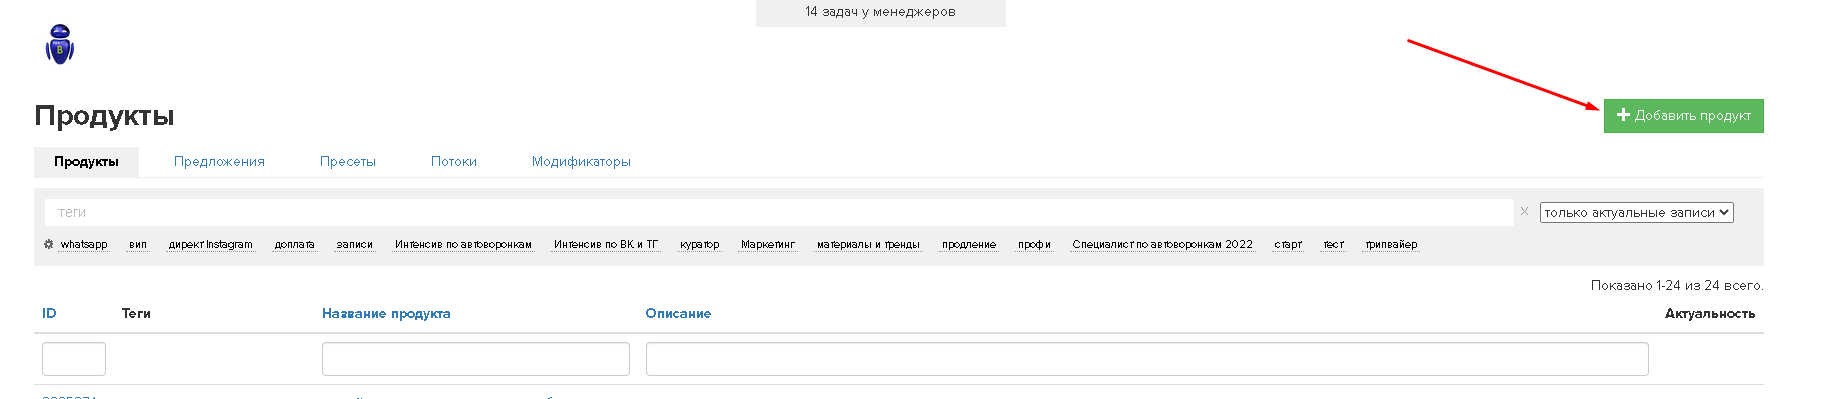
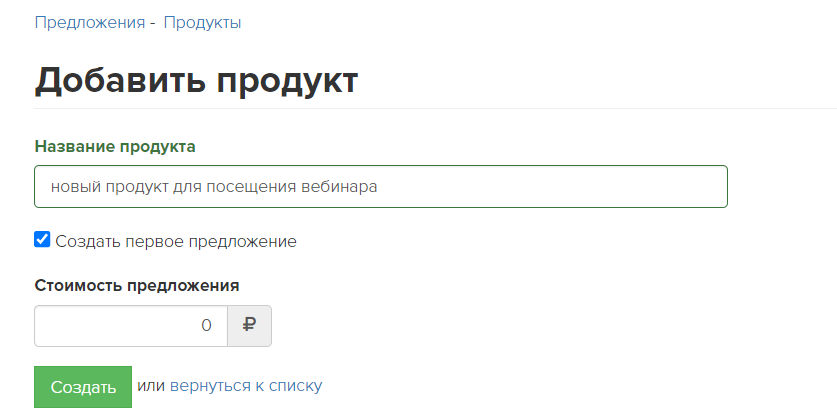
- Give the product a name.
- The price of the offer has to be 0.
- Further, such an offer will be called a “null offer”, and orders for this offer will be called “null orders”.
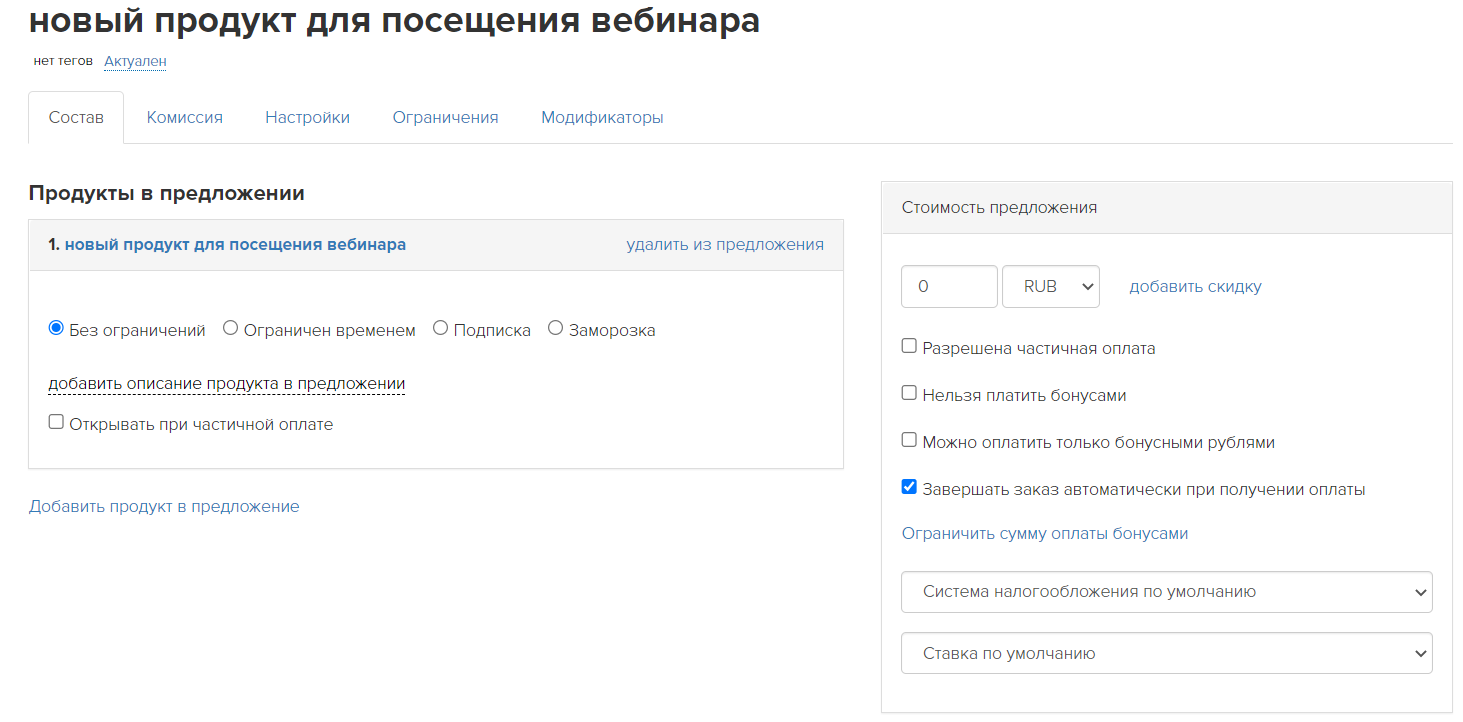
- After saving the product, go to the “Offers” tab and open the created offer (its name matches the product name).
- Make sure that the “Complete order automatically upon receipt of payment” checkbox is active for the offer.
- Then the orders for this offer will automatically switch to the “Completed” status.
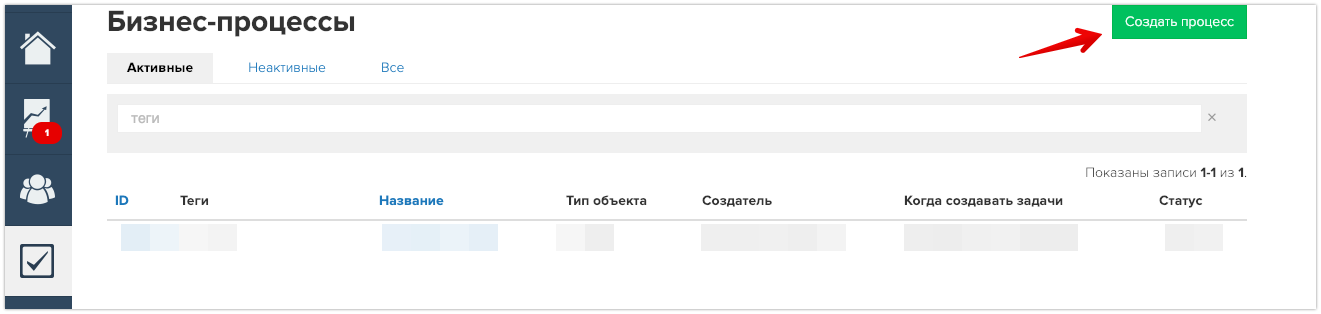
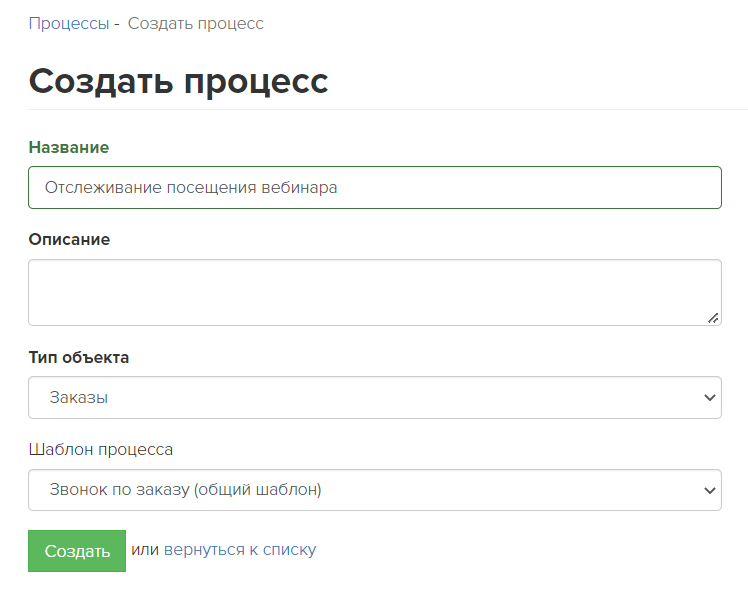
2. Creating a process
- Go to the “Tasks” section — “Processes” and click the Create Process button.
- Enter the process name.
- Select the “Orders”object type.
- You don’t need to enter anything in the “template” field — the “without template” option.
- Click the Create button.
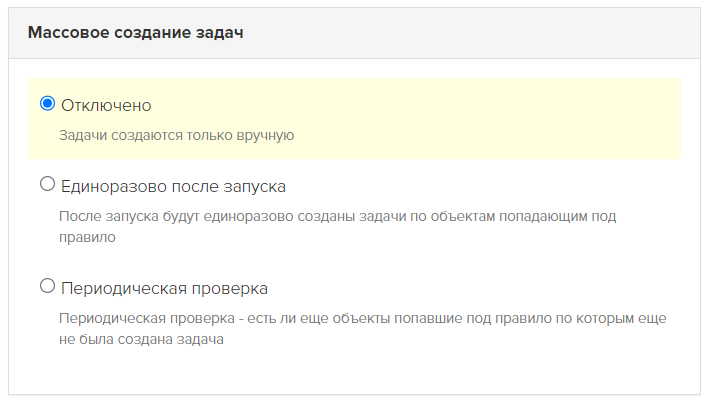
3. Process setup
- In the settings of the created process, in the “Mass task creation” section, select “Disabled”.
- We will automatically run this process from the registration form before the webinar (see below).
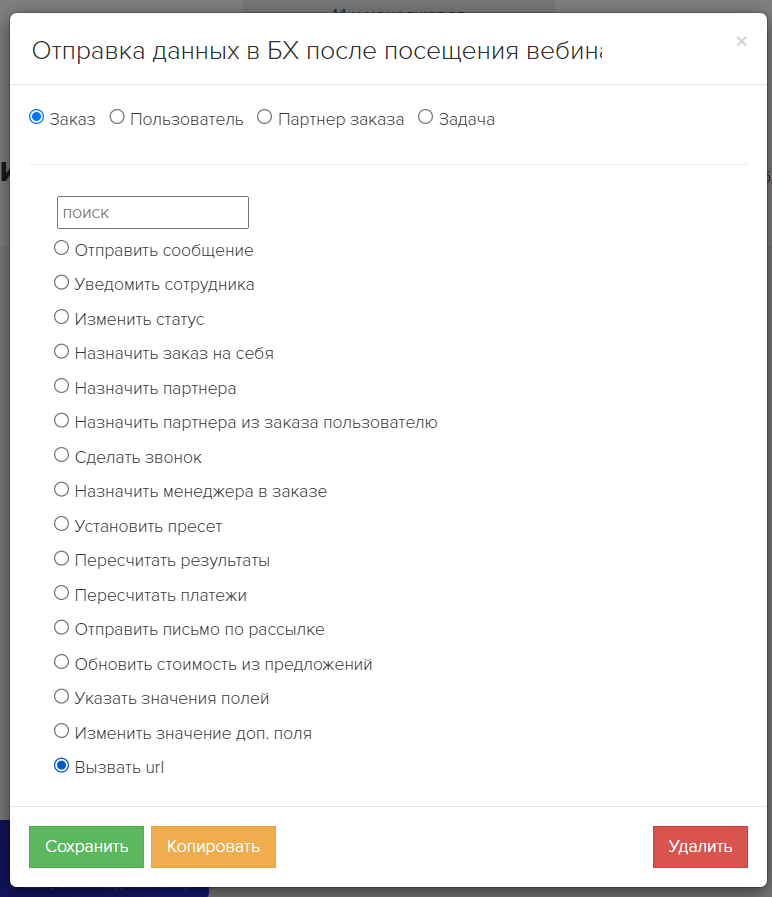
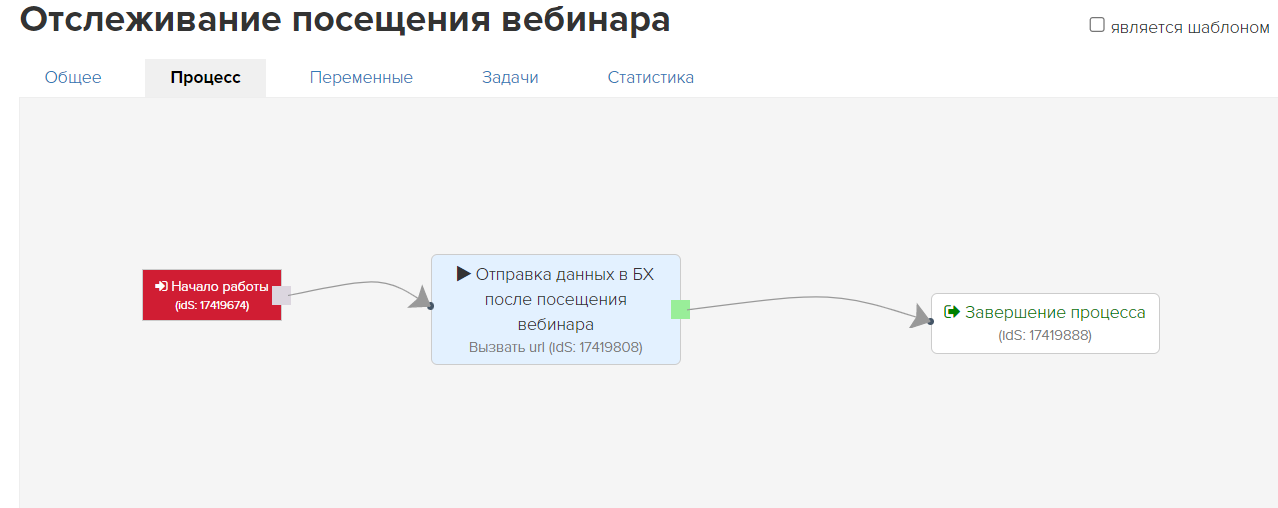
4. Creating process logic
- In the settings of the same process, go to the “Process” tab to set up the logic of the process itself.
- Add the “Operation” block.
- Enter the block name.
- The block should work according to the “Order”.
- The type of operation is “Call URL”.
- In the block settings, select the “POST” method.
- Insert the link in the URL column:
https://gc.bothelp.io/callback?email={object.user.email}&phone={object.user.phone}&order_status={object.status}&offers={object.offers}&domain_name={%Your domain is in Bothelp%}
- What is this link for?
- Using this link, GetCourse sends data about the person and their order to BotHelp so that the flow can further verify the condition.
- This link contains the necessary information about the person and their order:
- email — email address of the person. According to it, BotHelp finds a specific person in its database. This is a required field.
- domain_name — the name of your profile in BotHelp. Using this field, BotHelp understands in which profile to look for a person with such an email. This is a required field.
- phone — the person’s phone number. BotHelp can also use it to find a specific person in its database if there are several people found by the mail. This is an optional field.
- order_status — the person’s order status. This is a required field.
- offers — the number of the offer for which the person placed the order. This is a required field.
- Important! In the domain_name column instead of the text
{%Your domain in Bothelp%}you have to specify the domain of your profile in BotHelp.
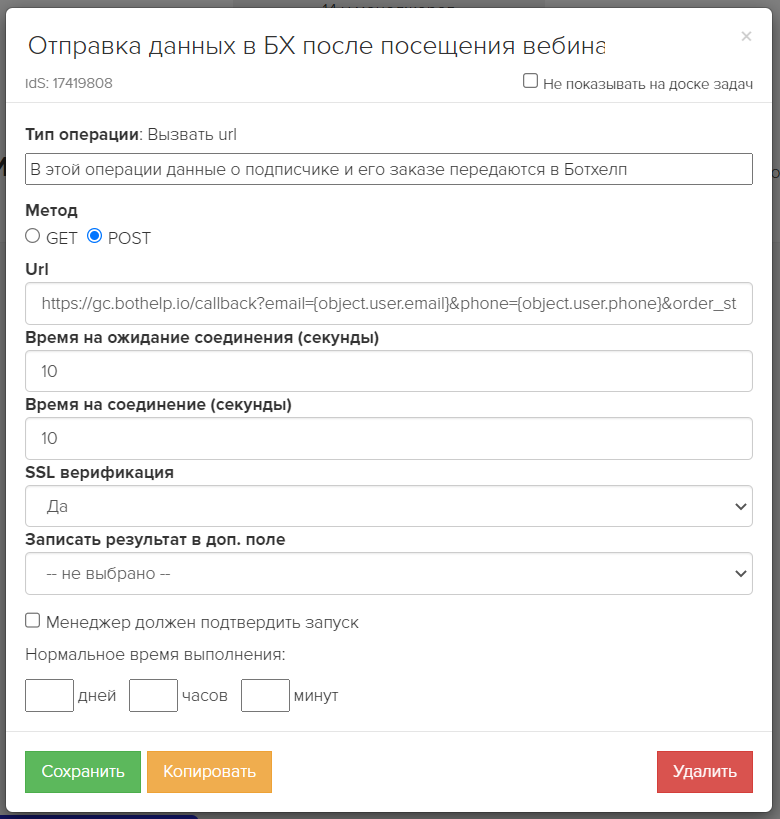
- Save the block.
- Add the “Process Termination” block and establish the links between the blocks.
- The final process should look like this:
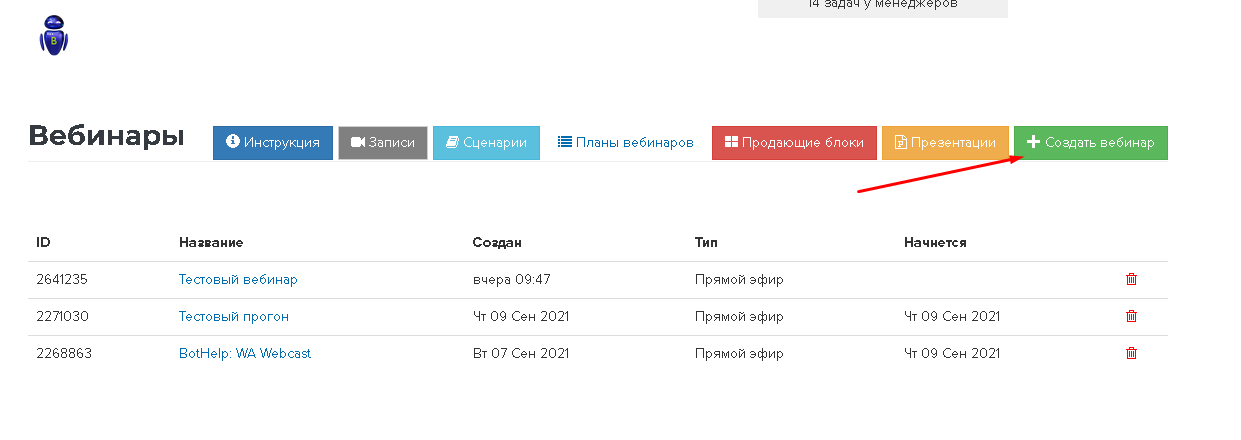
5. Creating a webinar
- Go to the “Website” section — “Webinars”.
- Click Create Webinar.
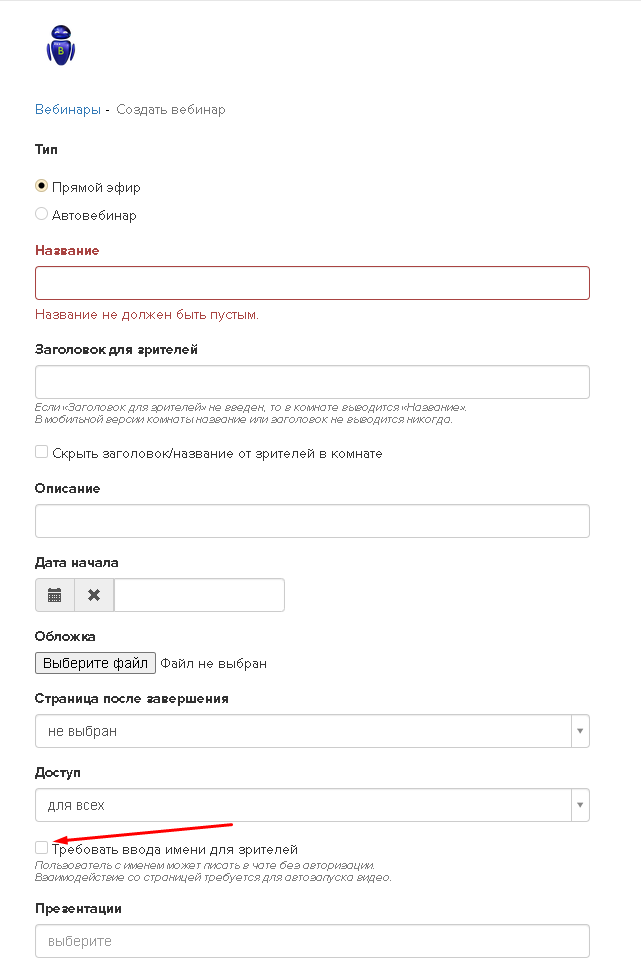
- In the webinar settings, you can uncheck the “Require name input for viewers” box.
- If you leave a check mark, GetCourse will request the person’s name before entering the webinar room. This name will be displayed in the webinar chat.
- Fill in the required fields in the webinar settings.
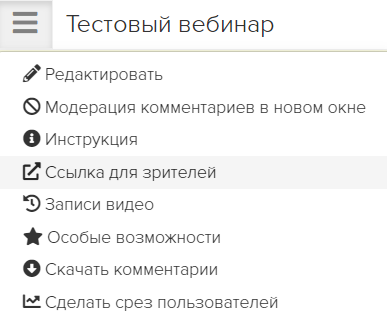
- After creating the webinar, select “Link for viewers” in the settings and copy the received link. Then you will have to add it to the registration form settings.
6. Create a registration form to enter the webinar
- Go to the “Website” section — “Pages”.
- Add a new page.
- Go to the page editor and add the standard “Regular Form” block.
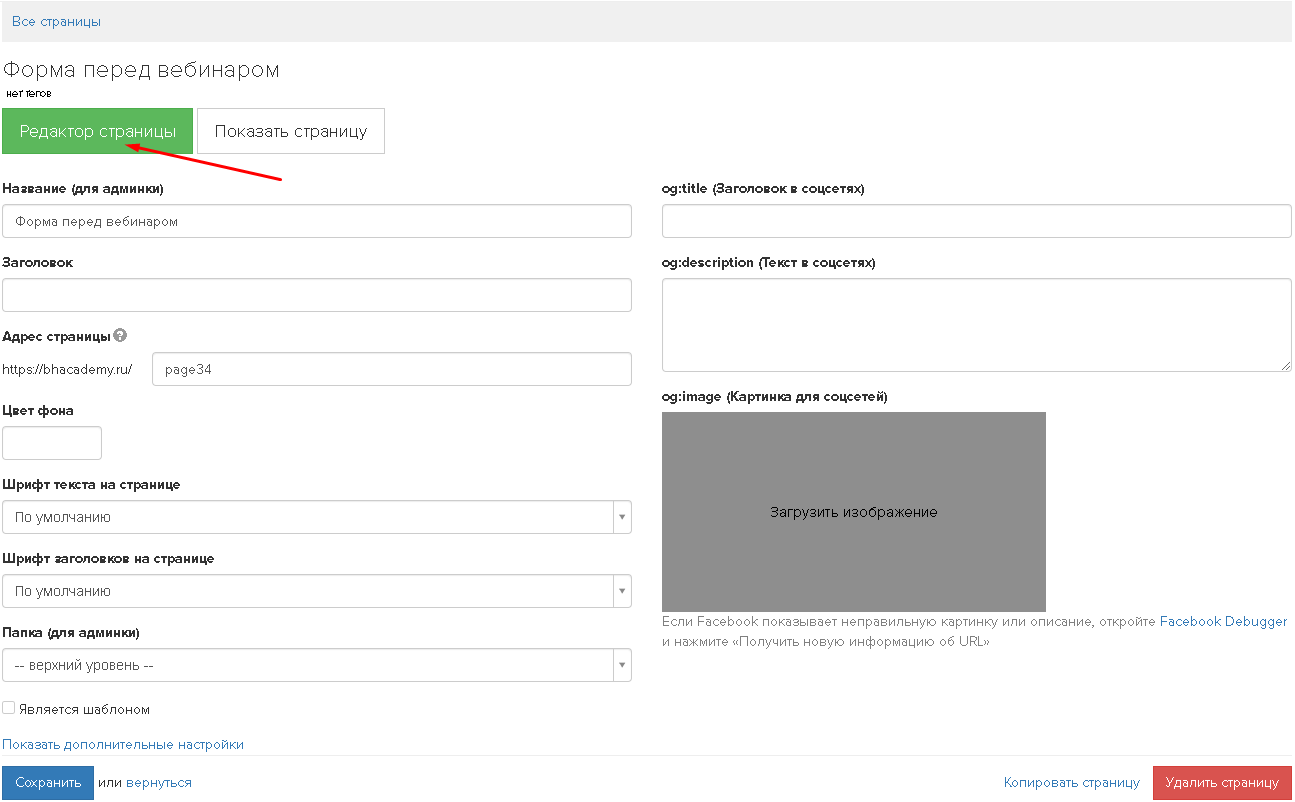
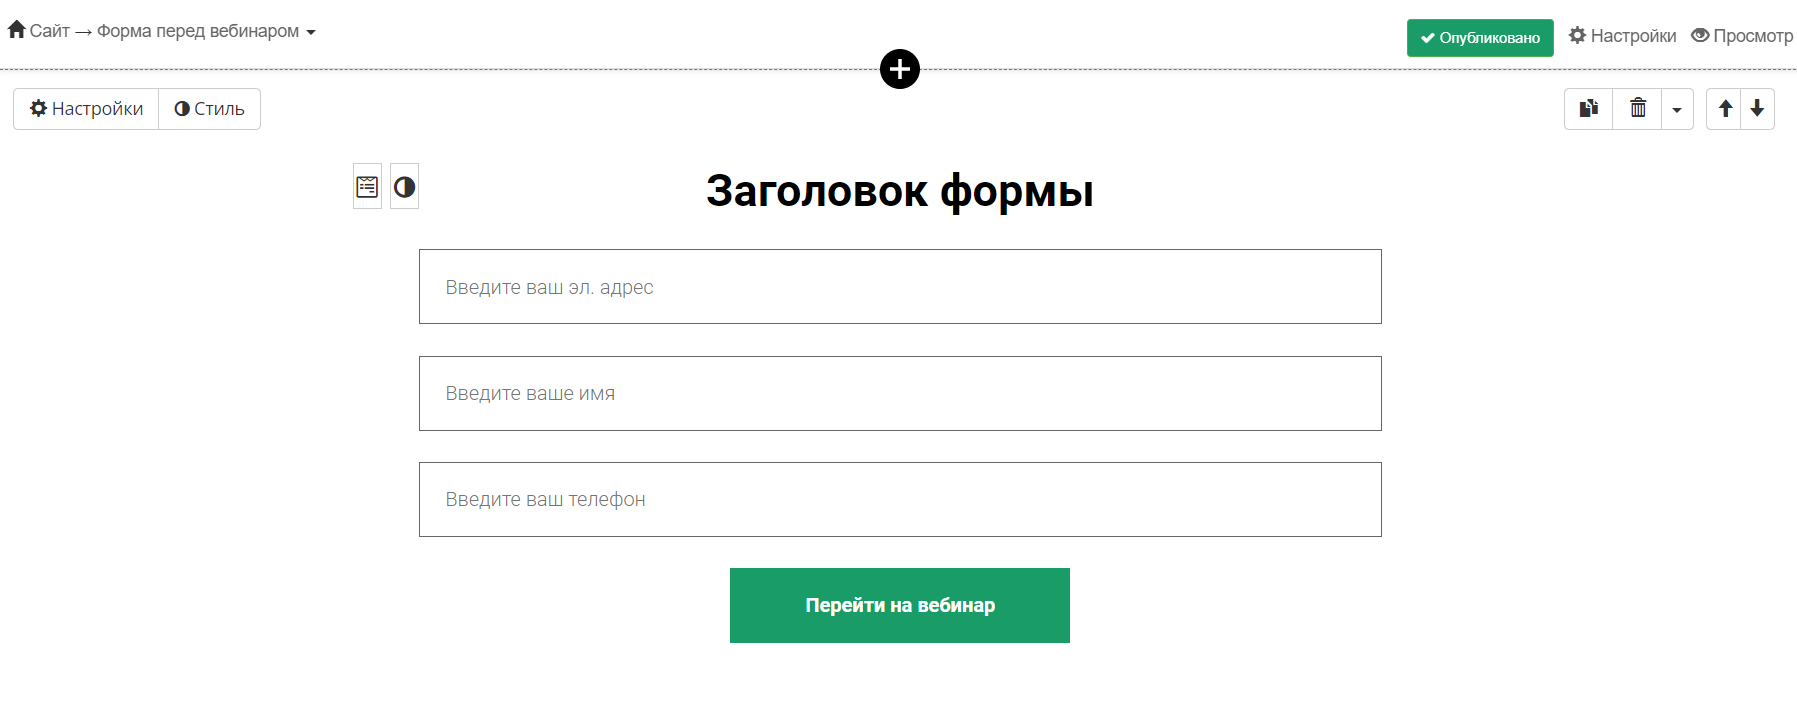
- Go to the form settings.
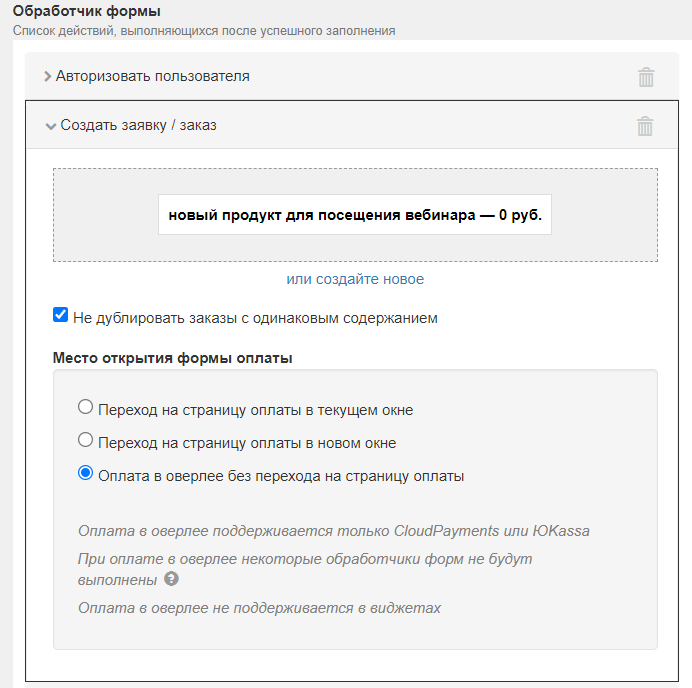
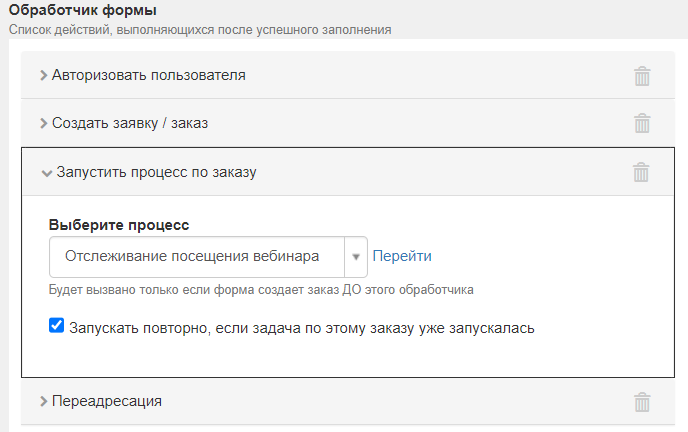
- In the “Form Handler” section, add the following actions (in the same order):
- “Authorize the user”.
- “Create a request/order.”
- “Start the process according to the order.”
- “Forwarding”.
- In the “Authorize user” action, you have to enter “Partial authorization”.
- In the “Create request/order” action, enter the null offer that was created to verify attendance at the webinar.
- Be sure to activate the “Do not duplicate orders with the same content” checkbox.
- In the “Run process on order” action, enter the process that was created earlier.
- Activate the “Restart if the task has already been started for this order” checkbox.
- In the “Forwarding” action, provide a link to the previously created webinar.
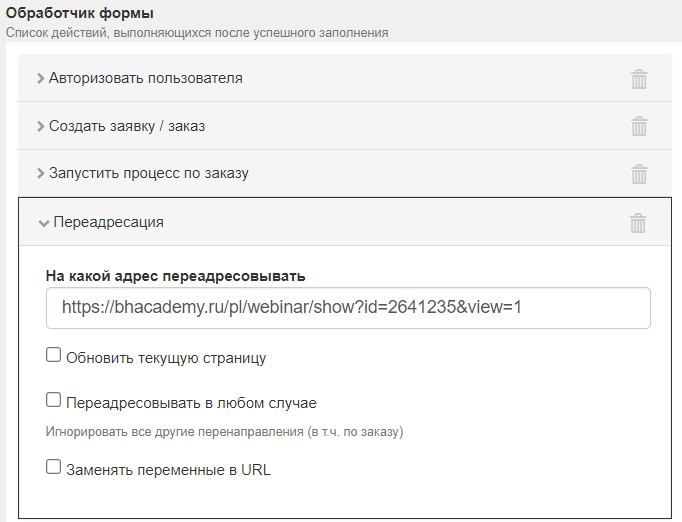
- Save the form and post the changes on the page.
- Done! You can send your people a link to the form page so that they can join the webinar.
Important! If the person has already logged in to GetCourse from their device, then they will not have to fill out the form again before the webinar — it will be filled out automatically. If the user accesses the webinar from another device, they will have to re-log in via the form.
Setting up a funnel in BotHelp
First, you have to create a standard warming chain. Send useful content and take other engaging steps.
At the moment when the webinar is scheduled, set a link to the webinar in the flow step or send it in another way convenient for you. You can use delays to send messages at the exact time.
After the start of the webinar, set a condition for tracking the order status in GetCourse, specify the ID of the null offer and the “Completed” order status.
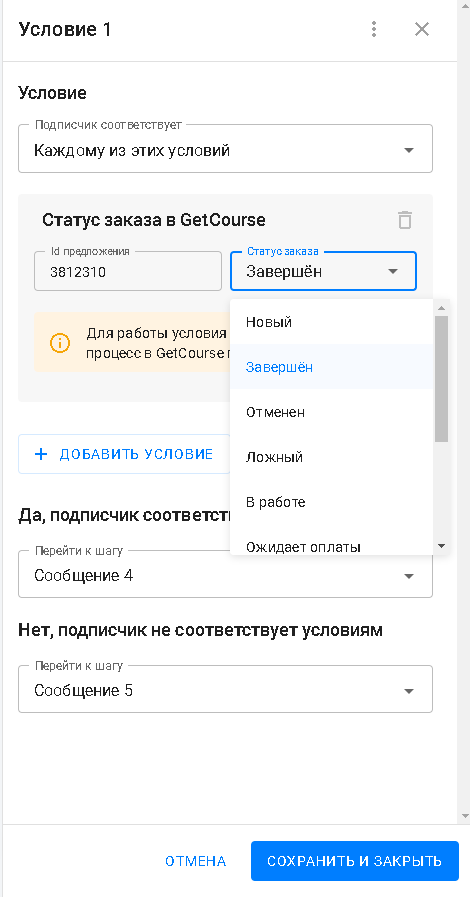
Set the transitions from the condition along the “Yes” and “No” branches to different steps. On the “No” branch, you can set a similar condition again after a while in order to track users who came a little later.
The basic branch with the verification of webinar attendance will look like this:

If you haven’t found the answer to your question, contact us in the chat in your profile or email hello@bothelp.io😃
Get 14 days of full functionality of BotHelp, a platform for creating broadcasting, autofunnels, and chatbots.