On your website, you can place messenger buttons that launch flow chains.
Setting up
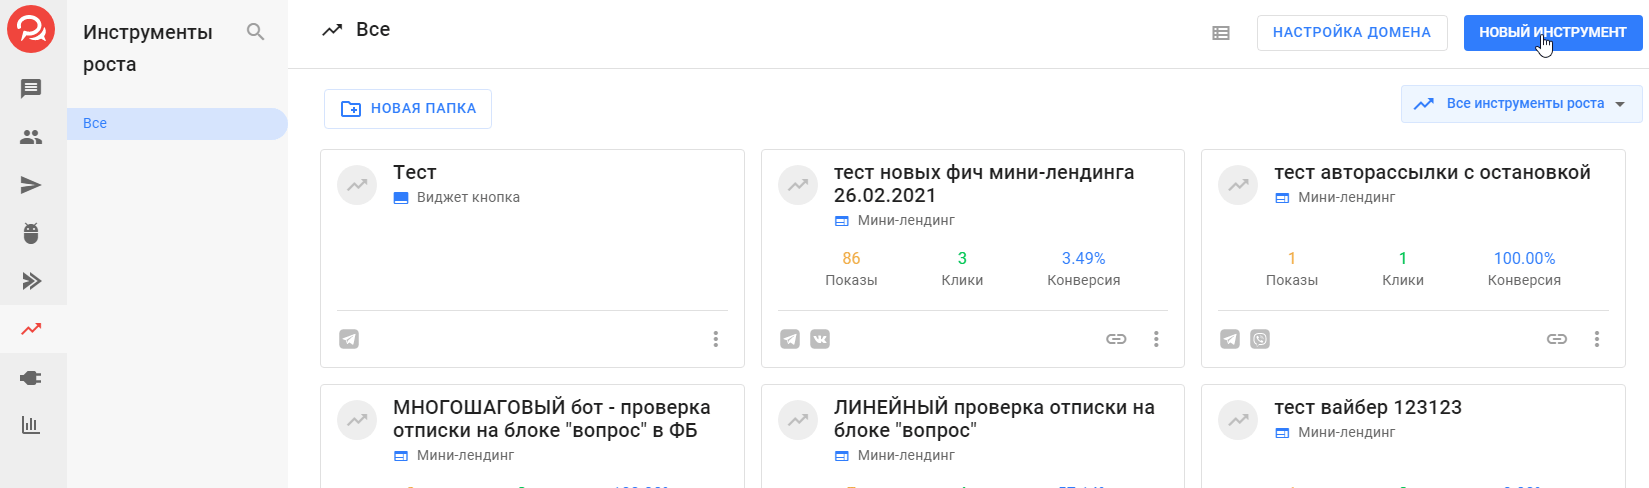
- In the “Growth Tools” section, select the “Widget button”.
- Enter the name of the widget and the tags that will be assigned to the person when the funnel is launched.
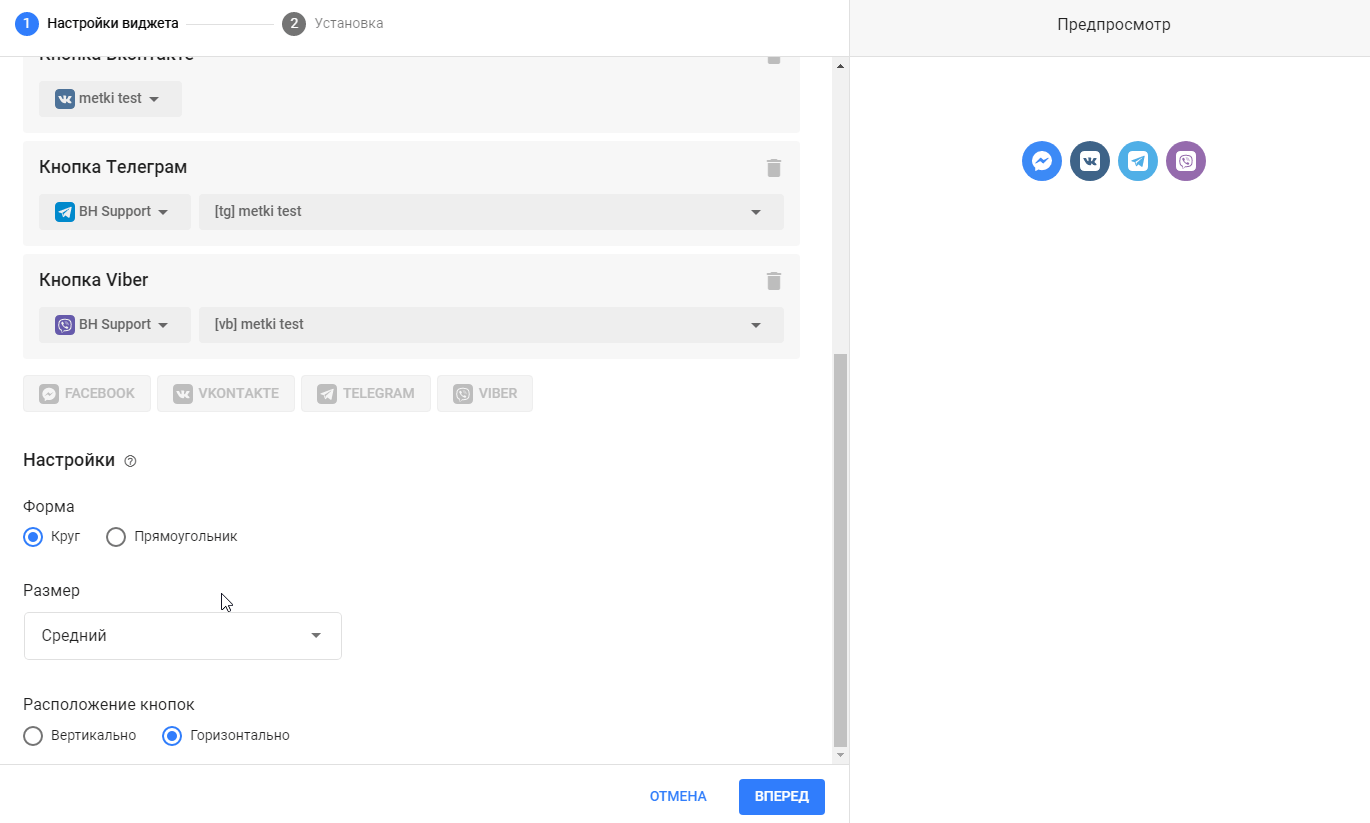
- Add the buttons that will be displayed in the widget.
- You have to select a flow or a sequence that will be launched when you subscribe.
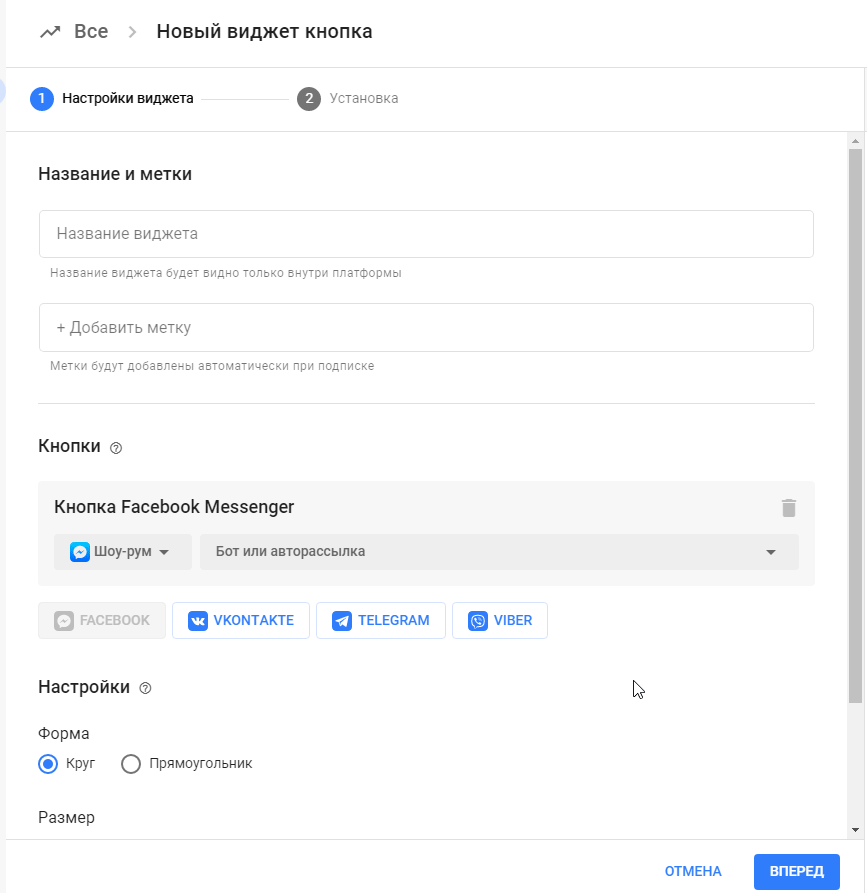
- Set up the visual display of the widget on the website. The result can be seen in the preview field on the right.
- Go to the next step to install the widget. When you create the widget for the first time, you will see the Forward button. After editing the widget, you can save it.
Installation
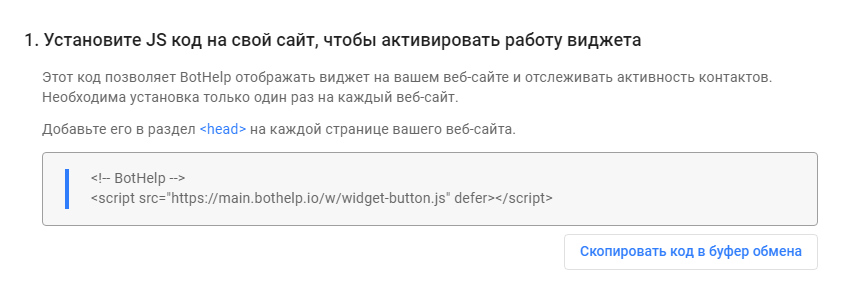
- Install the javascript code on your website. This code allows BotHelp to display a widget on your website and starts the funnel chain. Add it to the <head> section on each page of your website where the widget will be used.
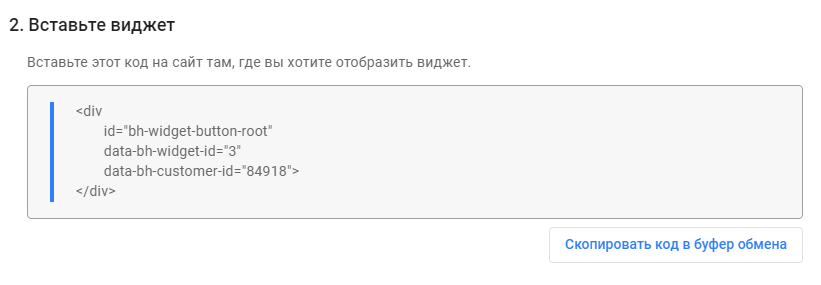
- Insert the widget. This code allows you to place buttons on the site. Paste it where the widget should be displayed.
Important! It is enough to install the code on the website once. In the future, it will be possible to change the display and funnel directly in the widget settings in the profile. Everything on the website will change automatically.
You can also use the Subscription Widget growth tool on the site.
Transmitting UTM tags and parameters when subscribing from the widget button
If the widget buttons are installed on a site with UTM tags and other parameters added to the link, the tags will be transferred to our platform when the flow chain is launched.
IMPORTANT! This works for Telegram, Viber, Facebook* and Vkontakte.
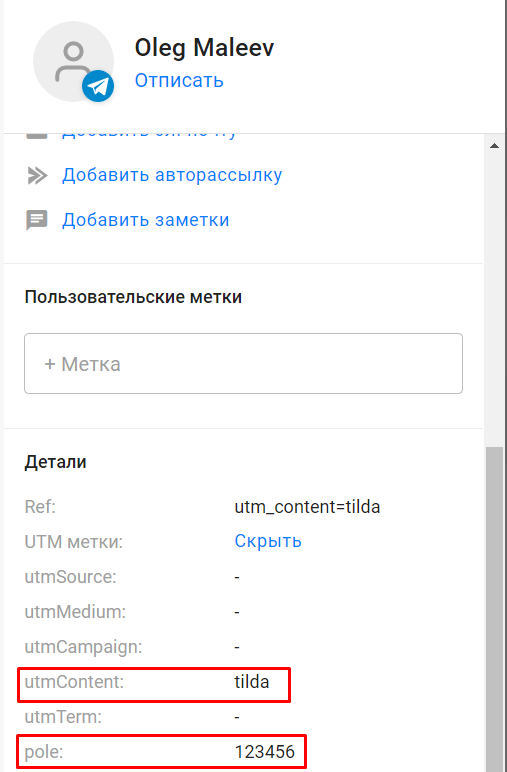
Example of a link to a website with the UTM tag “utm_content” and the custom field parameter “pole“:
https://768767.tilda.ws/landing_widget?pole=123456&utm_content=tilda
After subscribing from the widget button on the site, if the site’s link contains the named parameters, their values will be recorded in the person’s card in the appropriate fields. To do this, the site’s link must contain the specified parameters.
(!) If the required custom field is not yet available in the person’s card, the data will not be recorded. In other words, first, the field has to be created.
Frequently asked questions
How to track conversions with a Facebook pixel* when installing a widget on a website?
You have to insert the pixel code on the website. Conversion tracking and other analytics in the case of using widgets are on the user’s side.
How to set up data collection (email, phone) on the website via the widget?
You can only launch a flow from the widget. Data collection can be configured in the flow itself.
Is it possible to transfer UTM tags when subscribing from a widget button?
Yes, if the widget button is installed on a site with UTM tags added to the link. Then the tags will be transferred to our platform when the user subscribes.
Is it possible to insert multiple widgets in different blocks on the same web page?
Yes, you can use multiple widgets on a page. It is also possible to combine widgets on the site.
What to do to change the layout of the widgets?
- For horizontal alignment, you have to do the following:
Add one of the following properties to your container:
style=”display: flex; justify-content: flex-start” (at the beginning, by default)
style=”display: flex; justify-content: center” (centered)
style=”display: flex; justify-content: flex-end” (at the end)
Example:
<div id=”bh-widget-button-root” data-bh-widget-id=”100″ data-bh-customer-id=”100″ style=”display: flex; justify-content: center”></div>
- The vertical position depends on where you inserted the container.
Example:
<div>Section 1</div>
<div>Section 2</div>
<div id=”bh-widget-button-root”>Button widget</div>
<div>Section 3</div>
In this case, the widget will be between blocks Section 2 and Section 3.
- To make them at the very bottom, you have to change the structure to the following:
<div>Section 1</div>
<div>Section 2</div>
<div>Section 3</div>
<div id=”bh-widget-button-root”>Button widget</div>
How to remove the “Made on BotHelp” mark
It can be removed using CSS styles. To do this, add this to the CSS code of the page:
.bh-powered-by { display:none !important;}
If your site is based on a constructor in which the CSS code cannot be changed, then before inserting the widget code, you have to add the code:
<style>.bh-powered-by { display:none !important;}</style>
If the widget button is added on Tilda, you have to enter a slightly different code:
<style>.bh-w-powered-by { display:none !important;}</style>
* Owned by Meta, an organization recognized as extremist and banned in Russia.
If you haven’t found the answer to your question, contact us in the chat in your profile or email hello@bothelp.io 😃
Get 14 days of full functionality of BotHelp, a platform for creating broadcasting, autofunnels, and chatbots.