“External Request” can be found in the bot builder under the “Action” block in the dropdown list of actions.
Examples of how to use the “External Request” in bots:
-
“Subscriber chooses which Star Wars character they are”: link.
-
Sending the request.
-
Testing the request.
-
Description of simple JSON Path and saving data from the response to a user field.
-
Using the retrieved data in the bot.
-
Integration with Google Sheets to read data from a spreadsheet: link.
-
Setting up and preparing the Google account for integration.
-
Sending and testing the request.
-
Description of more complex JSON Path and saving data from the response to a user field.
-
Using the retrieved data in the bot.
-
Sending SMS via the SMS Aero service: video link.
-
Random number generator: link.
- Sending notifications to an agent in Telegram: link.
- Issuing certificates via the GramotaDel service: video link.
General Description
The “External Request” action allows you to:
-
Send requests to external services via their API. Available request types:
GET, POST, PUT, PATCH, DELETE -
Save data received in the response from the external service into the subscriber’s user fields.
-
Test the request and view the response in a modal window.
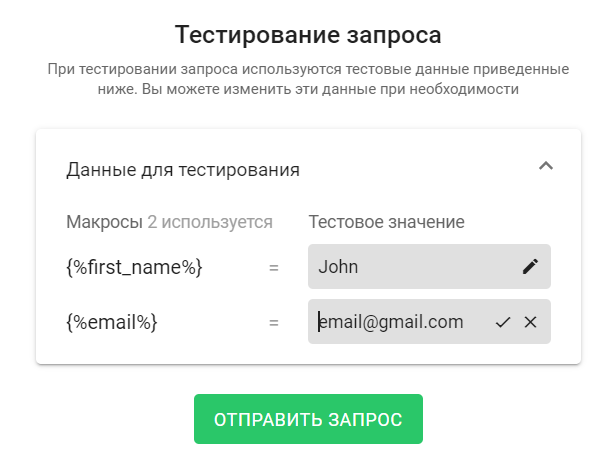
-
If macros are used in the request, test values will be substituted during testing and can be changed before the test.
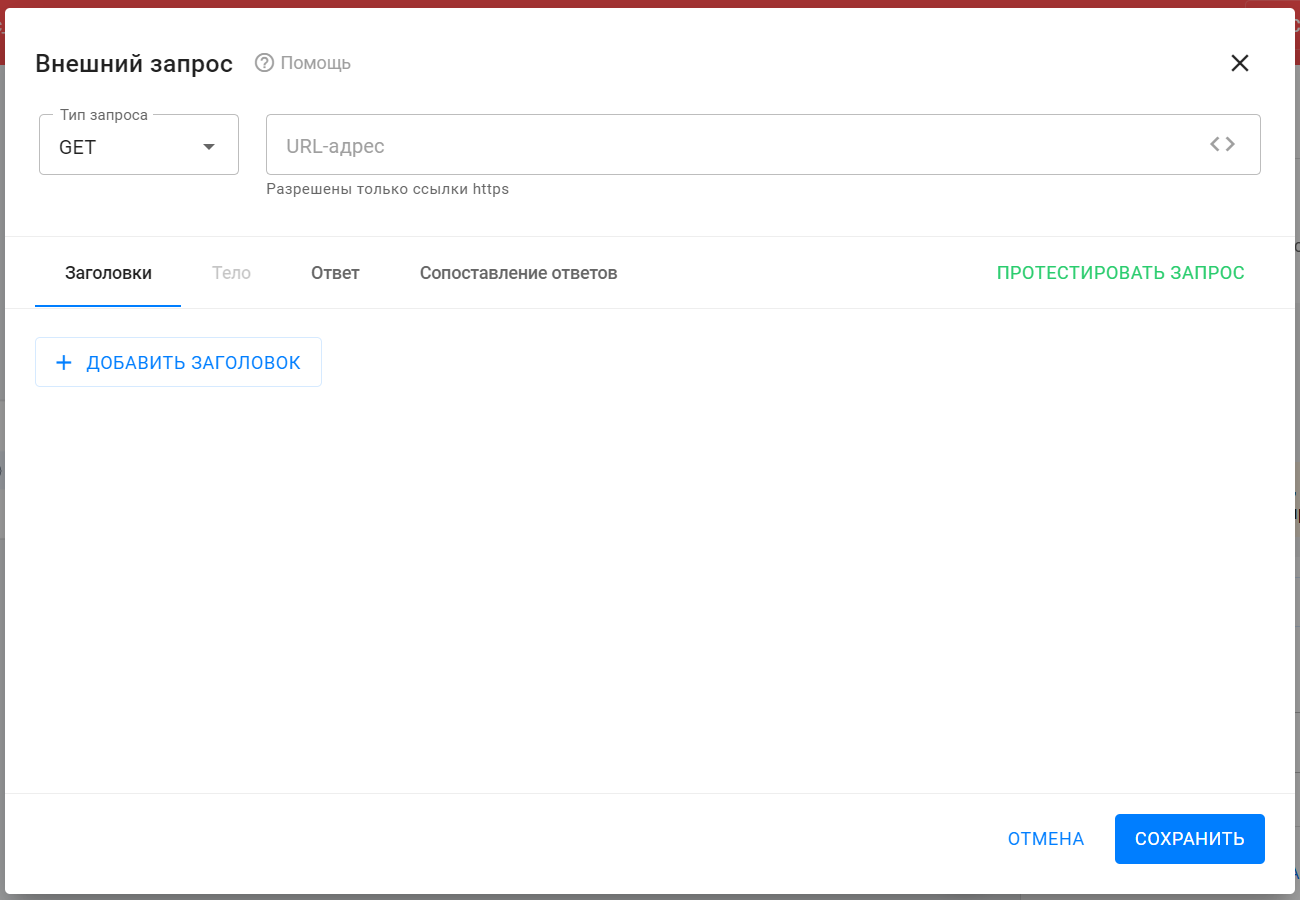
All “External Request” settings are configured in a separate modal window opened via the editor.
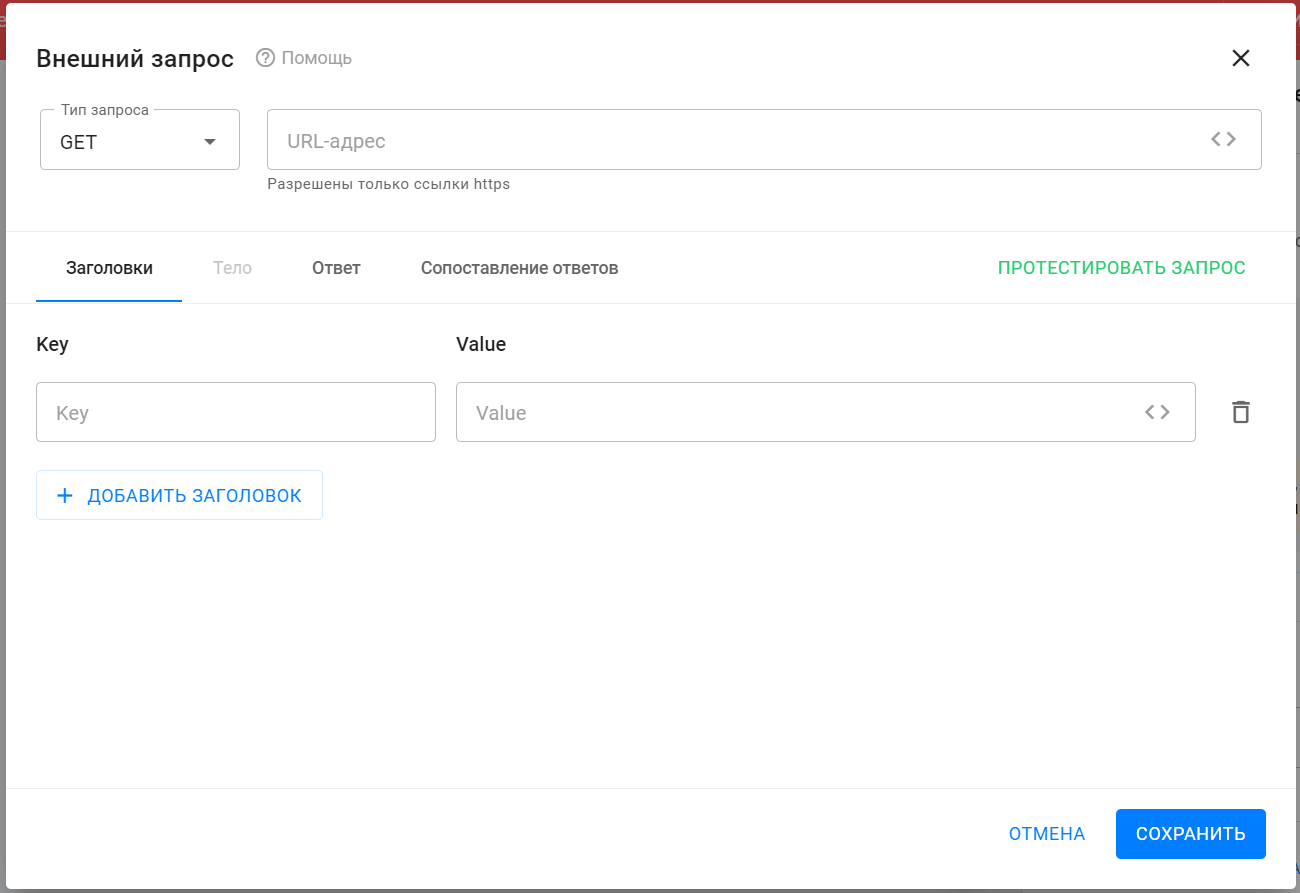
Request Type and URL
In the dropdown “Request Type,” select the type of request (check the external API documentation).
In the “URL” field, enter the request endpoint (also from the API documentation).
Standard macros can be used in the URL. To insert macros:
-
Place
?after the main link; -
Separate parameters with
&.
Example: link.ru?utm_content=1&{%field%}
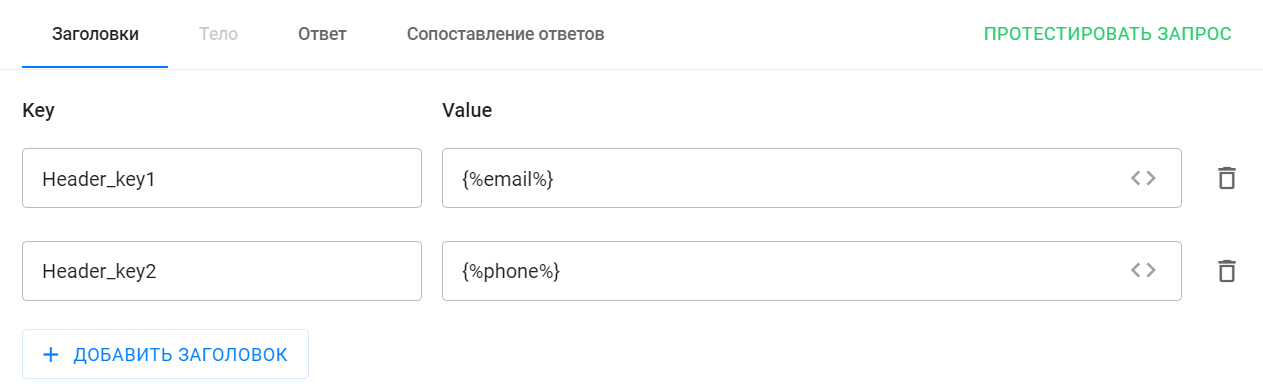
Headers
This section configures headers for the request.
You can:
-
Add/remove headers;
- Use macros in header values, so values will differ per subscriber.
Important: For correct data mapping, you must set the Content-Type header in both the request and the service’s response.
Allowed values: application/json and text/html

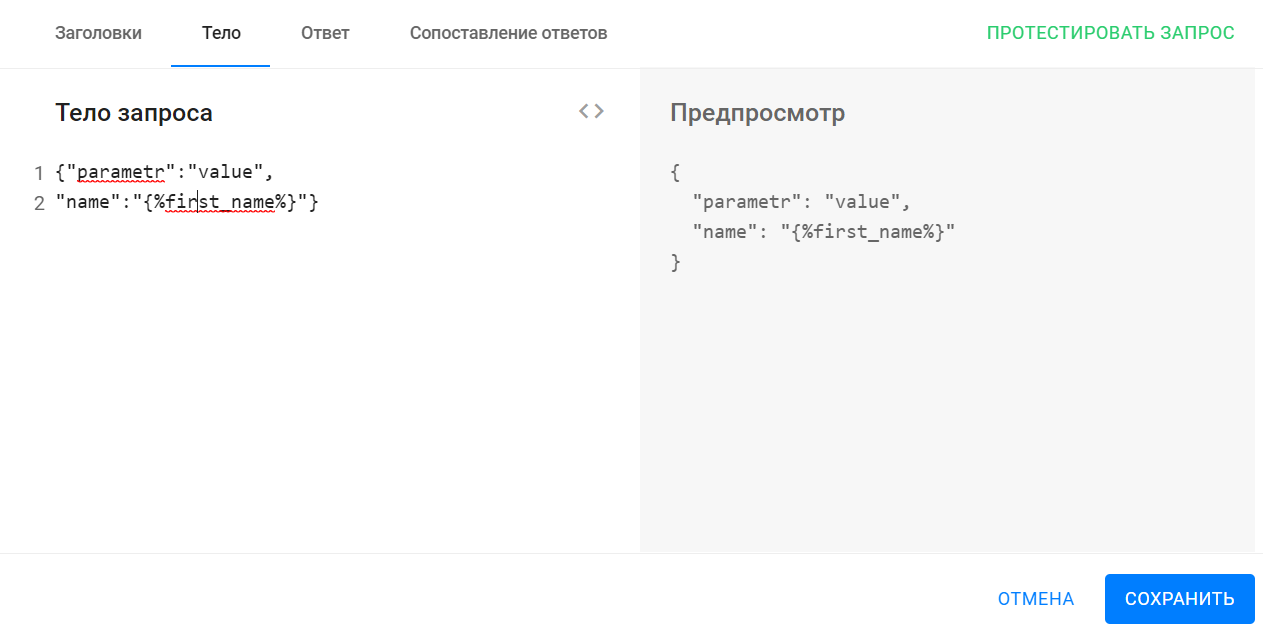
Body
This section describes the body of the request (usually JSON), as required by the external service.
-
Only required for request types other than GET.
-
Standard macros can be used.
-
On the right side, a preview with validation and formatting is shown.
Response Section
This section displays the response received from the external service when the request test is launched.
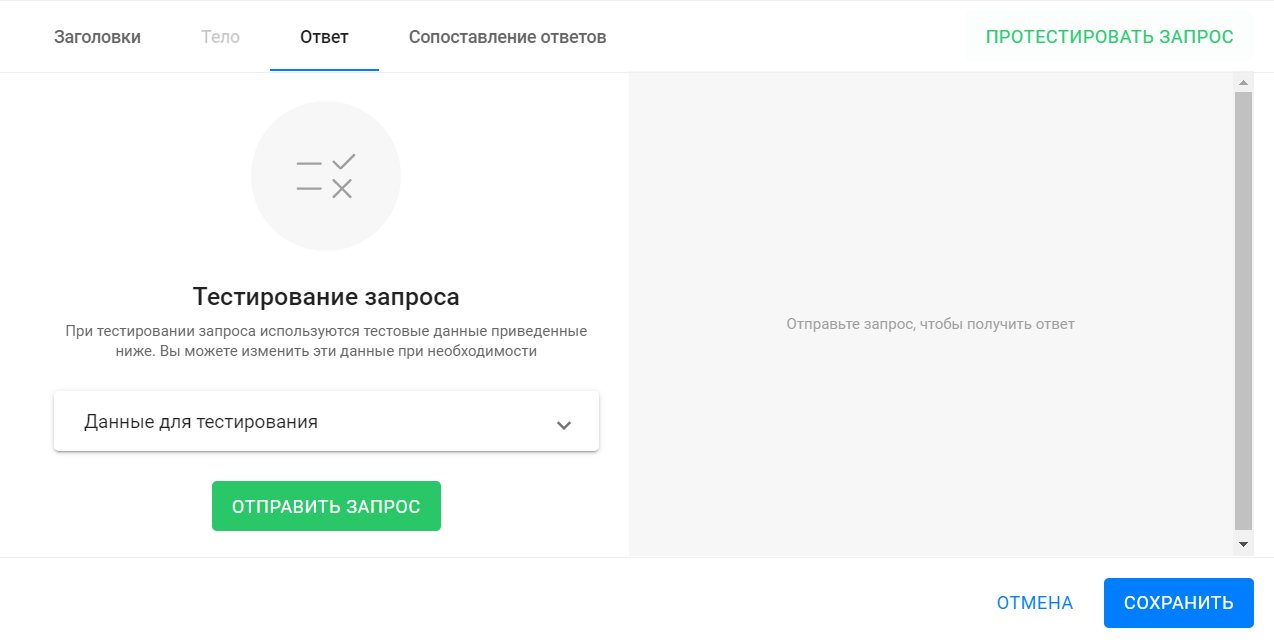
- Click Send Request or Test Request to start.
- If macros are used in headers, body, or URL, test values will be substituted.
- You can change test values using the dropdown “Test Data”.
The response (status, headers, and body) will appear on the right side.
Use the “Response Mapping” tab to extract and save values from the response into user fields.
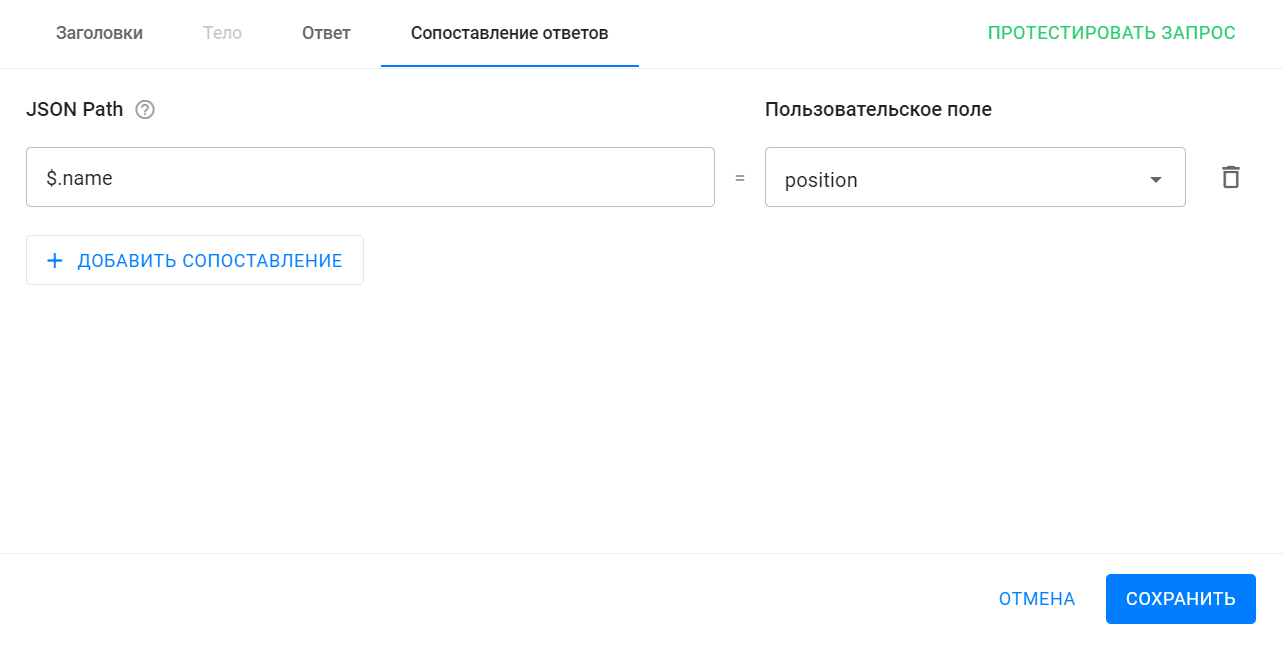
Response Mapping Section
In this section, you can configure response mapping so that data returned in the response to a request is saved to specified subscriber user fields.
You can view the data and its structure once you begin testing the request, under the “Response” tab in the “Response Body” section:
This guide describes a scenario that includes request testing, mapping setup, and further use of the data in the bot.
To configure mapping:
-
Add a mapping rule by clicking the + Add Mapping button;
- Specify the JSON Path — the path in the response body where the required value should be taken from. A detailed guide on how to write JSON Path is available;
- Specify the user field where the value from the response will be saved.
IMPORTANT! After configuring and testing the request, be sure to click Save.
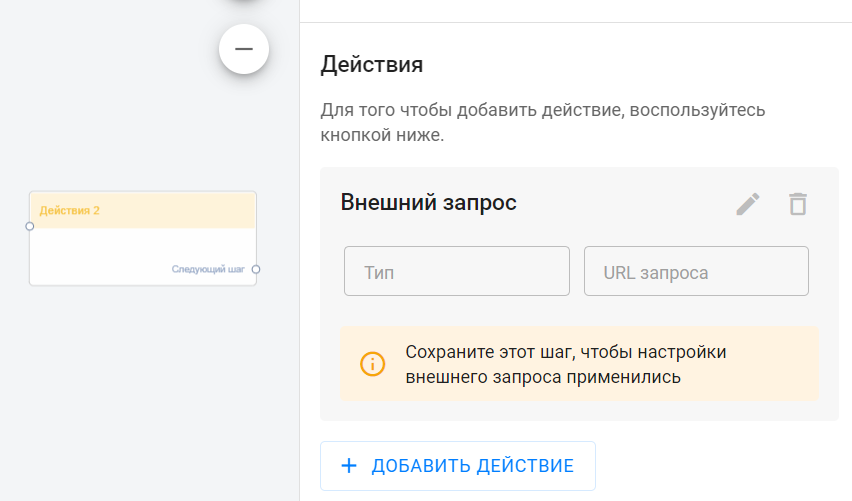
IMPORTANT! To ensure the external request settings are not lost, make sure to save the “Action” step where you added the external request.
Frequently Asked Questions
Where can I get the Key for headers?
This depends on the service and method you are integrating via the external request. The external service’s setup documentation will specify what keys to use and where to insert them.
Examples of using External Request
Automated issuance of personalized certificates.
YouTube video
Sending SMS messages to subscribers.
YouTube video
Notifications in a Telegram channel.
YouTube video
Using the “External Request” action, you can send or request information from external services, then receive a response and record it into subscriber user fields.
A Simple Scenario for Using the “External Request” Action
Using the “External Request” action, you can send or request information from external services, and then receive and save their response in subscriber user fields.
Below is the simplest scenario of how to use the “External Request” action. It’s far from real-life use but demonstrates all the setup steps and the full functionality of “External Request”.
Scenario Description and Setup
In this example, we use the API from swapi.dev. This service contains information about the Star Wars movie series: movie titles, character names and traits, descriptions of vehicles, planets, species, and more.
In other words, it’s a Wikipedia for the Star Wars universe.
Main Scenario Steps
-
The subscriber enters the bot.
-
The bot sends a request to swapi.dev using the subscriber’s ID.
-
The service returns a character whose ID matches the subscriber’s ID.
-
The bot saves the character name to a user field and shows it to the subscriber.
Bot Setup
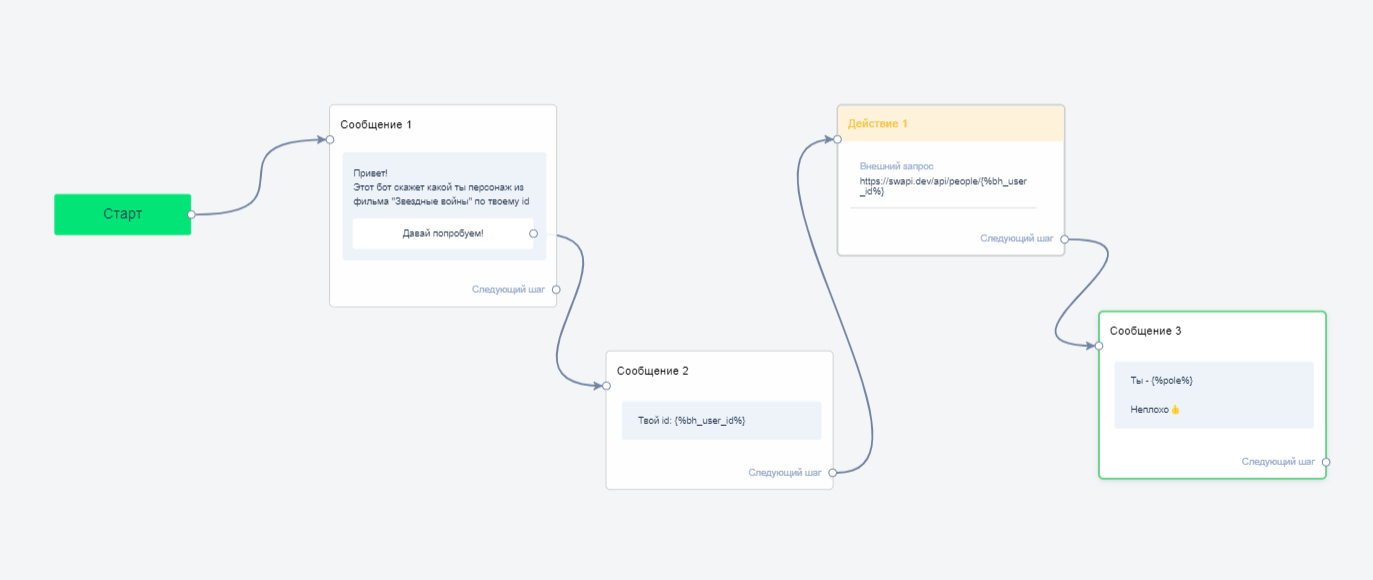
Create a simple bot flow:
-
Add the “Message 1” block.
Write a welcome message.
Add a button to move to the next step. -
Add the “Message 2” block.
Display the subscriber’s ID.
The external service will use this ID to find a character in its database.
-
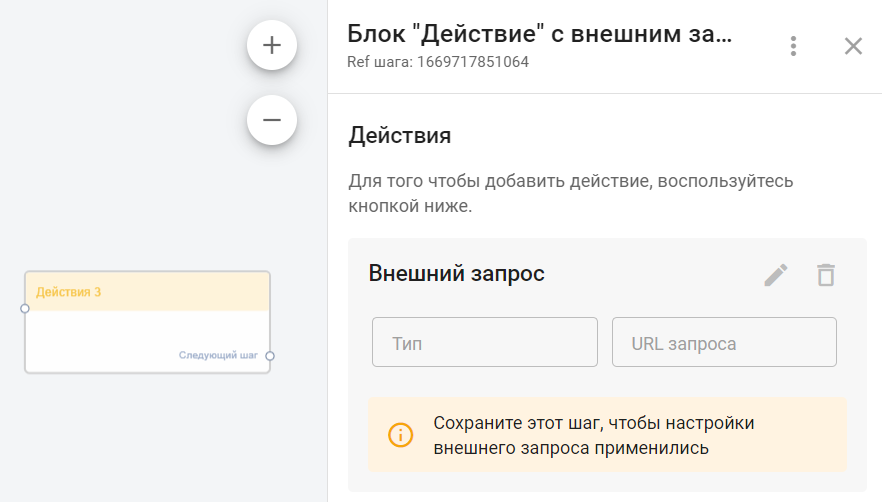
Add the “Action 1” block.
In this block, select the “External Request” action (we’ll configure it below).
-
Add the “Message 3” block.
Display the user field where you will save the character name retrieved from the external service.
Connect all the blocks, and you’ll have a simple bot like this:
Configuring the “External Request”
Once you’ve added the “External Request” action in the “Action 1” block, click the pencil icon to open the editing window for the External Request. Continue the configuration in the opened window.
- Enter the request URL
- From the swapi.dev documentation, choose the method that returns character info: https://swapi.dev/api/people/1/
- Copy and paste this into the “URL” field.
- In this URL, “1” is the character ID. Replace this value with a macro that automatically inserts the internal subscriber ID. To do this, click the <> icon in the URL field and choose the required macro.
- Final URL: https://swapi.dev/api/people/{%bh_user_id%}
- Select the request type.
This request type is GET. You can find this information on the external service’s API documentation site. Select GET in the “Request Type” dropdown.
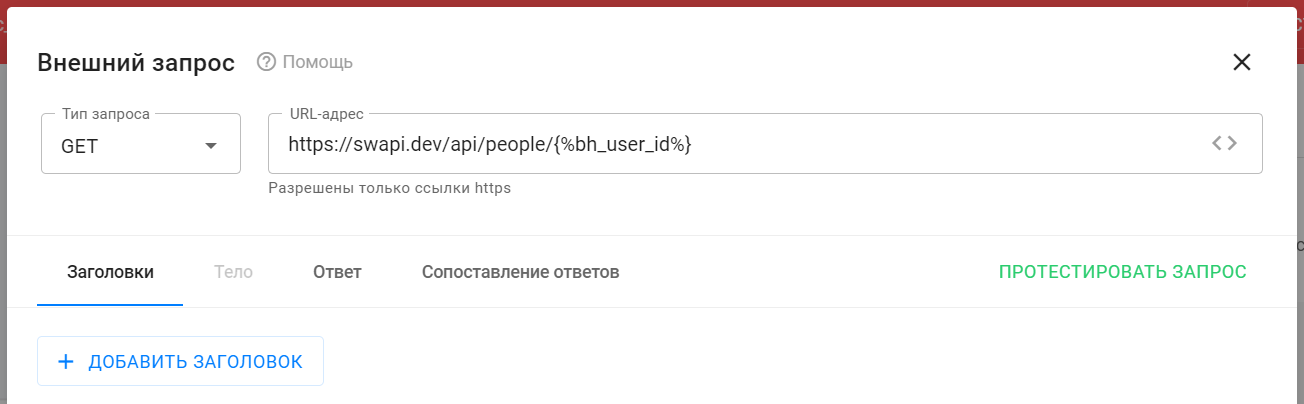
This method doesn’t require headers or a request body, so proceed to request testing.
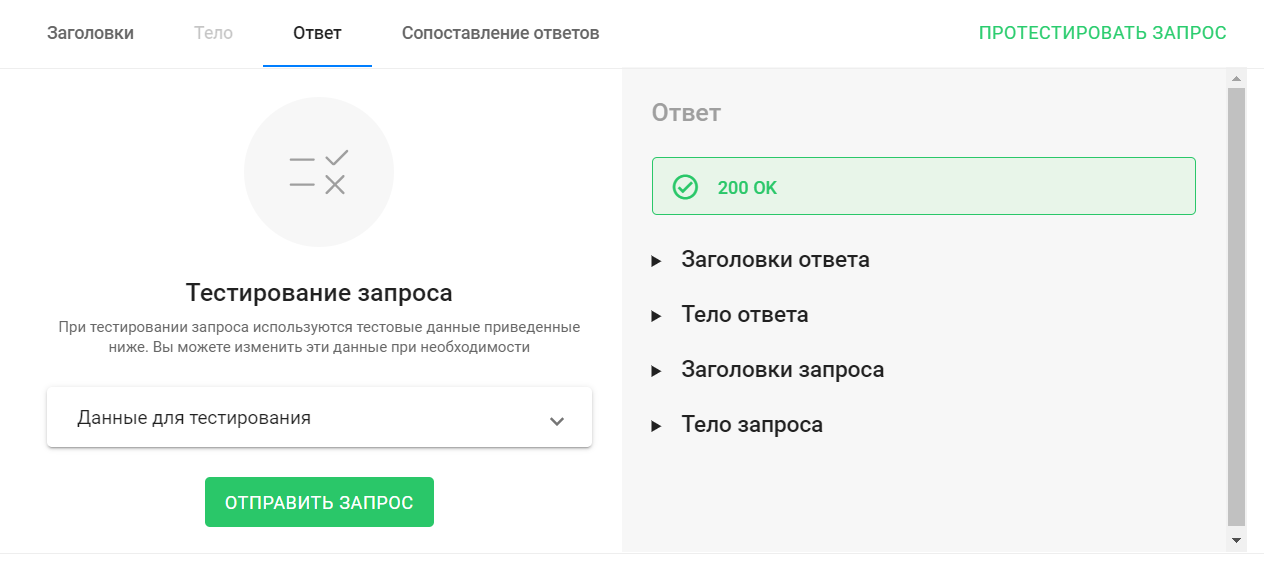
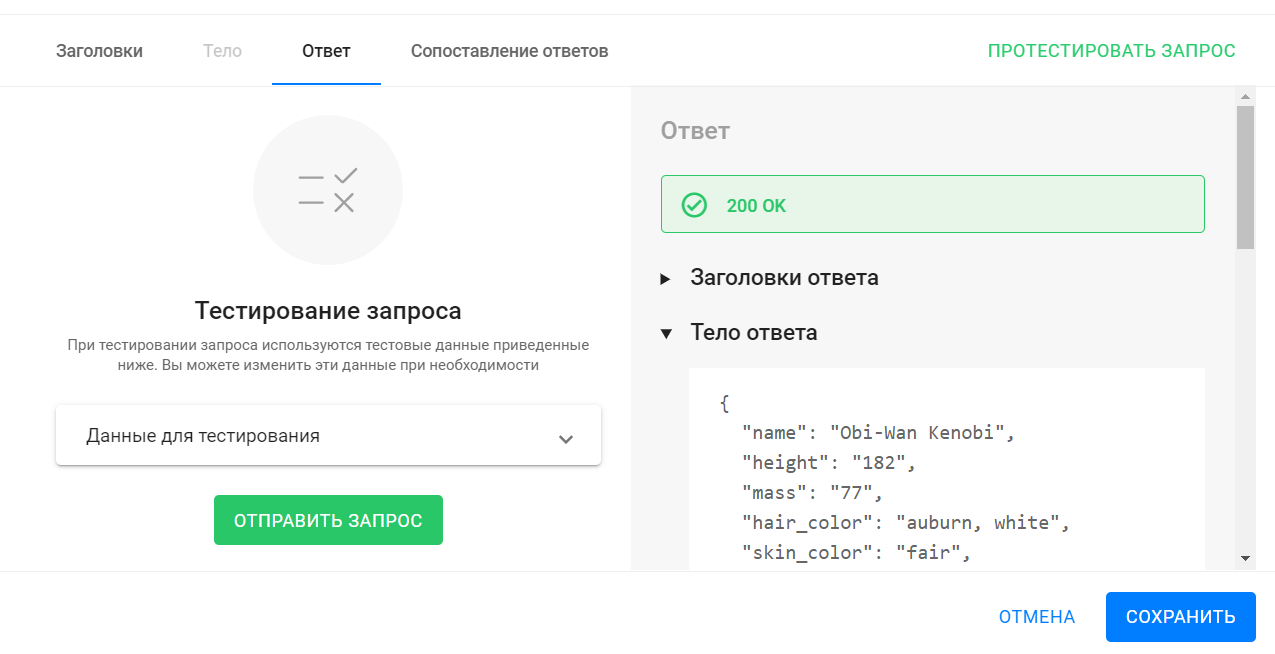
- To start testing the request and ensure everything is working correctly and the service returns a valid response, go to the “Response” tab or click the Test Request button.
- In the opened tab, you’ll see test data for the used macros. Default value: 10. You can change it if necessary.
- To start testing, click the Send Request button.
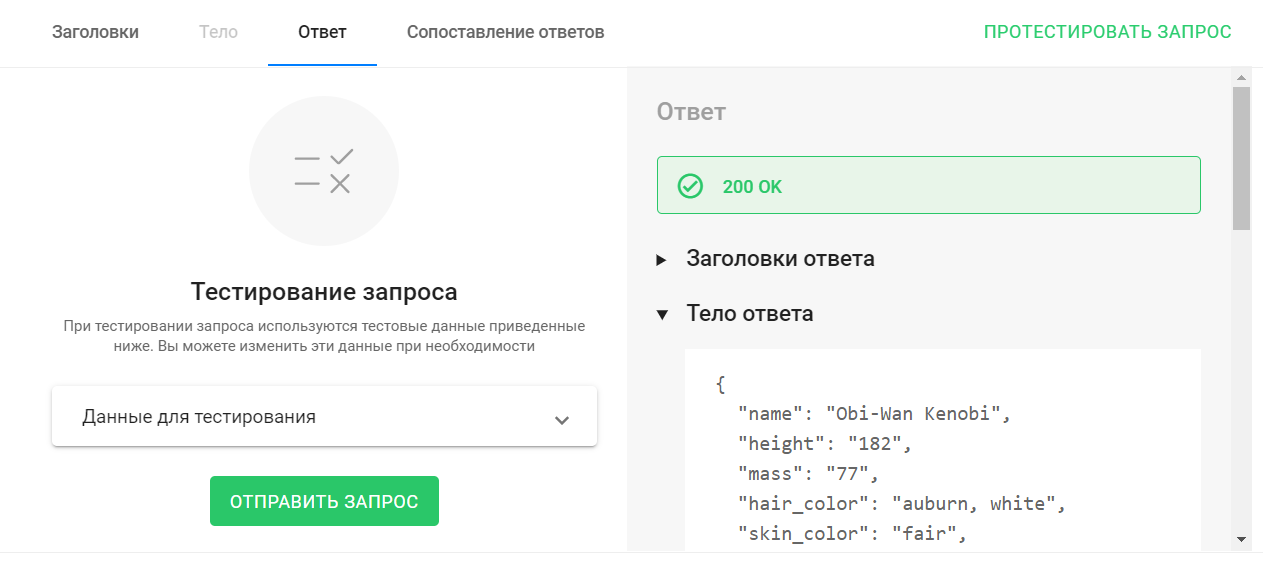
The response will return a “200 OK” status, which means the external service successfully received your request and sent back a response. - On the right side of the window, in the “Response Body” section, you’ll see what you received in return.
You need the value of the “name” field. This is the value you will automatically save into the subscriber’s user field.
Set up Response Mapping
Response mapping lets you configure the logic that extracts a specific value from the response body and saves it into a specified subscriber user field.
To do this, you need to specify:
-
the path in the response body where the desired field is located (more on that here), and
-
the user field where the value should be saved.
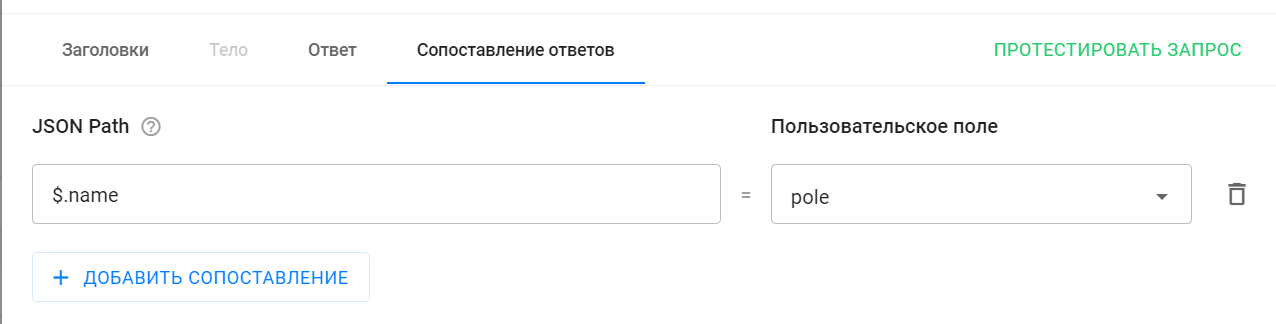
Add a mapping and fill in the fields.
The JSON Path $.name will return the value of the “name” field from the response body. In our test example, the value was “Obi-Wan Kenobi”.
At this point, you’ve completed the setup for “External Request”.
Be sure to save the settings by clicking Save.
Also, make sure to save the settings of the open “Action 1” step by clicking Save and Close.
Bot Testing with External Request
Run the bot test.
As a result, you will get a message sequence like this:

I’m Darth Vader, who are you? 🙂
General documentation on the “External Request” action can be found here: link.