What is Bitrix24
Bitrix24 CRM is an enterprise CRM system where you can store all customer data: from the first inquiry to the final deal. The integration of BotHelp with Bitrix24 allows you to automatically:
- create deals and transfer contacts from BotHelp;
- transfer subscriber custom fields;
- manage conversations with subscribers directly from the Bitrix24 deal card.
All these actions are available in the AI agent through the “Deal in Bitrix24” function.
The “Deal in Bitrix24” function allows you to create deals in a specified pipeline and at a specified stage, and to initiate conversation transfer. The function is triggered when a defined event occurs in a conversation with a subscriber:
- The subscriber confirms their intention to sign up for an online consultation / trial lesson / in-person meeting.
- Any other event.
Integration setup
By the time you connect the integration, you must have a registered Bitrix24 account.
Only the main administrator of the Bitrix24 account can connect the integration. The main administrator rights can be transferred to another agent only in a paid account.
- To connect the integration, you need to obtain the Application id (client_id) and Application Key (client_secret).
In your Bitrix24 account, open the “Developer resourses” section in the side menu. - In the menu that opens, select “Other”.
- In the next menu, select “Local application”.
- Configure the local application as follows:
- Select “Server”.
- In the “Your handler path” and “Initial installation path” fields, enter: https://main.bothelp.io/bitrix24/oauth
- Check the box “Script only”.
- In the Assign permissions, add CRM (crm), Open Channels (imopenlines), external messengers connectors (imconnector), Chat and notifications (im).
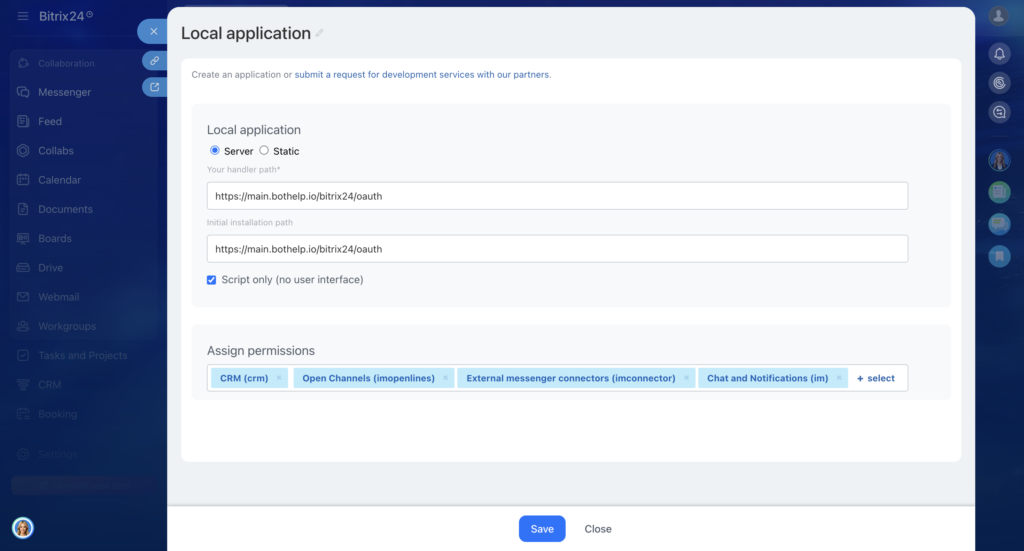
Save the local application.
After saving, the Application id (client_id) and Application Key (client_secret) will appear. Do not close the page — you will need this data to connect the integration.
- In the BotHelp dashboard, the integration can be connected in the Settings → Integrations section, or directly in the settings of the “Deal in Bitrix24” function.
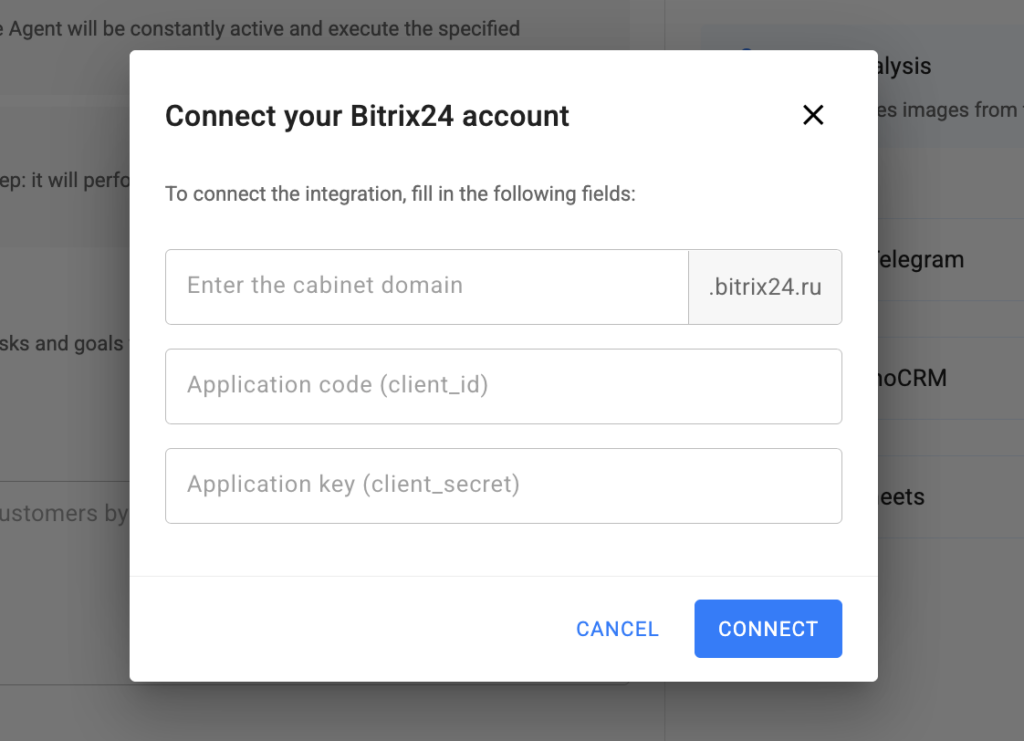
- In the integration settings, enter the Bitrix24 account domain code, the Application Code (client_id), and the Application Key (client_secret).
- Click “Connect integration”.
Congratulations! The integration has been successfully set up!
How to connect the function

- In the first step of configuring the AI agent, go to the “Functions” section and select the “Deal in Bitrix24” card.
- Configure the function parameters:
- When should a deal be created
— Define a trigger that matches your business logic. For example, “the subscriber confirmed their intention to sign up for an online consultation.” - Which pipeline to add the deal to
— Select a pipeline from your Bitrix24 account. - To the stage
— Select a stage within the pipeline from your Bitrix24 account. - Transfer messages to Bitrix24
— Enable this checkbox if you want to start transferring the conversation to Bitrix24 along with creating the deal. - Transfer fields
— Map the subscriber card fields that you want to send to Bitrix24.
- When should a deal be created
- Save the function.
- Congratulations! The function has been successfully configured. Don’t forget to test it before launching it for all subscribers.
Function details
When message transfer to Bitrix24 is initiated, a system notification will appear in the subscriber’s conversation: “Conversation transfer to Bitrix24 has started.”
The function can be added multiple times to an Agent. This is useful when different events require creating deals in different pipelines or at different stages.
Overview of all functions at the link.
If you haven’t found the answer to your question, contact us in the chat in your profile or email hello@bothelp.io
Get 14 days of full functionality of BotHelp, a platform for creating broadcasting, autofunnels, and chatbots.