
AI-Agent on Site is a widget that you can embed on your website so visitors can chat with an AI agent directly from the page without switching to a messenger. The widget allows you to assist visitors and collect leads and contact details while they are still on your website.
Use cases
- 🎓 Online school — adds the widget to a landing page. The agent answers questions about enrollment and course terms and collects contact details.
- 🛒 Online store — the agent helps visitors choose products directly on the page.
- 💬 Support service — the agent handles common questions before visitors contact support.
- 📞 Service landing page — the agent collects the visitor’s name and phone number and passes the lead to the team.
Features
- Visitors can chat with the AI agent directly on the website. The agent answers questions based on its Knowledge Base and assists the visitor.
- The widget can be installed on a specific page or across all pages of a website. It works with website builders such as Tilda and with custom-built websites.
- You can add buttons that redirect visitors to messengers.
- Visitors can attach an image or document to their messages.
AI-agent capabilities in the widget
- Collect visitor data in fields such as name, phone number, email, and others.
- Provide consultations based on the Knowledge Base or follow a predefined algorithm.
- Send notifications to operators in Telegram.
- Save data to Google Sheets.
- Use macros and send links.
How to set up
The widget is created in the Growth Tools section.
1. Go to Growth Tools and click New Tool.
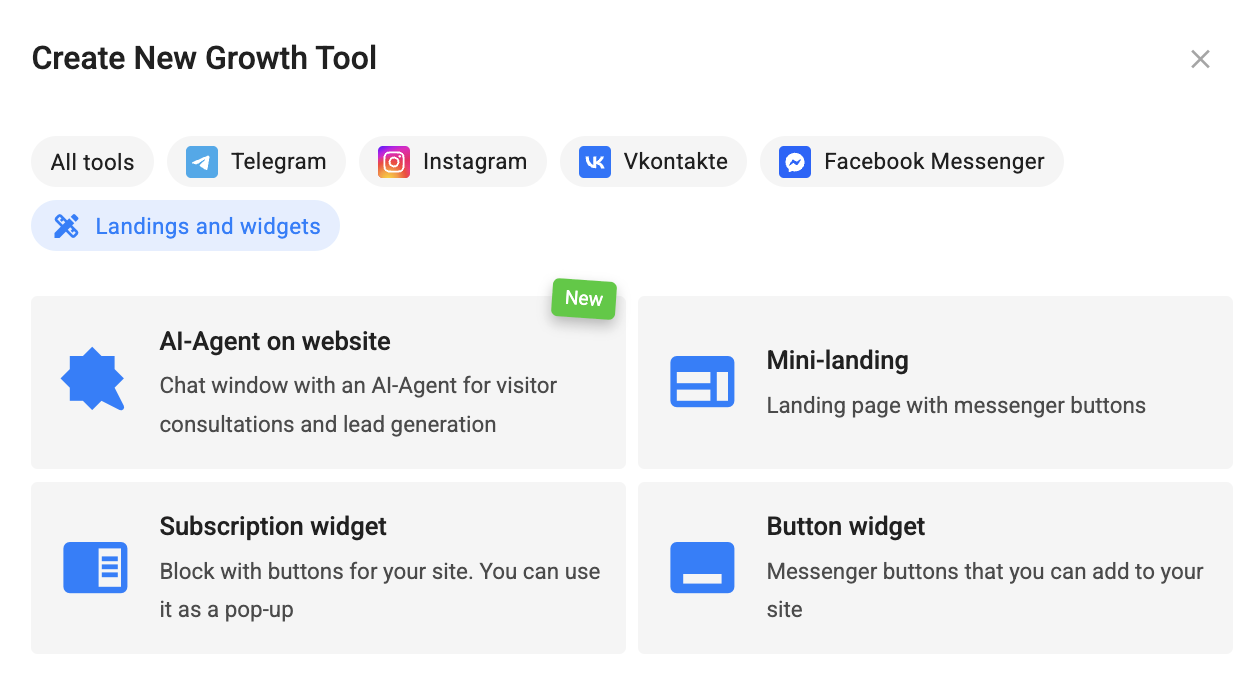
2. In the tool creation window, select AI-Agent on Site in the Landings and Widgets section.
3. On the widget settings step:
- Enter the URL of the website where you want to install the widget.
- Enter the agent name.
- Select an AI agent from your account.
- If needed, add buttons that redirect visitors to messengers: Telegram, MAX, VK, Facebook, or Viber. For each button, select the flow (or VK landing page) and the step from which the flow should start.
- For each messenger button, you can enable Ignore repeated launch and specify the ignore period by entering a number and selecting Minutes or Hours.
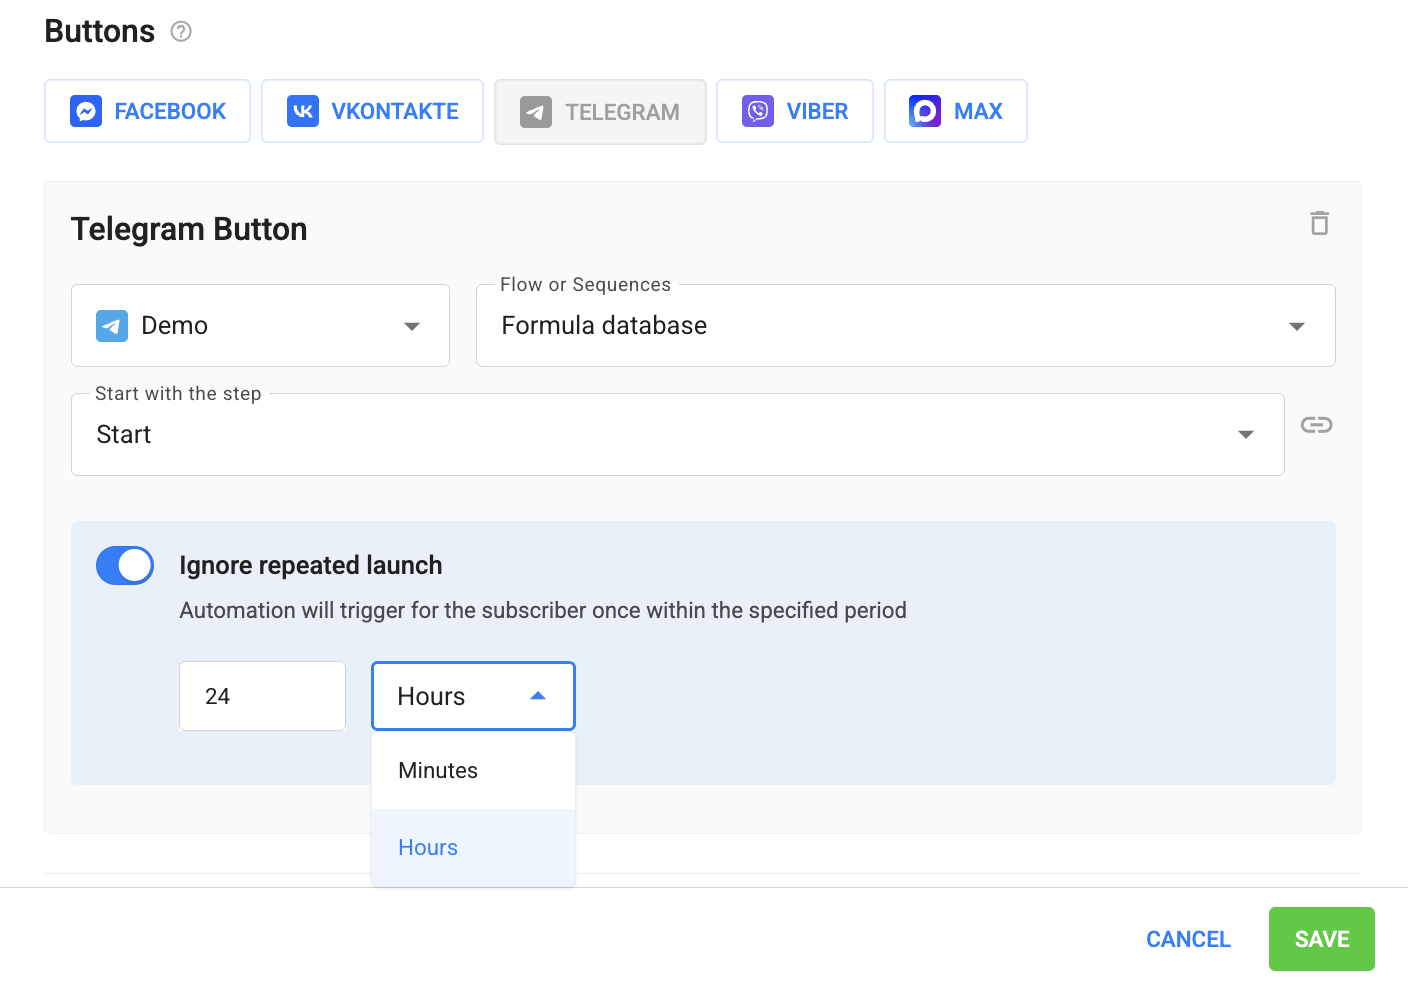
— The countdown starts with the first launch and is tracked separately for each subscriber + button pair.
— Repeated launches during the ignore period do not extend or reset the countdown. The window remains fixed from the first launch.
— When the period expires, the next button click launches the flow again and starts a new ignore period.
— The option applies only to this specific button. Other widget buttons, Growth Tools, and keywords work independently.
— If you change the ignore period or disable the option, the changes also apply to ignore periods that are already in progress. The remaining time is recalculated according to the new settings, and disabling the option immediately removes the restriction.
— When you duplicate a widget within the account, the option’s status and ignore period are copied along with the button.
-
- Enter a link to the document describing your user data processing policy.
- In the Preview section, check how the widget looks and test the conversation if needed. Click Update to apply the latest settings to the preview. The test conversation will be reset.
- On the Installation step:
- Copy the widget code and paste it into the desired location on your website.
Important: The widget only works on the website whose URL you specified during setup. If the widget code is copied to another website, it will not launch there.
Conversations with website visitors
Conversations with website visitors are available in the Conversations section, under AI-Agent in Widget. You can filter conversations by widget name.
Website visitors are not charged as subscribers. They do not appear in the Subscribers section, and their conversations are available only in Conversations.
Features and limitations
- Conversations with website visitors are not available in the mobile app.
- Conversation history is restored only in the same browser used by the visitor. The conversation is not transferred between devices.
If you couldn’t find the answer to your question, contact us via the in-app chat, send us a message on Telegram at BotHelpSupportBot, or email us at hello@bothelp.io.
Get 14 days of full access to the BotHelp platform for creating broadcasts, automated funnels, and flows.
Sign up for BotHelp
Get 14 days of full access for free — enough to build your first bot and test it on real subscribers.
Create account
Была ли статья полезна?